

I’ll never forget the sinking feeling in my stomach as I watched chunks of soft wood pulp fly off my siding and onto my prize-winning hydrangeas. It was a Saturday morning, the sun was just peaking over the gables, and I thought I was being the ultimate efficient homeowner with a rented high-powered pressure washer. In reality, I was shredding twenty years of character and protection right off my home. If you’re standing in your driveway right now, staring at that weathered, silver-gray cedar and wondering if you should just blast the grime away, please, put the wand down and take a breath. Cedar is a temperamental beauty. It’s naturally rot-resistant and durable, sure, but it’s also incredibly delicate when it’s been baking in the sun for a decade. After that $2,000 mistake that left my siding looking like it had been attacked by a giant cat, I spent the next three summers obsessing over the right way to prep wood. Today, I’m going to show you exactly how to get those shingles pristine and ready for a fresh coat without ruining them in the process. [image-placeholder]
Stop Blasting Your Siding and Start Cleaning It Instead
The biggest myth in the DIY world is that more power equals more progress. When you’re tackling house painting projects, especially with exterior wood, aggressive force is your absolute worst enemy. I learned the hard way that the danger of pressure washing wood siding before house painting isn’t just a suggestion—it’s a guarantee for a fuzzy, ruined finish that won’t hold stain. You want to kill the mildew spores, not the wood cells. I used to think a little bit of surface grayness wouldn’t hurt the stain’s ability to stick, but the reason your exterior paint is bubbling just weeks after application often traces back to trapped moisture or organic matter beneath the surface. You need a gentle chemical solution—usually a mix of oxygen bleach and water—that lifts the gray dead fibers and kills the mold without turning your shingles into a hairy mess. Before you even think about the brush, you have to ensure the canvas is actually worth the effort. If you aren’t sure, take a minute to learn how to tell if your exterior wood is too rotten to paint so you don’t waste expensive stain on wood that is already functionally gone.
Is all this prep work actually worth the effort?
You might be tempted to skip the deep clean and just slap on a heavy, solid-color stain to hide the mess. Don’t do it. According to the Western Red Cedar Lumber Association, cedar contains natural oils called tannins that can bleed through finishes if the surface isn’t properly neutralized and cleaned first. I once skipped the brightening step on a north-facing wall, and within six months, my beautiful honey-toned stain looked like it had a bad case of road rash. A proper clean doesn’t just make it look better; it opens the pores of the wood so the stain can actually penetrate and protect. Have you ever started a project only to realize you were making things worse with every step? Drop a message or contact us if you’re currently in the middle of a DIY siding crisis. We’ve all been there, and there is always a way to fix it before the first drop of stain hits the bucket.
Wet Everything Down Before the Soap Hits the Wood
Before you even crack open a gallon of cleaner, you need to saturate your siding and the surrounding landscape with fresh water. Think of cedar like a dry sponge. If you pour concentrated cleaner onto dry wood, it’s going to suck that chemical deep into the grain where it’s hard to rinse out. By pre-wetting the boards, the cleaner stays on the surface where the mold and dirt actually live. While you’re at it, how to protect your perennials during exterior house painting becomes a priority—soak your plants and cover them with plastic. I once scorched a row of expensive hostas because I assumed the “eco-friendly” label on my cleaner meant it wouldn’t hurt greenery. It did.
Mix the Right Solution to Dissolve Grime
Forget the harsh chlorine bleach that smells like a public pool; it’s too aggressive and can break down the lignin that holds wood fibers together. Instead, use an oxygen bleach powder mixed with warm water. It’s like using an effervescent soak for your house. It bubbles up and physically lifts the gray, dead wood cells and organic growth. I usually mix about a cup of powder per gallon of water in a pump sprayer. Apply it from the bottom up—another weird but vital rule. If you start at the top, the cleaner runs down and creates “clean streaks” on the dry wood below that are nearly impossible to even out later. 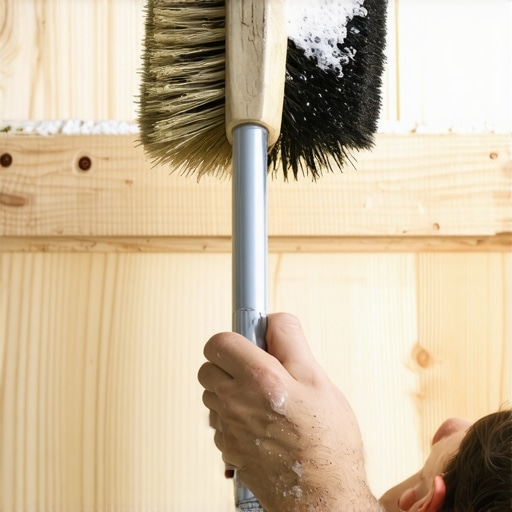
Ditch the Pressure Wand for a Soft Bristle Brush
This is where the real work happens. Once the solution has sat for about 15 minutes (don’t let it dry!), grab a soft-bristle brush on an extension pole. You aren’t trying to sand the wood with the brush; you’re just agitating the loosened dirt. Think of it like brushing your teeth—you want to reach the crevices, not scrub away the enamel. I remember one humid July afternoon spent on a ladder, thinking I could skip the scrubbing if I just turned the pressure washer up a tiny bit. Within seconds, I’d carved a jagged “Z” into a $40 cedar board. Since then, I’ve realized why you should never use a pressure washer on your deck or siding—the mechanical damage is never worth the saved time.
Rinse Like Your Life Depends on It
After scrubbing, rinse the wood thoroughly with a standard garden hose and a spray nozzle. You want to see the water running clear, with no more soap bubbles or brown slurry. If you leave chemical residue behind, it can react with your future finish, leading to the secret to keeping paint from peeling on old porch floors and siding: a neutral pH. If the wood still looks a bit dark or dull once rinsed, you might need a wood brightener (citric acid based) to bring back that golden glow.
Give the Wood Time to Breathe
The hardest part of this process isn’t the scrubbing; it’s the waiting. Cedar is porous and holds onto moisture like a camel. You need at least 48 hours of dry, sunny weather before you even think about opening a can of stain. If you rush it, you’ll be searching for how to maintain your newly painted exterior for ten years or more while watching your current coat flake off in sheets. Use a moisture meter if you have one; you’re looking for less than 15% moisture content. Once it’s bone dry, you’ll be ready to choose the best roller nap for rough exterior cedar siding to apply that perfect finish.
Now that we’ve covered the basics of scrubbing and rinsing, it is time to dig deeper into the chemical reality of wood fibers. Most people believe that once the wood looks bright and the dirt is gone, the job is half-finished. In my experience, that is exactly where the most expensive mistakes happen. Let’s talk about a nuance that even some seasoned pros ignore: the pH balance of your siding. If you’ve just finished using a heavy alkaline cleaner like oxygen bleach, your wood surface is currently sitting at a high pH. Paint and stain, however, are designed to bond with slightly acidic surfaces. If you don’t neutralize the wood, you are essentially setting yourself up for a failure where the coating simply sits on top of the fibers rather than biting into them. This chemical mismatch is often the reason you should never paint over peeling paint without a full reset of the substrate’s chemistry. Have you ever fallen into this trap? Let me know in the comments.
Stop Trusting Your Eyes and Start Checking the pH
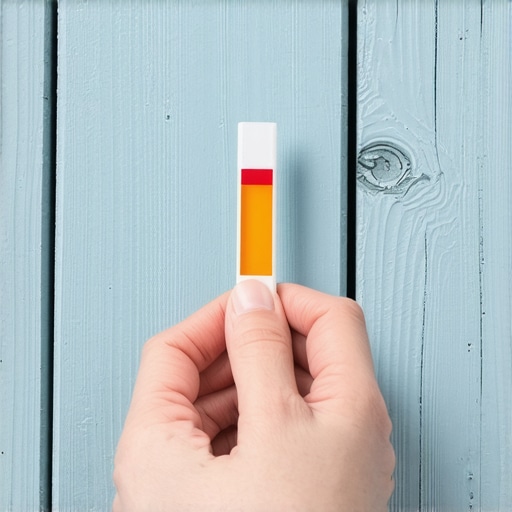
The biggest myth in exterior maintenance is that “bright wood equals healthy wood.” You can make a board look brand new with harsh chemicals, but you might be destroying the lignin—the natural glue that holds wood fibers together—in the process. A study by the USDA Forest Service (Forest Products Laboratory) indicates that over-exposure to alkaline cleaners can cause “fuzzy” wood, which is essentially a layer of detached cellulose. If you paint over that fuzz, the paint will peel within a year, not because the product is bad, but because the wood itself is structurally failing. This is a classic example of why you should master the art of house painting with these pro tips before you commit to a full exterior overhaul. I always recommend a quick citric acid rinse after cleaning to drop the pH and tighten those fibers back down. It’s like a toner for your house; it closes the pores and prepares the surface for a long-term bond.
Does the Species of Your Cedar Change Your Chemical Strategy?
Advanced DIYers often ask if Western Red Cedar and Eastern White Cedar can be treated the same. The answer is a firm no. Western Red is packed with water-soluble tannins that can migrate to the surface the moment they get wet. If you use a high-pressure rinse, you’re just pulling more tannins to the surface, leading to dark staining that will bleed through even the best primers. Eastern White is less tannin-heavy but much more prone to internal rot if it’s over-saturated. Knowing these nuances is how you avoid how to fix paint that is already cracking on your window sills or siding panels later on. Also, keep an eye on your hired help; it is vital to know how to tell if your painter is diluting the paint with water, as cedar requires a full-bodied, high-solid product to effectively seal those open grains after a deep clean. Don’t let a lack of chemical awareness turn your expensive cedar into a maintenance nightmare.
I’ve spent thousands of dollars on high-end stains, only to realize that the most important tool in my kit actually cost about fifty bucks. If you want to avoid the reason your exterior paint is bubbling just weeks after application, you absolutely need a digital moisture meter. I personally use a pin-style meter because it pierces the outer skin of the wood to tell me what’s happening deep inside the fibers. Cedar can look and feel bone-dry on the surface while holding a 22% moisture level internally, which is a guaranteed recipe for premature peeling. When you’re aiming for expert house painting tips for 2025, data-driven decisions will always beat a “gut feeling.” Beyond the meter, I never touch my siding with anything stiffer than a nylon-polyester blend brush. I’ve seen people use natural hog hair or stiff synthetics, but on rough-sawn cedar, those brushes tend to shed or create micro-abrasions that allow water to pool. If you are opting for a faster application, make sure you’ve picked the best roller nap for rough exterior cedar siding—typically a 3/4-inch or 1-inch nap—to ensure the stain is pushed into every groove and not just hovering over the surface peaks. #IMAGE_PLACE_HOLDER_D# I also recommend using a dedicated “wood brightener” containing citric or oxalic acid as your final prep step. It’s not just about aesthetics; these acids neutralize any leftover alkalinity from the cleaning stage, which is vital for stain adhesion. I’ve found that local painting secrets often come down to these extra ten minutes of effort that DIYers usually skip. When you see that wood turn from a dull gray to a vibrant honey gold, you know the fibers are ready to drink in the protection.
How do I keep my siding looking fresh for the long haul?
Maintenance isn’t a one-and-done event; it’s a seasonal rhythm. Many homeowners wait until the paint is flaking to take action, but that’s the most expensive way to own a home. According to the USDA Forest Products Laboratory’s Wood Handbook, the service life of an exterior finish is drastically extended by simply washing the surface every two years. This removes atmospheric pollutants, bird droppings, and salts that chemically degrade the paint’s binder over time. This isn’t a deep chemical scrub—it’s a gentle garden hose rinse with a soft brush. If you stay on top of these minor cleanings, you’ll find that how to maintain your newly painted exterior for ten years or more is actually quite simple. I also recommend a “walk-around” every spring. Look for small cracks in the caulk around window frames. If you catch those early, you prevent the moisture intrusion that leads to rot. I predict that in the next few years, we’ll see a massive shift toward graphene-enhanced and self-healing coatings that react to UV light to seal micro-fissures. For now, the most effective strategy is to unlock the power of professional painting by being meticulous with your gear and your timing. Don’t let a $50 moisture meter be the reason your $5,000 paint job fails. Grab one today and wait for the reading to hit 15% before you open a single can. If you’re still feeling overwhelmed by the technical side of things, check out master the art of house painting with these pro tips to streamline your workflow. It’s all about the small details that the pros use to stay profitable and efficient.
The Truth About Why Some Cedar Just Won’t Hold a Stain
After years of trial and error, I’ve realized that the sun is actually a harsher critic than any homeowner. The south-facing side of your house will always strip your stain faster than the north, and it requires a completely different approach to saturation. I used to treat every wall the same, but the UV damage on the sunny side often requires a deeper brightening step to remove dead fibers that the north side simply doesn’t have.
Another lightbulb moment was realizing that ‘fuzzing’ on the wood isn’t just a cosmetic issue; it’s a structural failure of the wood’s top layer. If you see that hairy texture, you’ve likely used too much pressure and need to lightly sand it back before applying any expert house painting tips for 2025. Finally, never underestimate the power of a pH-balanced surface. If you don’t neutralize the alkaline cleaners, you’re essentially painting over a chemical reaction that will eventually push your finish right off the board.
The Short List of Tools That Actually Protect Your Investment
You don’t need a trailer full of equipment to do this right, but you do need these specific items to avoid the reason your exterior paint is bubbling just weeks after application. First, a pin-style moisture meter is your best friend; if that reading is over 15%, keep your brushes in the bag. Second, I swear by oxalic acid-based brighteners—they act as a chemical ‘reset’ for grayed cedar. Third, always have a dedicated soft-bristle brush on an extension pole to agitate the cleaner. This gentle friction does more work than a 3000-PSI pressure washer ever could. Finally, if you’re going to use a roller, ensure you have the best roller nap for rough exterior cedar siding to reach into those deep, thirsty grooves.
It is Time to Put the Wand Down and Pick Up the Brush
Staring at a gray, weathered house can feel like looking at a mountain you’ll never climb. But once you see that first section of wood brighten back to its original golden-honey hue, the momentum will carry you through. It’s about more than just curb appeal; it’s about preserving a high-value material that protects your family from the elements. Taking these extra steps ensures you won’t have to repeat this process for years to come. By using local painting secrets like pH neutralization and moisture testing, you’re not just DIYing—you’re performing maintenance like a professional. Have you ever tried to restore wood only to have it turn ‘fuzzy’ or gray again just months later? Let me know about your biggest cedar struggle in the comments below!