

I spent an entire Saturday morning back in 2018 meticulously sanding my porch stairs, dreaming of that perfect forest green finish. I was so sure a thick coat of primer would fix everything. But three weeks later, my heart sank. The paint was flaking off in massive, rubbery sheets, and when I went to inspect it, I could literally poke my thumb through the riser. I had spent fifty bucks on premium paint and six hours of labor just to decorate a rotting corpse of a staircase. It was a classic rookie move in the world of house painting, and I felt like a total amateur. I realized far too late that the reason your exterior paint is bubbling just weeks after application is almost always what is happening beneath the surface, not the quality of the brush you used. Today, I am going to save you the sweat and the wasted cash by showing you exactly how to tell when wood is past the point of no return.
Stop Trying to Paint Over a Sponge
Most of us want to believe that a fresh coat of paint is a magic wand. We see a little soft spot and think, “Eh, the primer will seal that right up.” Trust me, it won’t. Wood rot is like a biological cancer; it doesn’t stop just because you covered it with a pretty color. In fact, sealing moisture into decaying wood often accelerates the rot. I learned the hard way that local painting projects fail not because of the weather, but because of poor substrate inspection. If you don’t catch the decay now, you’ll just be dealing with why your exterior window trim is rotting under the paint all over again next season.
Is it even worth saving?
I get this question from my neighbors all the time. They’re terrified that if they find one soft board, they have to replace the whole side of the house. The fear is real: is this going to turn into a five-figure renovation? Not necessarily. But you have to be honest with yourself. If the wood lacks structural integrity, no amount of local painting secrets will bring it back to life. Have you ever poked a piece of trim and felt that sickening ‘give’ like you were pushing into a wet loaf of bread? If so, you’re already in the danger zone.
Look for These Red Flags Before You Start
Before you even think about opening a paint can, you need to conduct a literal ‘vibe check’ on your siding and trim. According to the USDA Forest Products Laboratory, wood with a moisture content consistently above 20% is essentially a playground for decay fungi, which eat the cellulose and lignin that give wood its strength. If your boards have reached that state, paint won’t stick because the wood is literally exhaling moisture. You might notice why your exterior paint is flaking only on the window sills while the rest of the wall looks fine—that is usually a sign of localized water intrusion. Don’t ignore the gray, fuzzy texture or the ‘alligatoring’ of old finishes. These are cries for help from your home’s exterior. [image placeholder] Have you noticed any spots on your home that feel a bit ‘squishy’ lately? I’d love to hear about the ‘problem areas’ you’re staring at right now before we move into the actual tests. We’re going to dive into the ‘Screwdriver Test’ next, which is my absolute favorite way to settle the ‘to paint or not to paint’ debate once and for all.
Grab Your Dullest Screwdriver and Start Poking
Let’s get our hands dirty with the screwdriver test. You don’t need a fancy moisture meter or high-tech sensors; you just need a flat-head screwdriver and a bit of elbow grease. Walk along your siding and press the tip of the tool into anything that looks suspect—discolored patches, areas where the paint is bubbling, or joints where two boards meet. If the wood resists and feels like an ice cube, you’re in the clear. But if the screwdriver sinks in more than a quarter-inch with minimal effort, you’ve found a rot pocket. This is exactly why professionals say the reason you should never paint over peeling paint is that the surface underneath is often structurally failing. Once wood loses its density, it acts like a sponge, drawing in humidity from the air and pushing it against the back of your new finish, causing immediate failure. 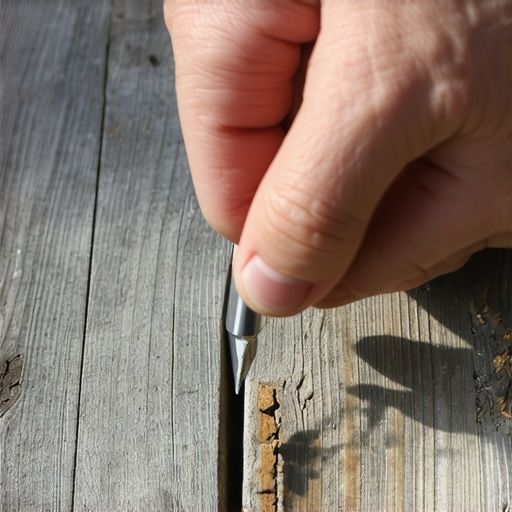
A Quick Reality Check from My Own Mistakes
A few years ago, I was helping a friend prep their Victorian-style home for a house painting project. We were looking at a gorgeous bay window. From the sidewalk, it looked like it just needed a light sand and some fresh white trim. I took my screwdriver, gave the bottom sill a firm press, and the metal didn’t just stop—it glided through the wood like it was warm butter. We found an active carpenter ant nest thriving behind the paint. If we hadn’t poked it, we would have just trapped those ants inside a fresh, expensive paint job. That moment taught me that local painting isn’t just about the color; it’s about the detective work you do before the lid of the paint can ever comes off.
Don’t Let the Pressure Washer Finish the Job
It is tempting to grab a high-powered machine and blast the dirt away, but you have to be incredibly careful. I’ve seen homeowners try to ‘clean’ these soft spots, but the danger of pressure washing wood siding before house painting is that you force gallons of water into the core of the board. If that wood is already starting to soften, the high pressure will shred the fibers like wet cardboard. Suddenly, a small repair job turns into a total siding replacement. Instead of blasting, use a stiff brush and a mild detergent. You want to clean the surface, not excavate it. When you master the art of house painting with these pro tips, you learn that moisture is your absolute greatest enemy. If the wood is wet, the paint will fail. It’s that simple.
Know Exactly When to Toss the Board
Sometimes, wood filler just won’t cut it. Think of wood filler like a bandage, not a bone graft; it can fix a scrape, but it can’t fix a broken leg. If the rot extends through more than 30% of the board’s thickness, or if it’s located at a structural joint, you need to replace the wood entirely. Applying local painting secrets elevate your space effortlessly only when you have a solid foundation to work on. Once you’ve replaced the compromised sections, you can move forward with confidence, knowing you’ve built a surface that will last. Taking the time to do this right is the only way how to maintain your newly painted exterior for ten years or more without seeing the same familiar bubbles and flakes returning by next spring.It is easy to think that once you have scraped the rot and filled the holes, you are in the clear. But here is the contrarian truth that most big-box store employees won’t tell you: sometimes, the ‘best’ primer is exactly what causes your paint to peel. Most people assume that slathering on a heavy, oil-based sealer is the gold standard for protection. However, if your wood has even a hint of internal moisture—which is common in older homes—that ‘impermeable’ sealer becomes a plastic bag. It traps water behind the film, and when the sun hits the wall, that water turns to vapor, expands, and blows the paint right off the siding. This is exactly why using the wrong primer causes your trim paint to chip even when you spent a fortune on the top-shelf stuff.
Is mill glaze sabotaging your new siding?
One of the most advanced ‘oops’ factors I see in house painting involves brand-new cedar or redwood. You would think new wood would be a dream to paint, right? Wrong. When wood is planed at high speeds in a mill, the heat can draw out resins that create a shiny, hard ‘glaze’ on the surface. According to the USDA Forest Service’s Forest Products Laboratory, this ‘mill glaze’ prevents paint from penetrating the fibers. If you do not sand that invisible shine off, your expensive finish will literally slide off within eighteen months. It is a frustrating trap because the wood looks perfect to the naked eye. 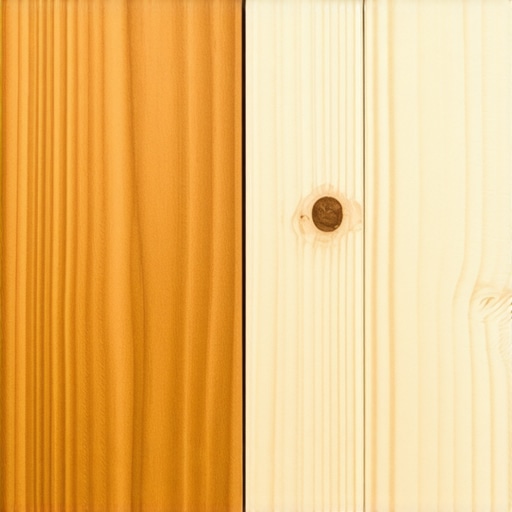 When you are painting your home, top local painting strategies revealed suggest that a quick scuff-sanding is mandatory, even for wood that has never seen a drop of rain. If you skip this, you are basically trying to paint a sheet of glass with a watercolor brush.
Stop falling for the contractor grade marketing trap
Another trap I fell into early on was believing that ‘Contractor Grade’ meant ‘High Performance.’ In the world of local painting, ‘Contractor Grade’ often actually means ‘Cheap and easy to spray in high volumes for new construction.’ It is designed for speed, not necessarily for twenty years of UV resistance on a south-facing wall. When you transform your home with expert house painting tips for 2025, you realize that knowing the difference between contractor grade and premium paint is the difference between a five-year and a fifteen-year paint job. The premium stuff has more solids, which provides the film thickness needed to resist cracking. Have you ever fallen into the ‘more is better’ primer trap or bought the cheap gallon only to regret it three months later? I would love to hear your stories in the comments—we have all been there! Finally, watch out for the environmental trap. I once saw a gorgeous front door ruined because the homeowner painted it at 4:00 PM on a humid Friday. By 8:00 PM, the temperature dropped, the dew point hit, and the paint never properly coalesced. That is the reason your front door stays tacky for days after painting. It is these tiny, nuanced timing issues that separate a ‘DIY look’ from a professional finish. If you want to local painting secrets elevate your space effortlessly, you have to respect the chemistry as much as the color.The right tools aren’t just about making the job faster; they’re about preventing the exact failures I’ve been warning you about. If you’re serious about local painting, you need to stop buying those $5 ‘all-purpose’ brushes at the checkout counter. I personally won’t touch a trim project without my 2.5-inch Corona Excalibur. Its stiff nylon-polyester blend is designed to maintain its ‘flex’ even on a 90-degree afternoon, whereas cheap synthetics turn into wet noodles the moment they hit the heat. This is the trick to keeping your paint brushes soft for years and ensuring your lines stay razor-sharp.
Ditch the Manual Sanding for a Dustless Setup
If you really want to unlock the power of professional painting for a stunning home, you have to talk about prep equipment. I moved to a Festool HEPA-certified dust extraction system three years ago, and I’m never going back. In the past, I’d be covered in fine particulate, but now, the sander sucks up 99% of the mess before it even hits the air. This isn’t just about being clean; it’s about better adhesion. According to the Painting and Decorating Contractors of America (PDCA) P1 standard, surface preparation is the single most critical factor in coating longevity. If there’s microscopic dust left on the board, your bond is compromised from second one. #IMAGE_PLACE_HOLDER_D#
How do I keep my exterior looking fresh for a decade?
Maintenance isn’t just a once-a-year power wash—in fact, we already know why you should never pressure wash your wood siding on high settings. Instead, walk the perimeter of your home every spring with a bucket of mild detergent and a soft-bristle brush. Focus on the ‘splash zones’ near the ground where dirt and salt accumulate. This simple act removes the corrosive elements that eat through the clear coat of your finish. It’s the core of how to maintain your newly painted exterior for ten years or more.
Self-Cleaning Siding is the Next Big Thing
Looking ahead, I predict we are going to see a massive shift toward ‘cool roof’ technology applied to siding and bio-mimetic ‘Lotus-effect’ coatings that literally shed dirt with the morning dew. We are already seeing some of this in expert house painting advice for 2025, where infrared-reflective pigments are becoming standard to help keep homes cool. This isn’t just aesthetic anymore; it’s structural engineering. If you want to really boost your home’s value, you have to look at these high-performance options. I challenge you to try this on your next small project: pick up one high-end, $25 brush instead of a multi-pack, and feel the difference in how the paint flows. You’ll never look at a hardware store bucket the same way again.
The Hardest Lesson I Learned About Chasing the Perfect Finish
Looking back, the biggest mistake I made wasn’t using the wrong brush; it was lying to myself about the quality of the wood. If you ignore a soft board, you aren’t just “painting over a problem,” you are essentially throwing money into a wood-chipper. One lightbulb moment for me was realizing that local painting is 90% preparation and only 10% actual color application. If the wood doesn’t ring like a bell when you tap it, it’s not ready for paint. I also discovered that why your exterior caulk is falling out of the gaps already usually boils down to moisture trapped inside the grain, pushing everything outward.
Tools That Saved My Sanity on the Job
I used to think a brush was just a brush until I picked up a professional-grade Corona. It changed everything. For any house painting project, I now swear by a few non-negotiables. First, invest in a high-quality 2.5-inch angled sash brush; it holds more paint and keeps your hands from cramping. Second, get a reliable moisture meter—it’s the only way to know if you’re actually ready to prime. #IMAGE_PLACEHOLDER_E# Third, don’t skimp on your surface prep; knowing the trick to keeping your paint brushes soft for years will save you hundreds of dollars in the long run. I also frequently check the PDCA (Painting and Decorating Contractors of America) guidelines to ensure my methods meet industry standards.
Make Your Home a Long-Term Masterpiece
Now that you know the difference between a surface that’s ready and one that’s rotting, you have the power to unlock the power of professional painting for a stunning home. Don’t let a few bad boards discourage you. Replacing a single piece of siding today is a thousand times cheaper than repainting the entire house in two years because the base failed. Take your time, trust your screwdriver test, and remember that local painting is about protecting your sanctuary, not just changing its outfit. When you master the art of house painting with these pro tips, you’re building something that will stand up to the elements for a decade or more. You’ve got this!
Have you ever started a project only to find a “surprise” carpenter ant nest or a board that crumbled like a cracker? Let me know about your craziest rot discovery in the comments below!