

I remember the day I tried painting over a patch of peeling wallpaper in my living room. I scrubbed, primed, and rolled out fresh paint only to see it bubble up or peel away within a few months. That frustrating cycle? I learned it the hard way—by rushing into a project without properly checking if the old paint was ready for the new. It was a lightbulb moment when I finally discovered the importance of the Tape Test for verifying old paint adhesion, and I want to share this neighborly tip with you.
Why Skipping the Tape Test Can Cost You Big Time
Have you ever wondered why some walls stubbornly refuse to adhere properly to fresh coats of paint? Or maybe you’ve painted over old paint layers only to face peeling, cracking, or even needing to redo entire sections. The answer often lies in the fundamental step many overlook—the Tape Test. It’s a simple, inexpensive way to gauge if your existing paint will hold up to your fresh layers. Trust me, neglecting this step can lead to costly rework, wasted materials, and a whole lot of frustration. Early on, I made the mistake of assuming that surface cleaning and roughening were enough—until I realized that old paint can sometimes be just as fragile as a delicate piece of glass, ready to give way when you least expect it.
What Are You Afraid Will Happen?
I get it—some might think, “Isn’t this just extra work before painting?” or “Will I really see a difference?” Believe me, I questioned whether the fuss was worth it too. But skipping this step has cost me time and money in the past. Rushing into painting without confirming adhesion is like building a house on shaky ground—you might save a few minutes upfront, but the foundation will crumble later. The good news? The tape test is quick, proven, and can save you from future headaches. In fact, according to industry standards, waiting for the right moment can extend your paint job’s life—saving you from repainting sooner than you’d like (source: https://elitepainterpro.com/the-flashlight-test-for-spotting-bad-sanding-jobs).
Now that I’ve laid out why this step matters, let’s dig into how you can confidently determine if your old paint is ready to embrace a new coat—and how to do it like a pro. Ready to become a paint-adherence expert? Keep reading, and I’ll walk you through the process from start to finish.
Prepare Your Surface
Before performing the Tape Test, ensure your wall is clean and dry. Dust, grease, and old mildew can affect paint adhesion. Use a gentle cleaner and warm water to scrub the surface thoroughly, then let it dry completely. For detailed cleaning tips, check out this guide.
Gather Your Materials
You will need painter’s tape, a putty knife or scraper, and a small section of wall to test. Use quality painter’s tape that adheres well but peels off cleanly. Keep a damp cloth handy to wipe away dust after scraping or tape removal.
Perform the Tape Test
Place a 3-inch strip of painter’s tape firmly onto a smooth, painted area—preferably an inconspicuous corner or a section where peeling isn’t evident. Press down the edges firmly to prevent air pockets. Wait about 30 minutes, then carefully peel back the tape at a 45-degree angle. If the paint underneath stays attached to the wall and the tape lifts cleanly without pulling paint off, your surface is ready for new paint. If paint peels or lifts, more preparation is needed.
Apply the Tape Correctly
Press the tape down smoothly, avoiding wrinkles that can cause false negatives. To ensure perfect application, avoid stretching or pulling the tape while sticking it down. Use a putty knife to smooth the edges if necessary. An ideal practice is to perform multiple tests across different areas for consistency.
Interpreting Results
If the paint strips off easily with the tape, it’s likely loose or chalking, indicating poor adhesion. In such cases, remove loose paint, sand the area to create a rough surface, and consider applying a primer before repainting. For stubborn spots, check surface cleanliness and moisture levels—excess humidity can compromise adhesion. Know-how on assessing surface readiness is detailed in this article.
What If the Paint Passes?
When your wall passes the tape test, you’re safe to proceed with painting. But always remember: preparation is key. Lightly sanding glossy surfaces, cleaning thoroughly, and priming patched drywall ensure a smoother, longer-lasting finish. For instance, I once painted a bedroom wall that had some patched drywall, and after sanding and priming, the paint adhered beautifully, with no peeling months later.
Micro-Story of Application
The first time I did this test, I was hesitant but decided to give it a try on a small patch behind a door. I applied the tape, peeled it after half an hour, and was relieved to see the old paint stayed put. That small step prevented me from redoing a large section later, saving time and frustration. It’s a simple yet powerful technique every DIYer should master.
Integrating this into your painting routine can drastically improve your results and extend the life of your paint job. Remember, a good foundation ensures beauty that lasts—so don’t skip the Tape Test.
While many homeowners are familiar with basic painting tips, there’s a wealth of nuanced insights that often get overlooked, leading to costly mistakes or subpar results. One pervasive misconception is that choosing a premium paint guarantees a perfect finish; however, even high-quality paint can fail if surface preparation isn’t meticulous. For example, surface cleanliness and correct sanding are critical—skipping these steps can cause peeling or uneven coloration, regardless of paint quality. To learn more about proper cleaning routines before painting, check out this detailed guide.
The Oops Effect: Don’t Underestimate Surface Preparation
A common trap is believing that a quick wipe-down suffices. The truth is, residual dust, grease, or mildew can seriously impair adhesion. This oversight causes blistering and peeling over time, especially on exterior surfaces. Advanced painters know that thorough cleaning and even inspection for moisture issues are essential—remember, even moisture trapped behind old paint can sabotage your project. Avoid this pitfall by performing a
micro-check, like the Flashlight Test, to spot hidden problems before painting. Neglecting these nuances isn’t just a minor mistake; it can significantly reduce your paint’s lifespan and your overall satisfaction.
Advanced Question: How can understanding paint chemistry help in choosing the right products for challenging surfaces?
Deep dives into paint formulations reveal that different types of finishes and binders respond variably to surface conditions and environmental factors. For instance, oil-based paints tend to adhere better to slick surfaces, but their longer drying times and VOC emissions demand careful consideration. Conversely, water-based paints are more eco-friendly and easier to clean but require impeccable surface prep to prevent issues like brush marks or peeling. Recognizing these nuances enables painters to select the optimal product for specific scenarios, especially when dealing with complex surfaces like textured drywall or exterior stucco—see this guide for advanced drywall repair tips that complement proper paint selection.
Moreover, experts emphasize that understanding environmental conditions, such as humidity and temperature, is crucial. For example, painting in high humidity can trap moisture, leading to longer curing times or even mold growth, which is why knowing the humidity rules becomes vital. Analyzing these factors ensures your paint job not only looks fantastic but lasts for years.
Have you ever fallen into this trap? Let me know in the comments. Mastering the subtleties and dispelling myths about house painting can save you money, time, and frustration—so don’t stop digging deeper.
Achieving professional-looking results in house painting isn’t just about choosing the right paint or technique—it’s equally about maintaining your tools and understanding how to keep your work lasting over time. In this section, I’ll share specific tools I rely on, maintenance routines that extend their lifespan, and insights into scaling your painting operations efficiently.
Invest in Quality Brushes and Rollers
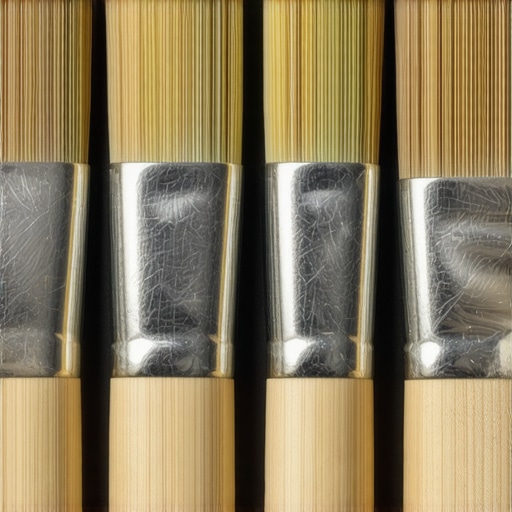
For interior work, I prefer high-quality synthetic brushes like Purdy’s Pro-Extra series. They deliver smooth strokes and are easier to clean, which is crucial for long-term durability. For larger surfaces, I recommend using reusable, durable rollers with foam or nylon covers depending on wall texture. I always keep a separate brush for cutting in—this ensures sharp edges and prevents cross-contamination.
Master Tool Cleaning and Storage
Proper maintenance begins immediately after painting. I use a combination of warm, soapy water for latex paints and mineral spirits for oil-based paints. To prevent tools from drying out or hardening, I perform a thorough cleaning immediately after use—no excuses. For storage, I keep brushes submerged in cleaning solutions or wrapped tightly in plastic wrap to maintain their shape and usability, especially if I plan to reuse them in the next 24 hours.
Use Modern Painting Software to Plan and Scale
When scaling projects or managing multiple jobs, software like Jobber or Houzz Pro streamlines scheduling, client communication, and material ordering. These tools help keep track of equipment maintenance schedules, estimate paint quantities accurately, and plan timelines effectively. By integrating technology into your workflow, you reduce waste and avoid costly delays, which becomes even more critical as projects grow in size.
Predicting Future Trends in Maintenance Tools
Emerging advancements like LED-powered cleaning devices and smart paint dispensers hint at a future where maintenance combines high-tech solutions with eco-friendly practices. For example, ultrasonic cleaning tools are already improving how professionals restore brushes and rollers, leading to longer tool life and better results. Staying informed about these innovations can prepare you for scaling your operations sustainably.
How do I maintain my painting tools over time?
Maintaining your tools requires consistent cleaning, proper storage, and periodic inspection for damage like bristles splaying or roller fabric fraying. Implementing a regular maintenance schedule—such as cleaning brushes immediately after each use and replacing worn rollers—can significantly prolong their effectiveness. Remember, well-maintained tools directly translate into cleaner lines, fewer touch-ups, and longer-lasting paint finishes. Check out this article for more on equipment that helps maintain high-quality results over time.
By adopting these specific tools and maintenance routines, you’ll improve durability, reduce costs, and set a solid foundation for scaling your painting projects. Don’t hesitate to try my favorite advanced tip: clean your brushes with a gentle vinegar soak once a month—it clears out dried paint and keeps bristles flexible for the next job. This simple step can make a noticeable difference in tool lifespan and paint application quality.
Lessons That Changed My Painting Approach
One of the most profound lessons I learned was the significance of patience—rushing through surface prep or skipping steps like the Tape Test often leads to peeling and rework, costing more time and money in the long run. Another insight was understanding that surface cleanliness and moisture control are the unsung heroes of a durable paint finish, transforming unreliable projects into successes. Lastly, overlooking surface texture and existing paint quality can sabotage any effort; recognizing these factors early saves headaches later. These lightbulb moments truly shaped my craftsmanship and efficiency in house painting.
Tools and Resources I Rely On for Superior Results
For consistent quality, I swear by Purdy’s Pro-Extra brushes—they provide smooth application and last longer when properly maintained. A high-quality painter’s tape like FrogTape ensures sharp lines without tearing off old paint. I also trust the comprehensive cleaning guide I follow to prep surfaces meticulously. To plan projects and manage time efficiently, I use software like Houzz Pro, which streamlines scheduling and estimates. Staying informed with resources like this expert advice continually elevates my craft and results.
Your Next Step in Painting Excellence
You’re closer than ever to achieving professional-quality results that last. Remember, each brushstroke and prep step is an investment in longevity and beauty. Embrace the detailed process—your future self will thank you for the durable, flawless finish that enhances your home’s value and aesthetic. Don’t let hesitation hold you back—start incorporating these insights today and watch your home transform with confidence.
Have you ever struggled with a particular step in surface preparation or choosing the right tools? Share your experiences below; I love hearing your stories and helping troubleshoot potential hurdles.