

Ever had that sinking feeling when a drywall patch catches your eye every time you walk into a room? I remember the first time I tried to conceal a repair, only to realize the patch was painfully obvious once painted. It was frustrating, especially after spending hours taping, mudding, and sanding. It seemed like such a minor flaw, but it nagged at me every day. That was my lightbulb moment—there had to be a better way.
The Struggle with Making Drywall Repairs Truly Invisible
Like many DIY homeowners, I initially believed that a smooth layer of joint compound would do the trick. But once the paint went on, the difference was clear. The patched area shimmered differently under the light, revealing my attempts more than I cared to admit. It felt like a constant reminder of my imperfection—an eyesore I couldn’t ignore. Sound familiar? You’re probably wondering if there’s a secret to blending repairs seamlessly into the surrounding wall.
What I found was a simple yet powerful technique called the Cross-Hatching Method. This approach is a game-changer, ensuring your repair melds perfectly with the existing drywall texture, leaving no sign of the patch.
The Big Question: Is Cross-Hatching Actually Worth the Hype?
Early on, I was skeptical. It sounded like one of those fancy tricks that only pros could master. But the truth is, I made a common mistake—I rushed my initial mudding, thinking it was enough. That mistake made my repairs stand out even more. The cross-hatching technique, however, teaches patience and attention to detail, transforming rough patches into invisible repairs. Curious if it works for you? Stick around, because I’ll walk you through every step to make drywall patches vanish.
Before diving into the how-to, it’s helpful to understand what makes this method so effective. It’s about matching the wall’s texture pattern directly over your repair area, fooling the eye into ignoring the patch entirely. Trust me, once you master this, your walls will look flawless, even up close.
Now that you’re motivated, let’s get to the practical steps that turn this technique from theory into reality. Whether you’re patching a small nail hole or fixing a big dent, the cross-hatching method can save your walls—and your sanity. Ready to dive in? I promise, once you see the difference, you’ll wonder why you didn’t start sooner.
,
Prepare Your Repair Area for Flawless Blending
Start by cleaning the patched zone thoroughly with a damp cloth to remove dust and debris, ensuring the surface is primed for adhesion. Lightly sand the area with fine-grit sandpaper to smooth out imperfections and create a key for the joint compound. I once skipped this step and ended up with visible ridges after painting, which was a costly mistake. Think of sanding as giving your repair a clean canvas—necessary for a smooth finish.
Apply the Base Coat with Precision
Using a taping knife, spread a thin layer of lightweight joint compound over the patch, feathering the edges well beyond the repair site. Don’t rush this; a slow, steady hand produces a more uniform surface. I remember rushing through my first attempt and noticing the patch shimmered differently under the light. Allow it to dry completely—usually a few hours or overnight—then lightly sand to eliminate ridges.
Match the Wall Texture with Cross-Hatching
Set Up Your Texture Tools
Equip yourself with a stippling brush or a sponge, and prepare a small amount of watered-down joint compound. For similar textures, I find that a stippling brush works best; for more subtle effects, a sponge can mimic the existing wall finish more easily. Think of it like painting with a stamp—you’re recreating patterns, not just blending colors.
Practice on a Scrap Piece
Before working on your wall, practice the cross-hatching pattern on a scrap board or poster paper. Apply gentle, overlapping strokes to simulate the wall’s texture. When I was nervous, I practiced on an old piece of drywall, which boosted my confidence and refined my technique.
Apply the Texture onto the Repair
Dip your stippling tool into the watered joint compound, then gently stipple over the repaired area, following the original texture pattern. Use light, overlapping taps—similar to tapping a drum—until the patch blends into the surrounding wall. I once applied too much pressure, causing the texture to become uneven; gentle, controlled taps are key.
Refine and Finish
Once the textured coat dries, inspect closely for uniformity. If needed, lightly re-stipple problem spots or add subtle layers to match the wall. Afterward, prime and paint the entire wall, blending the new paint with the old—this is where the cross-hatching truly pays off. Remember, patience is vital; rushing will undo all your previous effort, making the repair obvious again.
With practice, this method becomes second nature. I’ve rebuilt a wall where the previous patch was glaringly obvious, but after applying these textured layers, it was indistinguishable from the rest of the wall—practically invisible. Once mastered, you’ll find drywall repairs no longer a source of frustration but a testament to your skills.
Many homeowners believe that choosing the right paint color is the most critical step in a successful house painting project. However, what most people overlook are the subtle nuances that can make or break the final finish. One common myth is that applying multiple coats guarantees a flawless look. In my experience, the real secret lies in understanding the paint’s formulation, drying times, and surface preparation, especially when working with specialty finishes like epoxy floors or clay paints. For instance, epoxy floors outperform traditional concrete sealers because of their chemical bonding abilities and durability, but only if applied correctly—something many DIYers mishandle by rushing or skipping surface prep.
Why Do So Many Paint Jobs Fail Despite Following the Basics?
Research by expert contractors shows that adhesion failures often stem from neglecting proper surface cleaning or using incompatible paint types. For example, painting over old, peeling paint without proper sanding or primer can result in bubbles and peeling months later, wasting time and resources. This is why understanding the chemistry behind paint adhesion and substrate compatibility is vital, a nuance many tend to ignore. Dive deeper into these issues by exploring articles like “Why Your Exterior Trim Is Rotting Beneath the New Paint” to avoid common pitfalls.
Another critical aspect is color consistency, especially with darker or vibrant shades that require precise matching and multiple coats. Some even believe that one coat is enough if the paint claims ‘covering in one.’ But, as tested by industry experts, especially when dealing with high-traffic or delicate surfaces, skipping additional coats can lead to uneven color, fading, or streaks over time. For advanced DIYers, mastering the timing between coats and understanding drying times is crucial, which can be easily overlooked. This is where a simple yet powerful technique, like the “60-30-10 color rule” or meticulous surface prep, makes all the difference.
Think that all paints are created equal? Think again. The rise of low VOC and allergen-free paints, like clay-based options, isn’t just a trend but a matter of safety and longevity, especially in spaces like nurseries. Choosing these paints not only reduces chemical exposure but also improves adhesion and finish quality. Experts agree that understanding the long-term benefits and proper application techniques for these specialized products elevates your painting results from amateur to professional level. Take note: Skipping proper application procedures can lead to issues like peeling, discoloration, or even health hazards down the line. Want to see for yourself? Check out “Why Clay Paint Is the Safest Choice for Nursery Walls” for an in-depth analysis of these advanced options.
Keeping It Working: Essential Tools for Long-Term Results
Achieving a professional-looking house paint job is only part of the story; maintaining that finish over time is equally important. To ensure your walls stay vibrant and crack-free, investing in the right tools and implementing consistent maintenance routines is crucial. One must-have in my toolkit is a high-quality paint can sealer and storage system. Not only does this prevent paint from drying out, but it also preserves color integrity for future touch-ups. Additionally, a reliable extension pole with adjustable angles allows for effortless reach in high or awkward spots, reducing strain and ensuring even coverage.
For routine inspections, I recommend using an LED flashlight with adjustable brightness. It helps reveal subtle cracks or peeling paint that might be missed in regular daylight. Combining this with a digital moisture meter ensures that surfaces are thoroughly dry before repainting or sealing, preventing future issues like blistering or peeling. Tools like these are invaluable, especially when working on local projects where conditions vary significantly.
Future Trends in Painting Maintenance Tools
Looking ahead, technology is poised to revolutionize how homeowners and professionals maintain their paint jobs. Smart sensors embedded in walls could soon monitor paint integrity and alert owners to issues like rising damp or temperature fluctuations affecting coatings. Augmented reality apps might assist in visualizing repairs before initiating any work, saving time and resources. Embracing such innovations will make maintenance less reactive and more predictive, prolonging the lifespan of your investments.
How do I keep my paintwork in top shape over time?
Regular cleaning with a gentle, non-abrasive cleaner paired with protective coatings can dramatically extend the life of your paint. Checking periodically for peeling edges and addressing them early prevents larger repairs down the line. I personally keep a maintenance schedule, inspecting my walls at least twice a year, and touch up areas with matching paint, taking care to blend seamlessly using techniques like the cross-hatching method discussed earlier. Properly storing paint and tools, avoiding extreme temperatures, and controlling indoor humidity also play vital roles in sustaining your results.
Remember, despite advancements in tools, the foundation remains the same: preparation and observation. For example, applying a high-quality primer before repainting significantly improves adhesion and durability, especially on previously painted surfaces. Incorporating these practices today will pay dividends for years to come.
If you’re serious about long-term maintenance, try using a moisture meter to monitor your walls’ condition periodically. This proactive approach can catch potential problems early, saving effort and cost later. So, equip yourself with these proven tools, stay attentive to your walls’ needs, and enjoy a gorgeous, durable finish for years ahead!
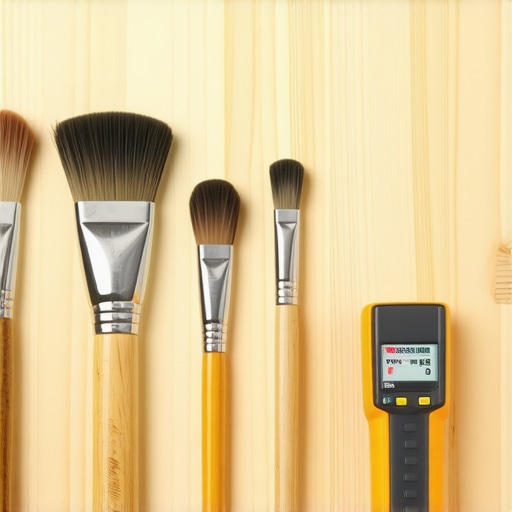
Over the years of tackling drywall repairs, I’ve discovered that the real magic isn’t just in patching but in understanding the nuances that make the fix invisible.
Lessons I Didn’t Expect to Learn on My Painting Journey
- The Devil Is in the Details: Skipping surface prep or rushing the texture matching can turn a simple patch into an eyesore, no matter how perfect your paint job is.
- Patience Pays Off: Allowing each layer of joint compound and texture to dry thoroughly is less tiring than fixing a flaky patch later—trust me on this.
- Practice Makes Perfect: Testing your cross-hatching technique on scrap drywall beforehand saves grief and boosts confidence when working on the actual wall.
- The Power of Texture: Matching the existing wall’s texture is more art than science. The right tools and subtlety can make your repair blend seamlessly.
- Tools Are Your Best Friends: Investing in quality stippling brushes, LED lights, and moisture meters can elevate your DIY game and ensure lasting results.
Tools and Resources That Changed My Approach
- Cross-Hatching Method Guide: Master this for undetectable repairs. It’s a game-changer for blending textures smoothly.
- Proper Paint Storage Solutions: Ensures your paints stay fresh for touch-ups, saving money and hassle down the line.
- High-Quality Tools: From stippling brushes to LED flashlights, investing in the right tools makes all the difference.
- Practice on Scrap Drywall: Experimentation beforehand boosts confidence and helps hone your texture-matching skills.
Keep Going—Your Walls Will Thank You
Don’t shy away from repairs because of fear they’ll stand out. With patience, the right tools, and a bit of practice, you can achieve flawless results that make your walls look brand new. Remember, every smooth corner and perfect blend adds a touch of pride to your home. So, grab your tools, roll up your sleeves, and embrace the challenge. Your walls—and your confidence—will thank you!
Ever struggled with matching textures or hiding drywall patches? Share your experience below and let’s learn from each other’s DIY triumphs and slip-ups!