

I’ll never forget the afternoon I hosted my first neighborhood BBQ after moving into my current place. I was leaning against the sunny side of the garage, beer in hand, talking shop with my neighbor, when I felt a strange dry sensation on my shoulder. When I looked in the mirror later, my favorite navy-blue linen shirt looked like I’d spent the day leaning against a dusty chalkboard. That fine, white powder wasn’t just dust—it was my house’s protective skin literally turning into a ghost. If you’ve ever walked away from your home with a white streak on your sleeve, you know exactly how frustrating and messy this “chalking” phenomenon is. It’s not just an eyesore; it’s a sign that your home’s first line of defense is failing. Today, we’re going to figure out why your paint is disintegrating and how you can fix it before the damage goes deeper than your wardrobe. Have you ever leaned against your house only to find your outfit ruined by a mysterious white dust? Drop a comment below if you’ve been there!
My Favorite Shirt Met Its Match Against the Siding
I learned the hard way that ignoring that dust is a recipe for disaster. Early in my DIY journey, I thought it was just ‘pollen’ or ‘road dust.’ I actually tried to paint right over it once, thinking a fresh layer would just glue the dust down. Spoiler: it didn’t work. The new paint peeled off in sheets within six months because the ‘chalk’ acted like a release agent, preventing the new coat from bonding. You absolutely must understand that you should never paint over failing surfaces like chalking without deep cleaning first. It’s one of those local painting secrets that professionals use to ensure a job lasts a decade instead of a season. Even if you’re looking at innovative house painting ideas to spice up your curb appeal, the physics of paint remains the same: if the foundation is powder, the topcoat won’t stay.
Is my siding actually beyond saving?
You might be worried that the chalky residue means your wood or hardy plank is rotting underneath. Most of the time, that’s not the case at all. The chalk is actually just the resin or binder in the paint breaking down due to years of harsh UV exposure. According to the Paint Quality Institute, while a tiny bit of chalking can help a house ‘self-clean’ by shedding dirt, heavy chalking is a definitive sign that the paint film is no longer protecting your home’s substrate. If you want to maintain your newly painted exterior for ten years or more, you have to address this breakdown before it exposes the raw material of your house to moisture.
Sunlight is Eating Your Paint Binders
Sunlight is the biggest culprit here, especially on the south and west-facing sides of your home. Those harsh rays literally cook the binders in cheaper, low-quality paints. Once the binder is gone, the pigment has nothing to hold onto, so it just sits on the surface as a loose powder. It’s why learning how to stop your exterior paint from fading in direct sunlight is about more than just aesthetics—it’s about structural integrity. When the paint fails like this, it becomes porous, allowing moisture to seep into your siding, which can lead to much bigger problems like rot or mold. If you follow the ultimate guide to house painting, you’ll see that preparation is 90% of the battle, and dealing with chalk is the most important part of that prep. We’re going to dive into the exact steps to wash and prime these surfaces so your next coat actually sticks.I once thought I could just take a leaf blower to my siding and call it a day. I stood there in a cloud of white powder, coughing and looking like a baker who had a very bad day. The dust just resettled. To actually fix this, you need to think of chalking like a layer of grease on a pan; you can’t just rinse it with water and expect the new paint to not slide off.
Stop Treating the Dust Like Dirt
When your siding is chalking, you are dealing with a chemical breakdown, not a dirty house. My first big mistake was grabbing a stiff-bristled broom and scrubbing until my arms burned. I ended up scratching the remaining good paint while leaving the microscopic powder behind. The goal is to emulsify that residue. You need a dedicated house wash or a trisodium phosphate (TSP) substitute. Mix it in a bucket, apply it from the bottom up, and let it sit—but don’t let it dry! If it dries, the chalk just bakes back onto the surface in a harder crust.
Get the Surface Squeaky Clean Without Damaging the House
While it’s tempting to blast the chalk off with a high-powered machine, you have to be careful. I’ve seen homeowners get so aggressive they literally carve initials into their cedar. Understanding the danger of pressure washing wood siding before house painting is crucial because water forced behind the boards leads to rot. Use a low-pressure setting—think of it like a heavy rain rather than a laser beam. Once it’s dry, do the ‘finger test.’ Run your hand across the siding. If your knuckles still look like you’ve been at a chalkboard, you need another round of cleaning. This is also the perfect time to check the integrity of your boards and how to tell if your exterior wood is too rotten to paint, as the cleaning process often reveals soft spots hidden by the chalk. #IMAGE_PLACE_HOLDER_B#
Seal the Surface with a Quality Primer
Once the siding is as clean as possible, you still might have a faint ‘ghost’ of chalk left. This is where most DIYers fail. They reach for a standard 2-in-1 paint and primer, thinking it’s a shortcut. It isn’t. You need a specialty masonry or chalk-binding primer. These are formulated with much smaller resins that can penetrate through any remaining microscopic dust to bite into the actual substrate. I once skipped this on a small shed out back, and why using the wrong primer causes your trim paint to chip became very apparent by the next spring. The paint literally peeled off in strips like a sunburned nose.
Choose Binders Over Cheap Fillers
When you’re at the store, don’t reach for the cheapest bucket on the shelf. This is where the difference between contractor grade and premium paint really shows. Premium paints have higher solids content—more ‘glue’ and less water. If you want to master the art of house painting with these pro tips, remember that the primer is the bridge between your house and your color. If the bridge is weak, the whole project collapses. I remember my neighbor using a cheap ‘contractor special’ on his chalky garage; two years later, it looked worse than before he started. Spend the extra twenty bucks on a high-bond primer.Most people assume that if the siding looks clean to the eye after a quick rinse, it is ready for the brush. But here is the professional curveball: clean is not always compatible. Everyone tells you to blast the house with a pressure washer to get rid of that chalky residue, but in my experience, brute force is often your worst enemy. High-pressure water does not just remove chalk; it drives moisture deep into the wood fibers, creating a damp sandwich once you seal it with paint. If you want to master the art of house painting with these pro tips, you have to realize that a garden hose and a soft brush often do a better job than a 3000 PSI machine. The real trap that catches even seasoned DIYers is the pH balance of the surface. If you used a heavy cleaner like TSP to cut through the chalking and did not rinse it like your life depended on it, you have left an alkaline film behind. This residue can chemically react with your new paint, causing saponification—which is basically a fancy way of saying your paint is turning into soap. This is one of those local painting secrets that separates a five-year job from a fifteen-year one.
Why does paint fail even when the surface feels bone dry?
The answer usually lies in the invisible moisture trapped inside the boards. The Master Painters Institute (MPI) specifies that wood siding should generally have a moisture content below 15 percent before application to ensure a lasting bond. Even if it feels dry to the touch, internal dampness will eventually push outward, causing those frustrating bubbles. This is exactly the reason your exterior paint is bubbling just weeks after application. I have seen homeowners rush to paint on a sunny afternoon after a rainy morning, only to have the sun pull that trapped water right through their expensive new finish. 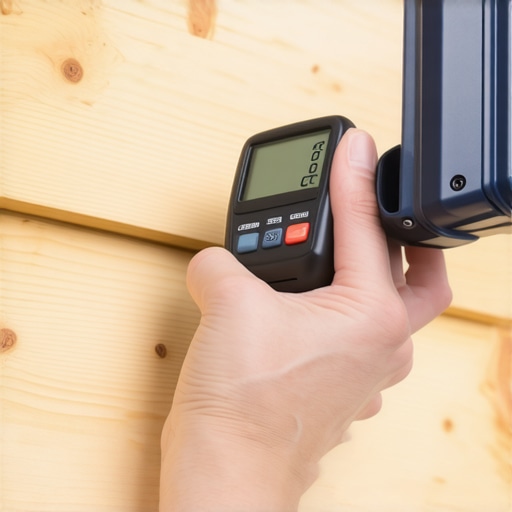 Another nuance involves the clock. You might think a hot, sunny day is perfect for drying, but why your local painting crew prefers early morning starts in summer is because the surface temperature needs to be within a specific range for the chemistry to work. If the siding is too hot, the paint flashes—it dries so fast it cannot level out or penetrate the pores, leaving you with a brittle shell. It is why painting your home requires more than just a brush; it requires an eye on the barometer. Have you ever spent a whole weekend prep-washing only to see the paint peel a month later? Have you ever fallen into this trap? Let me know in the comments—I would love to help you troubleshoot what went wrong!If you are serious about avoiding another “chalky shirt” incident, you need to stop guessing and start measuring. I stopped relying on my “gut feeling” about siding dryness years ago and invested in a pinless moisture meter. I personally swear by the Wagner Meters Orion series because it doesn’t leave unsightly pinholes in my cedar or fiber cement. Knowing exactly when your substrate is ready is how you truly master the art of house painting with these pro tips. If you see a digital reading above 15%, put the brushes down and walk away. It’s better to lose a Saturday to drying time than to lose a five-thousand-dollar investment to internal moisture rot. For the actual application on these tricky surfaces, I transitioned to using a high-end airless sprayer for the initial prime coat. While many DIYers fear the mess, learning the secret to using a paint sprayer without overspray everywhere allows you to drive that primer into the microscopic pores of the siding much more effectively than a brush ever could.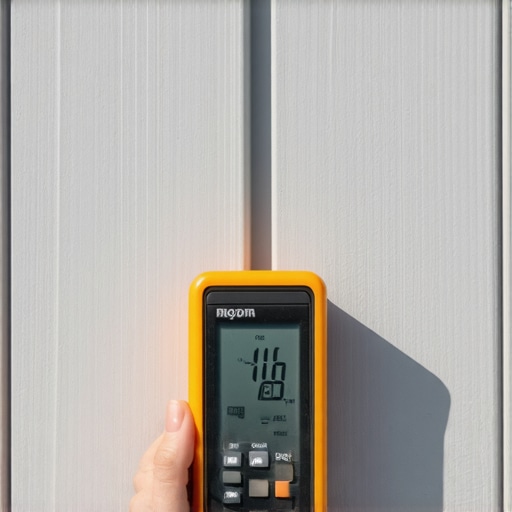
How do I maintain my exterior paint over the long haul?
To successfully maintain your newly painted exterior for ten years or more, you need a proactive schedule, not just a reactive repair kit. I recommend a “soft wash” every two years—forget the high-pressure settings and stick to a mild biodegradable detergent and a soft-bristle truck brush. I typically use a simple mix of a specialized ‘House Wash’ concentrate that connects right to the hose; it is about chemical lifting, not mechanical scrubbing. This removes the acidic environmental pollutants and salt spray that act as catalysts for UV-induced binder breakdown. According to the ASTM D4214 technical standards, which industrial professionals use to quantify the degree of chalking, the rate of film erosion is significantly accelerated when surface contaminants are left to bake in the sun. By keeping the surface clean, you are physically extending the life of the paint’s acrylic resin. This simple cleaning routine is one of the most effective local painting secrets that can save you a fortune in labor costs later.
Self-Healing Binders are the Next Big Thing
Looking toward the future, the industry is moving rapidly toward “smart” coatings and nanotechnology. I’ve been following recent developments in experimental nano-binders that can actually migrate to the surface to bridge micro-cracks before they even become visible to the naked eye. Within the next decade, we might see residential paints that utilize photocatalytic properties to break down organic dirt automatically, effectively cleaning themselves when it rains. For now, understanding the difference between contractor grade and premium paint remains your best defense. High-solids acrylics with advanced UV inhibitors are the closest thing we have to a permanent shield right now. My advice? Don’t just paint your house and forget it. Grab a moisture meter for your next project and treat your siding like the investment it is—it’s the single most important tool in my kit that ensures my hard work doesn’t literally turn to dust on my sleeve.
The Hardest Lessons I Learned About Failing Exterior Paint
One thing I learned after years of trial and error is that chalking is incredibly sneaky. You might wash the house and think it is ready, but if you do not use a dark-colored cloth to check the surface, you will likely miss a microscopic layer of powder that will ruin your bond. I also realized that so-called ‘self-cleaning’ paint is often just a marketing term for paint designed to chalk slowly—which is not always ideal for every climate. When you master the art of house painting with these pro tips, you learn that the biggest secret is simply patience; letting that substrate dry completely is more important than the brand of paint you buy. If you are hiring out the work, this intensive prep phase is exactly why your local painting estimates vary so wildly in price. The pros who spend three days on cleaning and drying are not the cheapest, but they are the ones who ensure your home stays beautiful for a decade.
#IMAGE_PLACEHOLDER_E#
The Gear That Keeps My Exterior Projects from Turning to Dust
If you want to tackle a chalking problem correctly, I recommend building a dedicated ‘prep kit.’ First, a pinless moisture meter is non-negotiable for checking siding before you ever open a paint can. Second, invest in a quality soft-bristle truck brush; it is much more effective than a standard sponge and far safer than using a high-pressure washer. Third, for those tricky, rough-sawn textures, always check the best roller nap for rough exterior cedar siding to ensure your primer is actually penetrating every crevice rather than just sitting on the surface. Finally, keep a jug of TSP substitute on hand—it is the only cleaner I trust to truly break down the chemical bond of that white powder residue.
Reclaiming Your Curb Appeal One Clean Board at a Time
Fixing a chalky house feels like a massive chore, but once you see that fresh, vibrant color sticking to a solid surface, it is incredibly rewarding. You are not just making the place look better; you are shielding your home’s structure from the elements for the next ten years. Follow the ultimate guide to house painting and take it one wall at a time. Your house painting project deserves a foundation that is not literally crumbling into dust under your fingers. Have you ever noticed that white powder on your siding and thought it was just road dust? Let me know in the comments how you handled it!