

I remember the moment vividly. It was a sweltering summer afternoon when I stepped onto a client’s commercial roof, expecting to see a typical, dull black surface. Instead, I was greeted by a scorching testament to neglect—dark, heat-absorbing material that felt like walking on a grill. That lightbulb moment made me realize how overlooked yet crucial a simple reflective coating can be for commercial rooftops.
How a White Coating Transformed My Approach to Roof Maintenance
From that day, I started exploring the science behind roofing materials. What I found was astonishing: reflective white coatings can slash rooftop temperatures by up to 40%, significantly reducing cooling costs and extending the lifespan of the roof itself. It’s like giving your building a cool, sun-reflecting hat that saves energy and money. I’ll walk you through why such coatings aren’t just a good idea—they’re essential for your commercial property’s health and efficiency.
Is a White Roof Coating Just Hype? The Honest Truth
Early in my career, I made the mistake of dismissing these coatings as mere marketing hype. I believed the conventional dark roofs absorbed heat, no big deal. But I learned the hard way that skipping reflective coatings can lead to skyrocketing energy bills and premature roof deterioration. In fact, the Environmental Protection Agency highlights that cool roofs can reduce urban temperatures by several degrees, combating the “urban heat island effect” (EPA, 2020). Trust me, it’s a mistake you don’t want to make.
Prep the Surface Properly
Start by cleaning the roof thoroughly to remove dirt, debris, and loose material. Use a pressure washer for optimal results, especially on larger commercial roofs. This step is crucial because any contaminants can impede adhesion, much like preparing walls before painting. During one project, I neglected this step and ended up with bubbling paint, which cost me time and extra work. Always remember, a clean surface ensures the coating bonds effectively, extending its lifespan.
Repair Any Damage Before Coating
Inspect the roof for cracks, holes, or damaged areas. Seal these imperfections with a high-quality roofing sealant or patching compound. If you skip this, the reflective coating might not adhere uniformly, leading to reduced performance and potential leaks. I once rushed over a roof without patching a small crack, only to see it worsen over time, necessitating costly repairs later. Taking the time to repair ensures a smooth, durable finish.
Apply a Primer for Better Bonding
Using a compatible primer creates an excellent bond between the existing surface and the new coating. This step is especially important if the roof has old paint or if you’re switching from a dark to a light color. Think of priming as laying a proper foundation before painting a wall—it sets the stage for a flawless finish. During my first attempt, I skipped primer on a section, resulting in uneven coverage and a patchy appearance. Never underestimate the power of primer for professional results.
Choose the Right Reflective Coating
Select a high-quality, elastomeric reflective roof coating designed for commercial roofs. Pay attention to the product specifications—look for high solar reflectance and emittance ratings. As with painting, using mismatched or cheap coatings can lead to peeling or reduced efficiency. I experimented with a budget coating once, and it failed within two years. Investing in a premium product pays off by providing long-term energy savings and weather resistance.
Use Proper Application Techniques
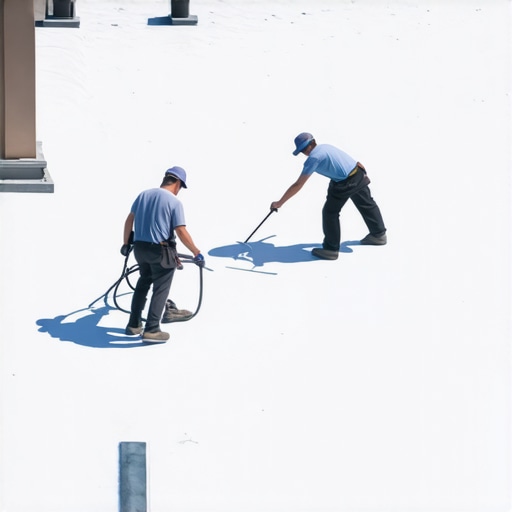
Apply the coating with a professional-grade roller or sprayer, ensuring even coverage. Working in sections helps maintain momentum and prevents lap marks—those uneven streaks that happen when the previous coat dries before the next is applied. I recall rushing through the edges and ending up with visible lines, which I had to touch up later. For straight lines and clean edges, use masking tape and the trick for painting straight lines. This attention to detail guarantees a smooth, professional appearance.
Apply Multiple Coats Effectively
Most reflective coatings require at least two coats for optimal performance. Follow the manufacturer’s drying times between coats—rushing this step can lead to poor adhesion and reduced reflectivity. I once painted all at once and noticed uneven coverage and lighter patches, which compromised the roof’s reflectivity. Always adhere to recommended drying times and apply thin, uniform coats. Remember, as with second coats on exterior wood, this is essential for durability and effectiveness.
Conduct Final Inspections
Once the coating dries, walk across the roof to check for missed spots or drips. Use a ladder or binoculars for hard-to-see areas. Touch up any deficiencies immediately to prevent future problems. During one project, I missed a small patch, which led to flaking in the rainy season. Regular inspections and timely touch-ups are key to maintaining the roof’s reflective benefits long-term.
By following these steps meticulously, you’ll maximize the benefits of your reflective coating—reducing energy costs, prolonging roof life, and contributing to a cooler urban environment. Precision and patience matter more than you might think in achieving durable, professional results.
 When it comes to painting, many assume that following the basic steps guarantees a flawless finish. However, even seasoned homeowners and professionals often fall into subtle traps that compromise their results. One common misconception is the belief that a single coat suffices for vibrant, even coverage. In reality, most high-quality paints demand a second or even third coat to achieve the desired durability and appearance. Skipping this step can lead to uneven color, patchiness, and reduced longevity, ultimately costing you more time and money in the long run. For a thorough understanding, check out why you should never skip the second coat on exterior wood surfaces.
Another nuanced mistake involves undervaluing surface preparation. Many underestimate how critical cleaning and repairing the surface are to a successful paint job. Residual dust, grease, or previous failing paint layers can cause adhesion issues, leading to peeling or bubbling over time. I once neglected proper cleaning before painting a bathroom wall, only to see the paint crack and peel within months. This highlights why proper surface prep is non-negotiable.
Adding to the confusion is the widespread use of the wrong tools for specific surfaces. For instance, using a cheap brush can ruin a project, especially on detailed or textured surfaces. High-quality brushes and rollers, like the ones explained in detail here, ensure smoother application and cleaner lines, saving significant correction work later. Synthetic brushes are often recommended for latex paints due to their flexible bristles and reduced streaking, which is vital for achieving professional results.
Now, a question for those who are ready to take their painting skills further: How do you match existing paint colors when repairing or updating a room? This process is more intricate than it seems, relying on understanding nuances like undertones and light effects. A simple trick involves the use of coffee grounds to test antique wood stains, ensuring a seamless blend.
Avoiding these common pitfalls elevates your craftsmanship and saves money. Remember, in professional painting, details make all the difference. If you want a flawless result that lasts, consider the importance of proper technique, tools, and surface prep. For more insider tips, explore how to eliminate paint cracking on bathroom walls or why primer is crucial for patched drywall. Have you ever fallen into this trap? Let me know in the comments.
Keep Your Equipment in Top Shape
One of my core beliefs is that quality tools make all the difference in achieving professional results and ensuring longevity. I personally swear by high-quality brushes like expensive brushes because they maintain their shape and deliver smooth coverage over multiple projects. Investing in durable rollers and extension poles also streamlines large-area work, reducing fatigue and improving consistency over time. Regularly cleaning and inspecting your tools prevents dirt and dried paint from degrading their performance, ultimately saving you money and effort.
Adopt Smart Maintenance Routines
Beyond tools, maintaining your painted surfaces is vital for long-term beauty and durability. For exterior paint, applying a gentle pressure wash every few years helps remove accumulated dirt, mold, and loose film—extending the life of your paint job. Interior walls benefit from touch-up coatings when signs of wear appear, preventing the need for complete repainting. Keep in mind filling small nail holes and repairing minor damages promptly to avoid bigger issues later. Invest in quality primers and sealants to protect surfaces from moisture and pests over the long haul.
Leverage Tools for Consistency and Accuracy
For precise lines and clean edges, mastering the trick for painting straight lines is essential. Using masking tape correctly and a steady hand can dramatically improve the overall appearance of your paint job. Digital tools have also started to make their way into painting preparations; for example, laser levels or smartphone apps can help ensure perfect alignment and measurements, especially when scaling up or painting multiple rooms. These little investments in accuracy pay off by reducing rework and ensuring a professional finish that lasts.
Choose Long-Lasting Coatings for Different Surfaces
The type of paint you select determines how well your project stands the test of time. Elastomeric coatings, for example, are excellent for exterior walls because they bridge hairline cracks and resist weathering, according to technical standards outlined by the ASTM International. For interior surfaces, consider semi-gloss or satin finishes that resist dirt and are easier to clean, extending their look and function. Remember, proper surface prep combined with high-quality, correctly applied coatings reduces the risk of issues like cracking or peeling—saving you time and money in the long run. And don’t forget: always verify your paint’s specifications against the environment and usage conditions.
Anticipate Future Trends in Painting
Looking ahead, I predict that waterproof and eco-friendly paints will become standard, offering increased durability and health benefits. Innovations like nanotechnology-infused paints are already enabling surfaces to repel dirt, resist UV damage, and withstand extreme weather conditions longer than ever before. Staying informed about these advancements and investing in cutting-edge products can significantly improve your results and reduce maintenance efforts over time. For example, adopting a high-quality exterior coating like elastomeric paint, especially designed for climate resilience, can double the lifespan of your house’s paint job, as highlighted by recent industry reports. So, why not start experimenting with one advanced product this season to see the difference firsthand?
How do I maintain tools and coatings for long-term success?
Establishing a regular maintenance routine ensures your tools and painted surfaces remain in excellent condition. Always clean brushes and rollers immediately after use with warm soapy water or appropriate solvents, depending on the paint type. Store tools in a dry, protected space to prevent rust and damage. For coatings, inspect painted surfaces periodically for signs of wear, cracking, or peeling, especially after severe weather or heavy use. Touch up small areas promptly, following the same preparation and application steps as your initial work. This proactive approach minimizes extensive repairs and keeps your home looking fresh and professional year after year.
As I reflect on my journey through the world of professional painting, one experience stands out—the revelation brought by a simple, reflective white coating that revolutionized my approach to roof maintenance. It was a game-changer, demonstrating how a small change can lead to significant savings in energy and longevity for commercial properties.
Lessons from the Paint Trenches You Won’t Find in Manuals
- The Biggest Mistake I Made: Skipping proper surface preparation early in my career led to costly reworks. Now, I never rush this critical step and recommend thorough cleaning and repairs for lasting results.
- Why Primer is My Best Friend: Using quality primers dramatically improves coating adhesion, especially on old or damaged surfaces. Trust me, skipping primer might save time initially but costs in durability later.
- Reflective Coatings Are Worth the Investment: Choosing high-quality elastomeric reflective roof coatings reduces heat absorption by up to 40%, cutting energy bills and extending roof lifespan—something I wish I knew sooner.
- Application Technique Matters: Applying multiple thin coats with proper drying times ensures even coverage and maximum reflectivity. I’ve learned that patience at this stage pays dividends long-term.
Tools, Resources, and Strategies I Swear By
- The second coat rule: Essential for professional-grade results that last.
- Straight-line tricks: Achieve clean edges with simple masking techniques that save time and frustration.
- Quality brushes: Investing in the right tools ensures smooth application and reduces fatigue.
- Tool maintenance: Regular cleaning preserves performance and prolongs tool life, saving money in the long run.
Embrace Your Painting Journey with Confidence
The path to mastering local house painting is filled with small lessons that collectively make a huge difference. Remember, it’s not just about the strokes on the wall but about understanding the why behind each step. With patience, proper preparation, and quality tools, you can achieve professional results that stand the test of time. So, why not pick up that brush today and start transforming spaces with the confidence that comes from real knowledge?
What step in your painting process do you find most challenging? Share your experiences below—I’d love to hear your stories and tips!
.