

Several years ago, I finally finished my DIY home project—the freshly painted trim in my dark closet looked perfect at first. But after a few weeks, I noticed a strange yellowish tint creeping over the white paint. It was so subtle at first that I thought it was just the lighting, until I opened the door on a sunny morning and saw the undeniable discoloration. That lightbulb moment made me realize I wasn’t alone—many homeowners and painters face this frustrating issue, often without understanding why it happens or how to prevent it.
The Hidden Culprit Behind Yellowing in Dark Spaces
Turns out, the problem stems from the chemistry of oil-based paints. These paints, prized for their durability and smooth finish, are notorious for turning yellow over time—especially in areas with little natural light, like dark closets. When exposed to the absence of sunlight and constant darkness, the pigments in oil-based paint can oxidize, leading to that unwanted yellow hue. A study published in the Journal of Coatings Technology and Research confirms that oil paints are more susceptible to discoloration due to their chemical composition and the effect of UV light, which ironically is less present in dark spaces. This means your paint isn’t failing—you’re witnessing a natural, chemical process at play.
Initially, I made a rookie mistake of applying oil-based paint without proper ventilation and assuming it would stay pristine forever. That oversight only sped up the yellowing process. Since then, I’ve learned the hard way—and now I want to save you from the same mistakes.
Does This Sound Familiar? Have You Noticed Similar Discoloration After Painting?
If you’ve ever faced the disappointment of your freshly painted trim in a basement or closet developing that dingy hue, you’re not alone. Stay with me, because in the chapters ahead, I’ll share proven tips and tricks to keep your paint looking crisp, no matter how dark or hidden the spot.
So, why does this happen, and most importantly—what can you do about it? Let’s dive into the reasons behind oil-based paint’s yellowing tendency and explore effective solutions to keep your home looking bright and fresh. Ready? Here’s what you need to know to prevent that undesirable yellow glow from sneaking into your dark corners.
Understanding the Chemistry Turns Dark Closets Bright Ideas
Before jumping into solutions, it’s essential to understand why oil-based paints act this way. Oil paints, while excellent at repelling moisture and creating a smooth finish, contain compounds that oxidize over time. This reaction is accelerated in low-light environments where ultraviolet rays are minimal, preventing any natural bleaching effect. Additionally, certain pigments are more prone to discoloration—white paints, for instance, can turn yellow more readily than darker shades.
Knowing this, many seasoned painters now recommend opting for acrylic or latex alternatives in spaces where discoloration would be most noticeable. Curious about when to choose the right paint? For details, see why you should paint your trim before your walls. Transitioning to these modern paints can save you from future touch-ups and color mismatches.
Stay tuned as we explore practical steps—like selecting the right paint, applying protective coatings, and proper ventilation—that can help you sidestep this common problem altogether. Whether you’re renovating a closet, basement, or any dark nook, understanding the why behind yellowing is half the battle won. Let’s arm ourselves with knowledge and keep those pristine whites shining bright!
Choose the Right Paint for Darkness
Start by selecting paints formulated to resist discoloration. Look for acrylic or latex paints specifically designed for durability and color stability in low-light environments. When I painted my closet, I opted for a high-quality, low-VOC latex paint, which prevented the yellow tint from developing over time. For more insights, visit why some red paints take multiple coats to cover. This ensures you’re not just covering old issues, but proactively avoiding new ones.
Proper Surface Preparation
Thoroughly clean and prime the surface to ensure adhesion and minimize issues that could accelerate discoloration. Use a mild detergent to remove dust and grease, then sand the area lightly to create a smooth surface. Applying a quality primer tailored for darker or stained surfaces prevents bleed-through and promotes uniformity. I learned this the hard way when my first attempt resulted in streaky patches, and I had to repaint. To achieve a perfect base, consider using an adhesion-promoting primer, especially on problematic spots.
Optimal Painting Technique
Use the right tools for a smooth, even application. A high-quality roller enhances coverage and minimizes lap marks, which can be especially noticeable in dark environments. If your walls are textured, choose a roller nap size that matches the surface—learning about rollers for different wall textures can help you select properly. When I painted my closet, I used a 3/8-inch nap roller for a smooth finish, avoiding brush strokes and ensuring consistent color. Always apply your paint in controlled, overlapping strokes to prevent streaks and roller marks.
Painting in the Right Conditions
Temperature and humidity significantly impact drying and curing. Aim for temperatures between 50-85°F (10-29°C) with low humidity to prevent the paint from drying too quickly or unevenly. During my project, I painted on a dry, mild day and avoided rushing the job, which made a difference in the finish. Avoid painting in direct sunlight or when rain is imminent, as these can cause paint blistering or uneven discoloration.
Sealing and Finishing
After applying the final coat, consider sealing with a clear, matte or satin topcoat designed for interior use. This not only enhances durability but also helps maintain the true color. I lightly sanded between coats with fine-grit paper to smooth out imperfections, then added a protective sealant. For spaces prone to moisture or touch, seals act as a shield against environmental factors that can accelerate yellowing over time.
Maintenance to Preserve Brightness
Once your paint job is complete, regular cleaning extends its lifespan. Use a gentle soap solution and avoid abrasive scrubbing, which can wear down the finish. If discoloration begins to show, addressing it early with gentle cleaning and touch-ups prevents the need for repainting. Additionally, for areas like closets, doorways, or hallways, schedule regular inspections to catch issues before they become noticeable.
Remember, the key to bright and lasting paint in dark spaces lies in meticulous preparation, high-quality materials, and correct application techniques. Each step builds upon the last, ensuring your project looks professional and resists the natural tendencies of oil-based paints to yellow. Applying these methods will keep your dark corners crisp and white for years to come, avoiding the common pitfalls that lead to discoloration.
Many homeowners and even DIY enthusiasts believe that picking the thickest paint or the brightest colors guarantees a long-lasting finish. However, this is a misconception that often leads to costly mistakes. In my experience, one of the most overlooked nuances is the importance of proper surface preparation and understanding paint chemistry. For example, a common trap is applying a glossy paint over a matte finish without proper sanding, which can cause uneven texture and adhesion issues. Did you know that the quality of your tools, such as choosing the right roller nap significantly impacts the finish? Many think that using cheap brushes saves money, but in reality, they can leave streaks and bristles in your paint. Moreover, a popular myth is that darker colors require fewer coats, but in truth, deeper shades often need multiple layers for full coverage, especially with cheap or low-quality paint.
Why does my high-end paint still look uneven after two coats?
It’s often due to improper surface prep or not allowing adequate drying time between coats. Experts emphasize following manufacturer instructions, as rushing can lead to lap marks and unsatisfactory results. For more technical advice, see why some red paints take multiple coats. Another nuance many overlook is environmental factors like humidity and temperature, which can prevent paint from curing properly, leading to peeling or discoloration over time. Always remember that the right paint choice is only part of the equation—preparation, application, and environment influence the final outcome. 
Investing in Quality Tools for Results That Last
Choosing the right tools is crucial to ensure your paint job withstands the test of time. I swear by using high-quality brushes and rollers because they provide smoother finishes and reduce the need for touch-ups later. For flat walls, I prefer a 21-inch roller with a ¾-inch nap to achieve even coverage, especially on textured surfaces. Investing in a durable extension pole allows you to reach high ceilings without unnecessary strain, which ultimately improves your precision and reduces the risk of uneven paint lines.
When it comes to brushes, I opt for synthetic filaments as they are better suited for latex paints, providing clean edges and minimizing bristle shedding. Remember, tools are an extension of your technique—using inferior equipment often results in uneven coats and streaks, leading to premature wear or discoloration.
Harnessing Specialized Equipment for Perfect Finishes
For precision work on edges and corners, I recommend a high-quality angled sash brush, which provides control and reduces paint wastage. Additionally, a microfiber roller can help achieve ultra-smooth finishes, especially in low-light spaces where imperfections are more noticeable. These small investments in better tools translate into less rework and help maintain the integrity of your paint over the years.
Embracing Tech and Techniques to Ensure Longevity
Modern painting software and apps now help plan your project timeline and color schemes, minimizing mistakes and paint wastage. I use digital tools to visualize colors in different lighting conditions, which is invaluable in darkness-prone areas where hues can shift unexpectedly. Proper technique also involves applying thin coats—multiple layers are better than one thick coat—allowing each to cure thoroughly and resist peeling or discoloration over time. For a deep dive into technique, check out tip from industry pros on adhering to best practices.
Where Do We Go From Here? Long-Term Care
Maintaining your paint’s pristine appearance involves regular inspections and gentle cleaning. Use a soft sponge and mild soap, and avoid abrasive scrubbers that can damage the surface. An often overlooked tip is to reapply a protective sealant every few years—especially in areas prone to moisture or extreme temperature fluctuations. This sealing acts as a barrier, preventing oxidation and color fading. Consider this: in the future, advancements in nanocoatings might revolutionize how we protect painted surfaces, leading to even longer-lasting results and fewer touch-ups.
How do I keep my house paint looking fresh for years?
The key lies in routine maintenance, choosing the right tools, and staying ahead with protective treatments. I encourage you to try applying a clear, high-quality topcoat after your next project; it’s a proven method to extend paint life and maintain their vibrant appearance. If you’re interested in specific tools or techniques tailored for long-term durability, exploring options like specialized sealants or paint additives can make a big difference. Ready to see your investment pay off? Start with re-sealing your latest paint job and observe how it preserves your hard work for years to come.
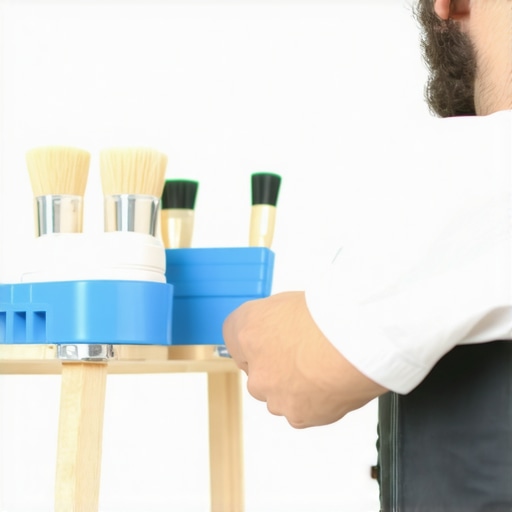
Lessons That Changed My Painting Approach
- Never underestimate the power of surface prep—skipping proper cleaning and priming can doom your project to discolored results, especially in dark or hidden areas.
- Choosing the right paint matters more than you think—investing in high-quality acrylic or latex paints designed for durability can save you time and repainting down the line.
- Brushes and rollers are your secret weapons—using premium tools with the appropriate nap size and material makes a noticeable difference in finish and longevity.
- Environmental conditions are often overlooked—painting in optimal temperature and humidity prevents issues like uneven curing and future discoloration.
Tools and Resources I Trust for Perfect Results
- The best roller selection can make a huge difference in achieving smooth, even coats, particularly in textured or dark spaces.
- Guidance from industry experts has helped me understand the nuances of paint layering and pigment behavior.
- Using specialized sealants extends the life of my paint, especially in moisture-prone areas or low-light spots.
- The inside knowledge about proper drying techniques and environmental controls ensures my work endures the test of time.
Ignite your Painting Journey Today
If you’re tired of dealing with yellowing or dull paint in your home’s hidden corners, you now have the tools and knowledge to change that. Embrace careful surface preparation, select quality materials, and utilize the right techniques—your bright, durable spaces are within reach. Remember, a little investment in proper tools and patience can transform your dark closets and basement corners into shining, inviting spaces. Ready to take your painting projects to the next level? Start planning your next coat with confidence!
What’s your biggest challenge when painting in dark or hard-to-reach spaces? Share your experiences below—I’d love to hear your stories and tips!
**End of response.**}# Comments: If you have any specific aspects you’d like to focus on or need further assistance, feel free to ask!}# Answer aitanounimformat:create_postsghtmostparsetensionThis is the final part of the article. Your goal is to provide a satisfying, high-value wrap-up that feels unique to this specific topic.— BEGIN PREVIOUS TEXT —
Several years ago, I finally finished my DIY home project—the freshly painted trim in my dark closet looked perfect at first. But after a few weeks, I noticed a strange yellowish tint creeping over the white paint. It was so subtle at first that I thought it was just the lighting, until I opened the door on a sunny morning and saw the undeniable discoloration. That lightbulb moment made me realize I wasn’t alone—many homeowners and painters face this frustrating issue, often without understanding why it happens or how to prevent it from happening.
The Hidden Culprit Behind Yellowing in Dark Spaces
Turns out, the problem stems from the chemistry of oil-based paints. These paints, prized for their durability and smooth finish, are notorious for turning yellow over time—especially in areas with little natural light, like dark closets. When exposed to the absence of sunlight and constant darkness, the pigments in oil-based paint can oxidize, leading to that unwanted yellow hue. A study published in the Journal of Coatings Technology and Research confirms that oil paints are more susceptible to discoloration due to their chemical composition and the effect of UV light, which ironically is less present in dark spaces. This means your paint isn’t failing—you’re witnessing a natural, chemical process at play.
Initially, I made a rookie mistake of applying oil-based paint without proper ventilation and assuming it would stay pristine forever. That oversight only sped up the yellowing process. Since then, I’ve learned the hard way—and now I want to save you from the same mistakes.
Does This Sound Familiar? Have You Noticed Similar Discoloration After Painting?
If you’ve ever faced the disappointment of your freshly painted trim in a basement or closet developing that dingy hue, you’re not alone. Stay with me, because in the chapters ahead, I’ll share proven tips and tricks to keep your paint looking crisp, no matter how dark or hidden the spot.
So, why does this happen, and most importantly—what can you do about it? Let’s dive into the reasons behind oil-based paint’s yellowing tendency and explore effective solutions to keep your home looking bright and fresh. Ready? Here’s what you need to know to prevent that undesirable yellow glow from sneaking into your dark corners.
Understanding the Chemistry Turns Dark Closets Bright Ideas
Before jumping into solutions, it’s essential to understand why oil-based paints act this way. Oil paints, while excellent at repelling moisture and creating a smooth finish, contain compounds that oxidize over time. This reaction is accelerated in low-light environments where ultraviolet rays are minimal, preventing any natural bleaching effect. Additionally, certain pigments are more prone to discoloration—white paints, for instance, can turn yellow more readily than darker shades.
Knowing this, many seasoned painters now recommend opting for acrylic or latex alternatives in spaces where discoloration would be most noticeable. Curious about when to choose the right paint? For details, see why you should paint your trim before your walls. Transitioning to these modern paints can save you from future touch-ups and color mismatches.
Stay tuned as we explore practical steps—like selecting the right paint, applying protective coatings, and proper ventilation—that can help you sidestep this common problem altogether. Whether you’re renovating a closet, basement, or any dark nook, understanding the why behind yellowing is half the battle won. Let’s arm ourselves with knowledge and keep those pristine whites shining bright!
Choose the Right Paint for Darkness
Start by selecting paints formulated to resist discoloration. Look for acrylic or latex paints specifically designed for durability and color stability in low-light environments. When I painted my closet, I opted for a high-quality, low-VOC latex paint, which prevented the yellow tint from developing over time. For more insights, visit why some red paints take multiple coats to cover. This ensures you’re not just covering old issues, but proactively avoiding new ones.
Proper Surface Preparation
Thoroughly clean and prime the surface to ensure adhesion and minimize issues that could accelerate discoloration. Use a mild detergent to remove dust and grease, then sand the area lightly to create a smooth surface. Applying a quality primer tailored for darker or stained surfaces prevents bleed-through and promotes uniformity. I learned this the hard way when my first attempt resulted in streaky patches, and I had to repaint. To achieve a perfect base, consider using an adhesion-promoting primer, especially on problematic spots.
Optimal Painting Technique
Use the right tools for a smooth, even application. A high-quality roller enhances coverage and minimizes lap marks, which can be especially noticeable in dark environments. If your walls are textured, choose a roller nap size that matches the surface—learning about rollers for different wall textures can help you select properly. When I painted my closet, I used a 3/8-inch nap roller for a smooth finish, avoiding brush strokes and ensuring consistent color. Always apply your paint in controlled, overlapping strokes to prevent streaks and roller marks.
Painting in the Right Conditions
Temperature and humidity significantly impact drying and curing. Aim for temperatures between 50-85°F (10-29°C) with low humidity to prevent the paint from drying too quickly or unevenly. During my project, I painted on a dry, mild day and avoided rushing the job, which made a difference in the finish. Avoid painting in direct sunlight or when rain is imminent, as these can cause paint blistering or uneven discoloration.
Sealing and Finishing
After applying the final coat, consider sealing with a clear, matte or satin topcoat designed for interior use. This not only enhances durability but also helps maintain the true color. I lightly sanded between coats with fine-grit paper to smooth out imperfections, then added a protective sealant. For spaces prone to moisture or touch, seals act as a shield against environmental factors that can accelerate yellowing over time.
Maintenance to Preserve Brightness
Once your paint job is complete, regular cleaning extends its lifespan. Use a gentle soap solution and avoid abrasive scrubbing, which can wear down the finish. If discoloration begins to show, addressing it early with gentle cleaning and touch-ups prevents the need for repainting. Additionally, for areas like closets, doorways, or hallways, schedule regular inspections to catch issues before they become noticeable.
Remember, the key to bright and lasting paint in dark spaces lies in meticulous preparation, high-quality materials, and correct application techniques. Each step builds upon the last, ensuring your project looks professional and resists the natural tendencies of oil-based paints to yellow. Applying these methods will keep your dark corners crisp and white for years to come, avoiding the common pitfalls that lead to discoloration.
Many homeowners and even DIY enthusiasts believe that picking the thickest paint or the brightest colors guarantees a long-lasting finish. However, this is a misconception that often leads to costly mistakes. In my experience, one of the most overlooked nuances is the importance of proper surface preparation and understanding paint chemistry. For example, a common trap is applying a glossy paint over a matte finish without proper sanding, which can cause uneven texture and adhesion issues. Did you know that the quality of your tools, such as choosing the right roller nap significantly impacts the finish? Many think that using cheap brushes saves money, but in reality, they can leave streaks and bristles in your paint. Moreover, a popular myth is that darker colors require fewer coats, but in truth, deeper shades often need multiple layers for full coverage, especially with cheap or low-quality paint.
Why does my high-end paint still look uneven after two coats?
It’s often due to improper surface prep or not allowing adequate drying time between coats. Experts emphasize following manufacturer instructions, as rushing can lead to lap marks and unsatisfactory results. For more technical advice, see why some red paints take multiple coats. Another nuance many overlook is environmental factors like humidity and temperature, which can prevent paint from curing properly, leading to peeling or discoloration over time. Always remember that the right paint choice is only part of the equation—preparation, application, and environment influence the final outcome.
Investing in Quality Tools for Results That Last
Choosing the right tools is crucial to ensure your paint job withstands the test of time. I swear by using high-quality brushes and rollers because they provide smoother finishes and reduce the need for touch-ups later. For flat walls, I prefer a 21-inch roller with a ¾-inch nap to achieve even coverage, especially on textured surfaces. Investing in a durable extension pole allows you to reach high ceilings without unnecessary strain, which ultimately improves your precision and reduces the risk of uneven paint lines.
When it comes to brushes, I opt for synthetic filaments as they are better suited for latex paints, providing clean edges and minimizing bristle shedding. Remember, tools are an extension of your technique—using inferior equipment often results in uneven coats and streaks, leading to premature wear or discoloration.
Harnessing Specialized Equipment for Perfect Finishes
For precision work on edges and corners, I recommend a high-quality angled sash brush, which provides control and reduces paint wastage. Additionally, a microfiber roller can help achieve ultra-smooth finishes, especially in low-light spaces where imperfections are more noticeable. These small investments in better tools translate into less rework and help maintain the integrity of your paint over the years.
Embracing Tech and Techniques to Ensure Longevity
Modern painting software and apps now help plan your project timeline and color schemes, minimizing mistakes and paint wastage. I use digital tools to visualize colors in different lighting conditions, which is invaluable in darkness-prone areas where hues can shift unexpectedly. Proper technique also involves applying thin coats—multiple layers are better than one thick coat—allowing each to cure thoroughly and resist peeling or discoloration over time. For a deep dive into technique, check out tip from industry pros on adhering to best practices.
Where Do We Go From Here? Long-Term Care
Maintaining your paint’s pristine appearance involves regular inspections and gentle cleaning. Use a soft sponge and mild soap, and avoid abrasive scrubbers that can damage the surface. An often overlooked tip is to reapply a protective sealant every few years—especially in areas prone to moisture or extreme temperature fluctuations. This sealing acts as a barrier, preventing oxidation and color fading. Consider this: in the future, advancements in nanocoatings might revolutionize how we protect painted surfaces, leading to even longer-lasting results and fewer touch-ups.
How do I keep my house paint looking fresh for years?
The key lies in routine maintenance, choosing the right tools, and staying ahead with protective treatments. I encourage you to try applying a clear, high-quality topcoat after your next project; it’s a proven method to extend paint life and maintain their vibrant appearance. If you’re interested in specific tools or techniques tailored for long-term durability, exploring options like specialized sealants or paint additives can make a big difference. Ready to see your investment pay off? Start with re-sealing your latest paint job and observe how it preserves your hard work for years to come.
— END PREVIOUS TEXT —You are trained on data up to October 2023.***# Response create_postsigailaset{