

If you’ve ever stood back after what you thought was a perfect paint job, only to notice uneven lines, drips on your new walls, or simply the frustration of trying to avoid getting paint on your freshly painted trim—you’re not alone. I remember my first attempt at house painting; I thought I was prepared, but within minutes, I had paint on my ceiling, smudges on the baseboards, and regret written all over my face. That was my lightbulb moment: I should have painted the trim first.
How a Simple Switch in Your Painting Routine Can Save You Time and Headaches
Today, I want to share with you a game-changing approach that I wish I had known from the start: painting the trim before the walls. It might sound counterintuitive at first—after all, isn’t it easier to paint the walls first? But let me tell you, making this shift can drastically cut down on the mess, rework, and stress that often accompany painting projects. Plus, it leads to a cleaner, more professional-looking finish that truly elevates your space.
Is Painting Your Trim First Really Worth the Effort?
Here’s the honest truth: I used to believe that start-to-finish painting was the only way. However, I once made the mistake of painting the walls first and then trying to get those tricky corner trims perfectly. It was a nightmare—paint smudges, accidental overlaps, and constant touch-ups. Once I flipped my process and painted the trim first, everything became smoother. I’ve also learned that preparing your surfaces properly—like cleaning your walls thoroughly before painting—can make a huge difference. If you want to ensure your paint sticks well and lasts longer, I recommend checking out this guide on wall cleaning.
So, if you’re tired of fixing mistakes or dealing with uneven lines, the solution might be simpler than you think. And in the sections ahead, I’ll walk you through the step-by-step process to make your next painting project both easier and more impressive.
Prep Your Workspace and Tools
Before you start, clear the room of furniture or move it to the center and cover with drop cloths. Gather your supplies: painter’s tape, high-quality brushes, a roller, primer if needed, and paint. Proper preparation minimizes mistakes and ensures a cleaner finish.
Protect Surfaces and Edges
Apply painter’s tape along the edges of walls, ceilings, and adjoining surfaces, especially on trim you plan to paint first. Use a straightedge or a fresh blade to ensure crisp lines and prevent bleeding, similar to running a razor along painters tape for razor-sharp corners (see this technique).
Prime and Basecoat the Trim
If your trim is stained, repaired, or has old paint, apply a suitable primer to ensure adhesion. Once dry, use a angled brush for edges and a smaller brush for detailed areas. Think of painting trim as outlining a drawing before filling in with color—this sets a clean boundary for the rest of your work.
Use the Right Brush Technique
Dip your brush about a third into the paint, tap off excess, and apply with smooth, even strokes. Overlap previous strokes slightly, which helps prevent lap marks and creates a uniform surface (power washing tips underscore the importance of a clean, prepared surface for lasting paint). Remember, patience in this step prevents bleeding and uneven edges later.
Carefully Paint the Flat Areas
Switch to a smaller foam or angled brush for corners and edges, while using a roller for flat surfaces. Imagine painting as following a trail—start at the edge, work toward the middle, and maintain consistent pressure. This technique keeps lines sharp and paint even, avoiding drips and streaks. For textured or detailed trim, using a high-quality brush set can make your job easier.
Prevent Smudging and Overlaps
When doing successive coats or reworking spots, feather out the paint edges to blend seamlessly. This prevents visible ridges, especially on larger or intricate trim. Waiting a few hours between coats allows the initial layer to cure, minimizing smudges (drying tips are critical here).
Remove Tape and Final Touch-Ups
Once the paint is dry to the touch, carefully peel off the painter’s tape at a 45-degree angle. If any paint bled under, lightly touch up with a small brush. Picture peeling tape as removing a bandage—slowly and steadily for a clean, professional look. Completing this step immediately prevents peeling or damage to the fresh paint.
Inspect and Perfect Your Work
Stand back and examine your trim from different angles. Use a flashlight if needed to identify uneven spots or thin areas. Fix imperfections quickly with a small brush dipped in your trim paint. The effort you invest here to perfect the edges results in a crisp, polished appearance that makes your entire painting project stand out.
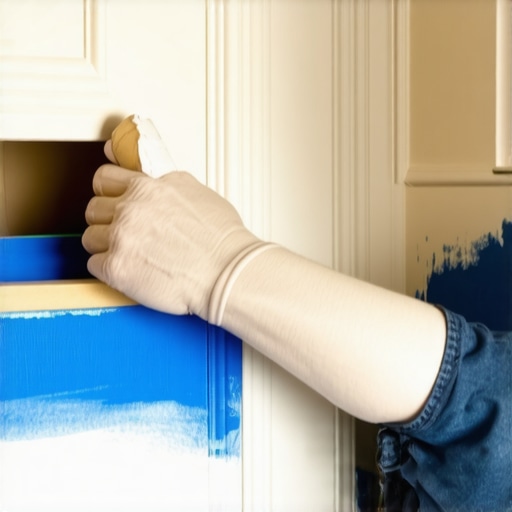 Many homeowners believe that painting is a straightforward DIY task, but even seasoned DIYers often overlook nuanced mistakes that can ruin the entire project. One common misconception is that more paint means better coverage, but applying too thickly can lead to drips, uneven drying, and cracking—issues that experts like those at Elite Painter Pro caution against. In reality, multiple thin coats are more effective and produce a lasting finish, as detailed in their article on proper paint application techniques. Additionally, a prevalent myth is that color matching is simple; however, subtle variations in lighting and surface texture can make matching tricky. Professionals recommend testing samples in the actual room environment before committing.
A frequent oversight is neglecting surface preparation—cleaning and sanding are often skipped to save time, yet these steps are critical for adhesion and durability. Skipping primer or using inferior-grade paint can compromise not just aesthetics but also the longevity of the paint job. For example, poor surface prep may lead to peeling or bubbling, especially in high-moisture areas like kitchens and bathrooms. In such cases, experts suggest thorough wall cleaning using methods outlined at this guide.
One sophisticated mistake many overlook involves understanding drying times and how they influence finish quality. Rushing the process or painting over wet paint can cause lap marks, uneven textures, or dust inclusion that tarnishes your hard work. According to industry specialists, checking the paint’s dryness with a simple touch test and waiting an appropriate period between coats is crucial—see this detailed explanation for more.
Have you ever fallen into this trap? Let me know in the comments. Knowing the hidden nuances allows you to achieve a professional finish and avoid common pitfalls that compromise your home’s appearance and durability.
Keeping It Working: Tools and Maintenance for Lasting Results
Investing in high-quality tools and establishing regular maintenance routines can significantly extend the lifespan and appearance of your paintwork. Personally, I swear by certain equipment that ensures professional results, even when tackling projects in my own or clients’ homes. For example, a UV light is a game-changer for spotting missed spots or uneven coats, especially in poorly lit areas, helping you catch flaws before they dry.
Another crucial tool is a quality brush set. I prefer angled brushes for edges and detail work because they give me better control and reduce paint drips. These brushes save me from rework and give my projects a crisp finish, even on textured surfaces.
For larger surfaces, a quality roller with a long nap helps apply paint evenly and quickly, reducing lap marks and streaks. I recommend choosing a roller cover suited for the surface texture—smooth for drywall, rough for stucco—to optimize coverage and durability.
When it comes to maintenance, regular surface cleaning is vital. A proper cleaning routine prevents dirt, grease, and mildew from degrading the paint over time. Using gentle detergents and soft scrub brushes prevents damage to the finish and keeps the walls looking fresh.
How do I maintain my paint over time?
Long-term maintenance involves periodic inspections to identify signs of wear early. Touch-up small areas with matching paint to prevent deterioration from spreading. Applying a clear protective coating or wax-on, wax-off techniques can also help preserve the finish against scratches, stains, and UV damage, especially for exterior paints. Experts suggest reapplying a topcoat every 5-7 years depending on exposure—as detailed in this article.
Looking ahead, innovations like self-healing paints and advanced UV-resistant coatings promise even more maintenance savings and longer-lasting aesthetics. Staying informed about these emerging technologies allows homeowners and professionals alike to make smarter choices, ensuring investments in painting projects continue to pay off over time.
So, why not give one of these maintenance tips a try? Regularly inspecting your surfaces and using the recommended tools will keep your paint looking freshly applied for years to come. Remember, the key to long-term success is not just the initial job but consistent care afterward.
What I Wish I Knew Before My First Brushstroke
Early in my painting journey, I believed that rushing through the process would save time, but I quickly learned that patience, preparation, and attention to detail are what truly make a difference. The biggest lightbulb moment was realizing that taking the time to properly prep surfaces, choose the right tools, and follow a strategic order—like painting the trim first—can prevent costly mistakes and rework. This insight transformed my approach and elevated the quality of my work.
Tools and Resources That Elevated My Skillset
If I could recommend essentials that changed how I paint, they would be a high-quality angled brush, a reliable roller with appropriate nap length, and painter’s tape with foolproof application techniques. Additionally, books like this guide on brushes and online tutorials on surface preparation have been invaluable. I trust these resources because they combine expert advice with practical, easy-to-follow steps, helping me achieve results that rival professionals.
Creating a Future Where Your Home Looks Perfect
Remember, every paint job is an opportunity to refresh your space and boost your confidence. By applying these insider lessons and continually refining your technique, you’re not just applying paint—you’re transforming your home and honing a craft that can save you money and bring lasting satisfaction. So, why not take the next step today? Your beautifully painted walls are just a brushstroke away — embrace the process and enjoy watching your space come to life.