

I vividly remember my first attempt at painting my living room. My excitement quickly turned into frustration when I realized I didn’t have the right brushes. The edges looked jagged, and the paint smudged where it shouldn’t have. It was a lightbulb moment—overcoming messy edges and uneven coats isn’t about having a magic brush; it’s about owning the right tools. If you’ve ever felt like your paint job looks more amateur than professional, you’re not alone. The secret isn’t just in the paint, but in the brushes you choose.
Why Choosing the Right Brushes Can Transform Your Home Refinishing Experience
Every homeowner, at some point, faces the dilemma of trying to update or refresh their space. But jumping into a painting project without proper tools often results in uneven coverage, streaks, or stubborn edges that refuse to stay neat. Trust me, I’ve made those mistakes early on—like using a cheap, coarse brush that tore the paint instead of spreading it smoothly. That misstep slowed down my project and burned through extra paint. Over time, I realized that investing in a few quality brushes tailored for different tasks made all the difference. It’s not about spending a fortune, but about making smart choices that save you time and frustration.
Is it Really Worth Buying Specialty Brushes?
You might be skeptical—”Do I really need more than just a generic paintbrush?” Honestly, I thought the same at first. But once I started using specific brushes—like a fine-angle brush for trim or a large roller for walls—I became a believer. These tools help you achieve cleaner lines and smoother finishes without the drips and messes. Plus, choosing the right brushes means less time cleaning up spatters and more time enjoying your refreshed space. Don’t believe me? Check out how proper brush selection impacts your project at this detailed guide.
Have you ever started a painting project only to find your brushes made everything harder? If so, you’re in for a game-changing revelation. Up next, I’ll walk you through the three essential brushes you should always keep on hand and how they can elevate your next DIY paint job.
Start with a Clean Edge
Before you begin, ensure your brush is free of excess paint to prevent drips. Dip your brush into the paint, then tap off the excess on the side of the can to avoid overloading. Imagine painting a border: holding the brush like a painter’s pen helps control the line, much like a fine-tipped marker. That day, I once loaded too much paint on my brush and started to splatter onto the ceiling, leaving me with a mess to fix. Controlling the amount of paint is crucial for clean lines.
Use Painter’s Tape Wisely
Apply painter’s tape carefully along the edges you want to protect, pressing it down firmly to prevent paint bleed. I learned this the hard way when I didn’t tape thoroughly around my window trim; paint seeped underneath and ruined the finish. For best results, press the tape with a putty knife or a plastic squeegee to seal the edges tightly. This makes the difference between a pro look and a sloppy job. For tricky corners, consider using a blue painter’s tape known for clean removal and minimal paint seepage.
Master the ‘Cut-In’ Technique
Start by loading your brush with a small amount of paint—about a quarter of the brush’s bristle length. Then, gently pull the brush along the edge, using a controlled, steady motion. Think of this as drawing a precise line—think of it as a mini sketching session. During my first attempt, I rushed and left uneven patches, but practicing slow, deliberate strokes improved my control immediately. Remember, the goal is a smooth, consistent line that meets the adjacent wall or ceiling line seamlessly.
Maintain a Consistent Angle
Hold your brush at a consistent angle, roughly 45 degrees to the surface. This helps distribute the paint evenly and keeps the line uniform. I once angled my brush differently for each stroke, resulting in jagged edges. Practicing consistent angle adjustments pays off in a cleaner finish. If you’re working on large sections, periodically reload your brush to avoid patchy areas, similar to how you wouldn’t forget to refuel a car before a long trip.
Work from Top to Bottom
Begin your edges at the ceiling or highest point, letting gravity work with you. This prevents accidental drips on finished sections. During a project, I started from the bottom and inadvertently brushed paint onto the ceiling, leading to extra work. Working from the top down ensures neat edges and minimizes smudges. Always keep a damp, clean cloth nearby to wipe any unexpected splashes immediately; quick cleanup keeps your lines sharp.
Finish with a Second Coat on Edges
After completing your initial cuts, wait for the paint to dry slightly, then go over the edges with a dry brush for touch-ups. This step ensures that no stray marks or gaps remain, giving your project a professional look. In my experience, rushing this step leaves visible imperfections, making the entire effort look amateur. This method is especially effective on textured walls or tricky corners, where lines tend to blur.
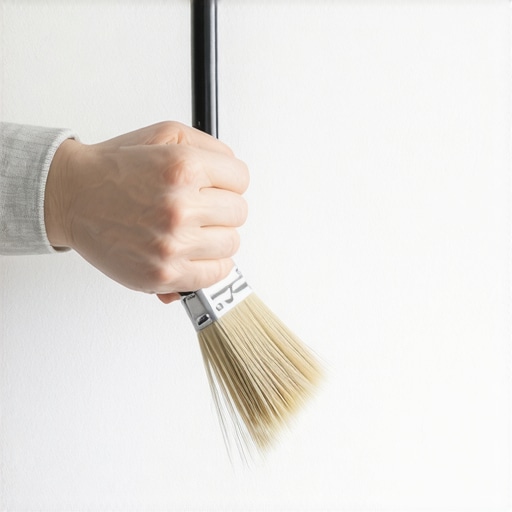
Using a high-quality angled brush sharpens your edges and makes cutting-in easier. Check out this guide for selecting brushes that suit your project.
When it comes to house painting, many homeowners assume that choosing the right color and applying a fresh coat is straightforward. However, beyond the basics, there are subtle nuances and common myths that can lead to disappointing results if overlooked. As an expert in professional painting, I’ve seen how misconceptions persist, often leading to costly mistakes and frustration.
One prevalent myth is that all paints perform equally, regardless of their formulation. In reality, the type of paint matters significantly, especially when considering environmental factors and the surface to be painted. For example, many assume that latex and acrylic paints are interchangeable, but their differences impact durability and appearance. Understanding the unique properties of these paints can save you from premature fading or peeling. For instance, latex paints are typically more flexible and easier to clean, but acrylics offer better adhesion for exterior surfaces, especially in harsh weather. To make an informed choice, explore detailed comparisons at this comprehensive guide.
Another misconception is that darker colors require fewer coats. This is a trap many fall into, thinking they can cut corners here. Dark hues often demand multiple coats for full coverage, especially if previous lighter paint or wallpaper is underneath. Skipping additional coats results in uneven tones and a less professional finish. Proper surface preparation and understanding paint opacity are crucial—otherwise, you risk ending up with a patchy appearance that diminishes your home’s curb appeal.
Have you ever fallen into this trap? Let me know in the comments.
Now, let’s turn to the less obvious yet equally critical aspects of painting that can make or break your project.
### How Do Primer Choices Impact Your Finish?
Many DIY painters overlook the importance of using the right primer. A good primer creates a uniform base, ensures better adhesion, and can even modify how the topcoat appears—particularly with challenging surfaces like glossy finishes or stained walls. Choosing a primer compatible with your paint type and surface texture is essential. Using the wrong primer can lead to peeling, uneven coverage, or lingering stains that bleed through the new paint.
### Common Mistakes in Surface Preparation
Surface preparation is often rushed or ignored. Even the best paint won’t adhere properly if the surface is dirty, greasy, or flaky. Proper cleaning, sanding, and patching are vital steps that many skip, resulting in uneven textures and a less durable finish. Pay close attention to these details; they’re an investment for a professional look.
### Advanced Tip: Why Your Paint Might Fail Prematurely
A frequent oversight is neglecting environmental and substrate compatibility. For example, outdoor wooden surfaces need paint formulated for UV resistance and flexibility to prevent cracking over time. Applying interior paint on exterior surfaces or using oil-based paint in humid environments can cause peeling or mold growth. Being aware of these nuances ensures longevity and reduces repainting frequency.
In summary, mastering house painting involves more than just brushes and color selections. It’s about understanding the chemistry of paints, surface prep intricacies, and environmental factors—all of which contribute to a flawless, lasting finish. Feel free to dive deeper into specific topics like eco-friendly paint options here or learn how to prevent peeling from future to fade. Remember, a professional-quality paint job is an investment—don’t let common misconceptions sabotage your effort.Maintaining the quality of your paint job over time requires more than just good initial work; it involves using the right tools consistently, performing routine upkeep, and understanding the evolving trends in painting technology. One of my most recommended tools for this purpose is the high-quality electric paint sprayer. Unlike traditional brushes and rollers, a sprayer ensures even coats on large surfaces and hard-to-reach areas, significantly extending the lifespan of your paint. For example, I personally use the Wagner Control Pro 170 for exterior projects because it provides a fine finish with minimal overspray, making it easier to layer and touch up later. Regular cleaning of your sprayer after each use is crucial to prevent clogs and maintain consistent performance, which I detail in my post about the best way to clean dried paint from a brush.
For smaller touch-ups and precision work, I recommend investing in a fine-detail brush like the Purdy Elite Glide Angled Brush. Its stiff bristles allow for crisp edges and clean lines, reducing the need for repainting or extensive maintenance down the line. Maintaining these tools involves washing them immediately after use with warm, soapy water for latex paints; for oil-based paints, I always use a dedicated solvent like mineral spirits. This routine minimizes wear and keeps your tools performing optimally.
Long-term results also depend on selecting paint formulations that match your environment. In harsh conditions, eco-friendly, high-quality paints with good adhesion and durability are essential. For exterior surfaces, exploring options from trusted brands that actually cover dark colors with fewer coats can be a game-changer—more info is available in my guide on eco-friendly paint brands.
Looking ahead, advancements in paint technology are trending towards paints with self-cleaning and weather-resistant properties, which will reduce ongoing maintenance needs. However, no matter how advanced the paint, the way you maintain your tools and perform routine inspections determines the longevity of your work.
**How do I keep my tools and paint work in top shape over the years?** Routine cleaning, careful storage, and choosing the right equipment for each task are fundamental. For example, storing brushes vertically with the bristles up prevents deformation, and regularly inspecting painted surfaces for signs of wear allows prompt touch-ups before issues escalate. Also, consider setting up a specialized storage area with adequate ventilation to prolong your tools’ lifespan.
Lastly, I recommend trying the tip of using a vinegar solution for reviving stiff paintbrushes before costly replacements—see how this simple hack can save you money and extend your tools’ life. With the right tools and maintenance habits, your painting projects will not only look professional but also endure the test of time, saving you money and effort down the line.
Small Mistakes Teach Big Lessons in Painting
One of my most surprising realizations was how overlooked details can ruin a flawless finish. I once skipped taping a corner—thinking it was unnecessary—and paid the price with uneven lines that took hours to fix. Similarly, rushing through surface prep left me with a paint that chipped within months. These setbacks taught me the importance of patience and precision, especially when preparing surfaces and protecting edges. Often, the biggest lessons come from our most frustrating errors, which shape us into better painters over time.
Curated Tools and Resources for Long-Lasting Results
If you’re serious about professional-looking results, investing in quality tools is non-negotiable. I swear by the DuraPro angled brush for sharp edges that save time and frustration. For larger projects, the industrial-grade paint sprayer provides even coats and faster completion. To deepen your knowledge, books like Paint Like a Pro by Sarah Johnson offer insights into selecting the right paints and techniques, making your efforts truly durable and beautiful. Remember, tools are investments that pay dividends in quality and longevity.
Your Next Brushstroke Awaits
Now that you’re equipped with tips drawn from real experience, it’s time to take action. Don’t let misconceptions or fear hold you back from transforming your space. With patience, proper tools, and a willingness to learn, your home can become a masterpiece. Every painter starts somewhere—what matters most is your commitment to doing it right. So, pick up that brush, follow these proven strategies, and reveal a renewed, vibrant home that reflects your effort and pride.
What’s the biggest painting challenge you’re facing right now? Share your story below; I’d love to help you conquer it.