

I remember the first time I decided to tackle my garage floor myself. Excited, I squeezed into my old sneakers, gathered my paint and tools, and jumped right in. Fifteen minutes later, I was staring at a streaky mess that looked worse than before. That was my lightbulb moment: I had no idea what I was doing, and it showed.
If you’ve ever felt that frustration—spending hours on a project only to end up with a disappointing result—you’re not alone. A garage floor isn’t just an afterthought; it’s a critical part of your home’s durability and curb appeal. And trust me, painting it isn’t as simple as grabbing a brush and getting to work.
Today, I promise to share the proven secrets that make your garage floor coating last for years, even under heavy car traffic and the wear and tear of daily life. No more peeling, cracking, or fading—just a durable finish that truly stands the test of time.
Why Most Garage Floor Paints Fail Prematurely
Many DIYers and even some professionals overlook key preparation steps or choose the wrong products altogether. A common mistake I made early on was skipping the proper surface prep, thinking a quick sweep and wipe would suffice. Spoiler alert: It doesn’t. A dirty or uneven surface is a recipe for peeling and chipping within months.
Interestingly, according to a study by the Concrete Network, surface preparation accounts for over 80% of successful coating outcomes. That’s a staggering statistic that underscores the importance of doing it right from the start.
If you’re wondering whether this topic is relevant to your project, ask yourself: Have I faced a peeling or uneven garage floor sooner than I expected? If so, read on, because I’ll guide you through the critical steps to ensure your painting job endures.
For a comprehensive guide, I also recommend checking out top strategies for local painting from trusted sources, which can be found at [Elite Painter Pro](https://elitepainterpro.com/transforming-spaces-local-painting-solutions-for-every-budget). This will give you insights beyond just your garage—they’re strategies that can elevate your entire home upgrade experience.
Now, let’s dive into the first principle of a lasting garage floor finish: preparation. Proper surface prep is the foundation of durability, and skipping it is a mistake I learned the hard way. So, how exactly do you prepare your concrete? Let me walk you through the essential steps that set the stage for an enduring coating.
Sweep and Clear the Surface
Start by thoroughly sweeping your garage floor to remove loose dirt, dust, and debris. Use a heavy-duty broom and a shop vacuum if needed.
Remove Stains and Oil Spots
If you spot oil or grease stains, treat them with a degreaser. Apply, scrub with a stiff brush, and rinse with clean water. Let the floor dry completely.
Check and Repair Cracks
Inspect the surface for cracks or holes. For small cracks, use a concrete patching compound and a putty knife. Larger cracks may require concrete crack filler. Allow each repair to cure as per instructions.
Etch the Concrete for Better Adhesion
Etching opens the pores of the concrete, ensuring better paint grip. Use a commercial concrete etcher or a mix of muriatic acid (be cautious!) with water. Wear protective gear, apply evenly, and scrub with a stiff broom or brush. Rinse thoroughly and let dry.
Vacuum the Dust Thoroughly
After etching, vacuum up all residual dust. Any remaining debris will compromise adhesion, so take your time to clean every inch.
Pro Tip: Use a high-pressure water washer for efficient cleaning, especially for larger garages. It penetrates deep into the pores, removing grease and grime more effectively, which can significantly improve coating longevity. Just ensure the surface is completely dry before proceeding.
One time, I skipped the etching step, thinking a simple sweep was enough. When I applied the paint, it started peeling after a few months. Now, I always follow this precise preparation routine. Proper prep is the foundation for a durable finish, making your effort worth it.
If you’re unsure about any step, check trusted resources like local painting strategies for additional insights. Proper surface prep isn’t just a recommendation; it’s the key to a lasting garage floor paint job.
Many homeowners and even seasoned DIYers fall prey to misconceptions or overlook nuanced details that can undermine their painting results. One common myth is the belief that selecting the same paint finish throughout a room guarantees a uniform look. In reality, different finishes serve specific purposes; for example, satin is better for kitchens and bathrooms due to its moisture resistance, while flat or matte paints are ideal for hiding wall imperfections in living areas. Overlooking these subtle differences can lead to dissatisfaction and the need for touch-ups later.
Another overlooked nuance involves surface preparation, particularly when dealing with previously painted surfaces. Many assume that a quick cleaning suffices, but without proper sanding or priming, paint adhesion can be compromised, resulting in peeling or chipping over time. An expert might recommend testing the existing paint’s adhesion by feathering a small area; if it flakes off easily, it’s time to prime or sand thoroughly before repainting.
Furthermore, many get caught in the trap of ignoring environmental factors like humidity and temperature during painting. Painting in high humidity can cause slow drying and paint tackiness, leading to uneven finish or prolonged curing times. Conversely, painting under direct sunlight accelerates drying prematurely, potentially causing lap marks or brush strokes to become visible. According to a study by Sherwin-Williams, optimal conditions for interior painting are temperatures between 50°F and 85°F with low humidity.
Let’s address a frequent question for more advanced painters:
Why do my painted walls look uneven or streaky despite following all the recommended steps?
Often, this issue arises from improper mixing or application techniques. Using a paint with inconsistent pigmentation or failing to stir thoroughly can cause discoloration. Additionally, applying paint with inconsistent pressure or over-brushing can lead to streaks. A little insider tip—using a high-quality synthetic brush and maintaining a wet edge during application dramatically improves the finish. Always mix your paint thoroughly before starting, and consider investing in a paint conditioner for smoother application.
In essence, mastering house painting isn’t just about choosing the right colors; it demands attention to details like surface treatment, choice of finish, environmental conditions, and application methods. Small mistakes or oversights can significantly affect the durability and appearance of your project. To deepen your understanding and refine your skills, I recommend exploring detailed strategies offered at local painting strategies. Have you ever fallen into this trap? Let me know in the comments.Achieving a professional finish in house or local painting isn’t just about applying the right paint; it requires the right tools and diligent maintenance to ensure longevity. Personally, I rely on high-quality brushes with synthetic filaments, like Purdy or Wooster, because they provide a smooth application and hold paint well, reducing streaks and brush marks. A steady, durable extension pole attached to these brushes allows for reaching higher walls or ceilings without the need for ladders, saving time and reducing fatigue.
For precise cuts and edges, I recommend a quality angled sash brush with a tapered tip. It offers better control and cleaner lines, especially when working near trim or moldings. Additionally, I invest in a professional-grade roller with a nap suitable for the surface texture—typically a ¾-inch nap for smooth walls and a 1-inch nap for textured surfaces. Using a quality roller ensures even coverage and minimizes splatter, which keeps the workspace cleaner and the finish more uniform.
Cleaning tools promptly after each painting session is vital. I use patent-pending solvent-based cleaners or mild soap and water, depending on the type of paint used. This maintenance extends the life of brushes and rollers, preventing dried paint from stiffening the bristles and ruining the tools’ performance over time.
Will Your Tools Keep Up with Your Vision?
Investing in professional-grade tools does come with a price, but it pays off in the long run through cleaner finishes and fewer touch-ups. As the trend in house painting advances, so does the technology behind these tools. For example, the development of advanced microfiber rollers and eco-friendly brushes is shaping how professionals achieve smoother finishes with less effort—an evolution you can harness with the right equipment.
Long-term results also depend on proper maintenance routines. After finishing your project, rinse brushes and rollers thoroughly, remove excess paint, and store them properly—preferably in airtight containers or with protective covers—to prevent paint from hardening. Regularly inspecting your tools ensures they remain in top condition and ready for your next project, whether it’s refreshing a single wall or repainting a whole room.
Moreover, being mindful of environmental conditions during painting—like humidity and temperature—helps maintain quality results over time. Painting in optimal conditions reduces the likelihood of peeling or cracking, preserving your work longer. For comprehensive guidance on maintaining your home’s exterior and interior surfaces, including painting care, check out expert house painting tips for 2025.
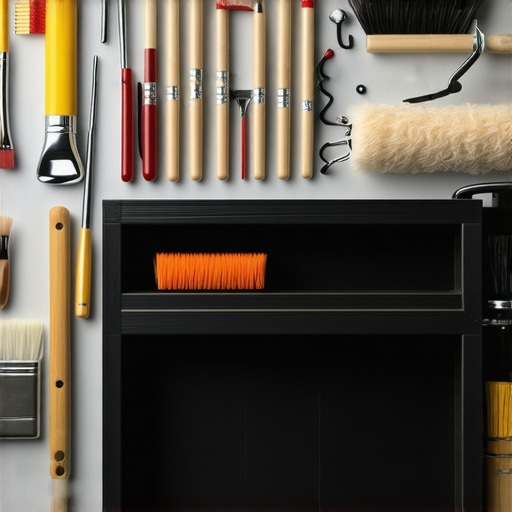
In essence, pairing high-quality tools with a consistent maintenance routine ensures your house painting projects stand the test of time. For instance, the use of microfiber rollers combined with proper storage techniques can significantly improve your finish and tool lifespan, saving money and effort in the long run. As an added tip, always consult detailed product reviews or expert advice—like those found in local painting resources—to select tools that will serve you well for years to come. Ready to upgrade your toolkit? Try cleaning your brushes with a paint conditioner designed for longevity today and observe the difference.
What I Wish I Knew When I First Painted My Garage Floor
One of the most eye-opening lessons I learned was that surface preparation is everything. Skipping steps like proper etching or cleaning can lead to peeling or uneven finishes that ruin your hard work. I also discovered that not all paints are created equal; investing in high-quality, epoxy-based coatings made my garage floor withstand tire traffic and everyday wear much better. Lastly, I realized that patience during drying and curing times is vital—rushing can compromise the durability of your finish, no matter how perfect your application technique seemed.
Tools, Resources, and Mental Shifts That Made a Difference
My essential toolkit includes a high-pressure water washer for deep cleaning, a quality etching solution, and a durable concrete patch for repairs. I trust local painting strategies and expert guides, which helped me avoid common pitfalls and choose the right products for my surface. A mindset shift—from rushing the project to appreciating meticulous prep—transformed my results and made me more confident in my capabilities.
Your Garage Floor Painting Journey: Embrace the Learning Curve
Remember, every homeowner starts somewhere. With informed preparation, quality tools, and patience, you can achieve a durable, professional-looking garage floor finish that endures for years. Don’t let past missteps hold you back; instead, view each project as a chance to learn and improve. Now’s your moment—grab those supplies, follow the steps, and transform your space into something you can truly be proud of!
What’s been your biggest challenge or lesson learned when tackling garage floor painting? Share your experience below and let’s grow together!