

Ever had that sinking feeling when you peel off painter’s tape and see your hard work marred by torn edges or smudges? I can’t tell you how many times I’ve faced this frustrating scenario. One moment, everything looks pristine; the next, a tiny tear or lift ruins the entire corner of my freshly painted wall. It’s a small detail, but it can make or break the professional look you’re aiming for.
The Lightbulb Moment That Changed My Painting Game
It was during my second house painting project that I finally cracked the code. I had meticulously taped off a room, ready for that perfect, clean line. But as I slowly peeled back the tape, my heart sank—ripped paint, frayed edges, streaks. Sound familiar? That’s when I realized I was missing a crucial step: how I removed the tape itself. Since then, I’ve experimented, researched, and refined my technique, saving myself both time and costly touch-ups.
Today, I promise to share with you my tried-and-true methods for removing masking tape without damaging your delicate, fresh paint. Whether you’re tackling a small accent wall or a full-room transformation, these tips will help you achieve crisp lines and pristine edges—no tears, no tricks.
Will This Method Really Make a Difference?
At first, I was skeptical. Could a simple peel really prevent my paint from tearing? But after a few attempts and some mistakes (never peel tape too early or too late!), I saw real results. I also learned that rushing or using the wrong type of tape can cause damage. For instance, skipping the step of pressing the tape firmly or not removing it at the right time can lead to peeling paint or smudging.
Early on, I made the mistake of pulling tape at a 90-degree angle—trust me, it’s a no-go. Instead, gentle, slow peeling at a 45-degree angle is your best friend. Want more tips? Check out how to make your painting last longer by avoiding common pitfalls like skipping the second coat or not cleaning surfaces properly (learn more here).
Now, let’s move beyond the frustration and get you the flawless finish you deserve. Ready to become a tape-removing pro? Let’s dive into the details that will transform your painting experience from nerve-wracking to smooth sailing.
Timing Is Everything When Removing Masking Tape
The first critical step is timing. I’ve learned from messy experience that removing painter’s tape too early causes smudges, while waiting too long risks the tape bonding firmly and tearing the fresh paint. Aim to peel the tape when the paint is dry to the touch but not fully cured—usually after about an hour for latex paints in warm conditions. Once, I impatiently removed tape after just 30 minutes and ended up with jagged edges that looked worse than the previous state. To avoid this, set a timer and remember, patience saves you from rework.
Peel the Tape at the Right Angle for a Clean Finish
Angling your peel is like slicing through cake smoothly. I now always peel at about a 45-degree angle, pulling gently and steadily away from the surface. I once rushed this step, pulling the tape straight up, which caused the paint to lift. Using this technique reduces stress on the paint edge, resulting in crisp lines. When I approached this method with care, I noticed my edges became noticeably sharper, and touch-ups diminished significantly.
Use a Utility Knife for Fine Detailing
If there’s resistance or slight fraying, a light run with a sharp utility knife along the tape edge helps separate any small adhesion points. I gently score along the boundary—think of it as snipping hair—without pressing too hard, to prevent paint from pulling up. This extra step ensures the tape releases cleanly, especially on textured or uneven surfaces. Remember, a steady hand with a sharp blade makes all the difference; I keep one nearby during peel-off for quick fixes.
Warm Water or Solvent Boosts Adhesive Removal
If the tape stubbornly sticks or starts to peel paint, dampening it with a cloth dipped in warm water or a mild solvent like mineral spirits can loosen the glue. I once faced a wall where tape refused to budge, risking damage. Gently applying warm water and letting it sit for a minute softened the adhesive, letting me peel effortlessly without ripping paint. Always test a small area first to avoid any possible damage—this extra effort pays off with pristine edges.
Final Checks and Touch-Ups
After peeling, inspect your edges. If any paint has lifted or smeared, lightly feather the area with a brush, blending the boundary. To prevent future issues, consider learning how to make your painting last longer by avoiding common pitfalls like skipping the second coat (more here). As I discovered through trial, patience and meticulous technique turn a good paint job into a professional-looking finish, saving money and time on fixes later.
Many homeowners and even some DIY enthusiasts are under the false impression that selecting the right paint color and brush is enough for a flawless finish. But in my experience, there’s a nuanced realm of details that many overlook—details that can make or break the durability and appearance of your paint job. One common misconception is the idea that all paints are created equal, which couldn’t be further from the truth. High-quality paint, like the ones discussed in this guide, can significantly enhance your project’s longevity, especially in high-traffic areas. However, even the best paint won’t save a poorly prepared surface or improper application techniques.
Another subtle mistake is assuming that surface preparation is a tedious, unnecessary step. Skipping or rushing through priming, cleaning, or sanding can cause paint to peel, chalk, or even fail prematurely, as detailed in this article. It’s tempting to cut corners, but such shortcuts often lead to bigger headaches and expenses down the line.
What About Full Coverage? Misconceptions on Applying Multiple Coats
Many think that applying a single coat of paint is enough, especially with premium brands. Yet, the science behind paint film formation shows that multiple coats—properly applied—are essential for durability and true color depth. Skipping the recommended second coat can result in uneven texture, reduced coverage, and increased susceptibility to moisture and wear. As explained in this detailed post, thorough layering builds a resilient and aesthetically pleasing finish.
Furthermore, many underestimate the importance of environmental conditions during painting. Incorrect humidity or temperature can impede proper curing, leading to issues like blistering or cracking. For instance, painting in high humidity without adequate drying time can trap moisture beneath the coat, causing future problems. Consult this article to understand how to judge your surface readiness before painting.
Let me ask you—have you ever fallen into this trap of assuming that surface prep and proper layering are optional? It’s a common pitfall that can be easily avoided with a little extra patience and knowledge. Share your experiences in the comments below, and let’s keep the conversation going. Remember, the devil is in the details, and mastering these nuances will elevate your home’s appearance and longevity.
For more on advanced painting techniques and avoiding common errors, check out tips on selecting the right tools from this post or learning about proper surface testing with the chalk test. Staying informed and attentive to these details can make all the difference between a paint disaster and a professional-looking finish.
Keeping It Working: Essential Tools for Durable House Painting
Achieving a professional-looking and long-lasting paint job isn’t just about technique; the right tools play a crucial role in maintaining quality over time. From surface preparation to cleanup, investing in quality equipment ensures your work remains pristine and reduces future touch-ups. One staple I rely on is a high-quality angled sash brush from this guide. I prefer brushes with synthetic filaments because they hold paint evenly and clean up effortlessly, making detail work and trim painting durable and tidy. Additionally, a variable-speed roller allows me to adapt pressure, especially when working on textured surfaces or uneven walls, preventing uneven coating and ensuring longevity. For larger surfaces, I highly recommend a pressure-driven paint sprayer. It offers precision, faster coverage, and a spray pattern that minimizes drips—vital for projects where durability is a priority.
Maintaining these tools is equally critical. Regularly cleaning brushes and rollers with warm water and mild detergent prevents residual paint from hardening, preserving their shape and performance. For sprayers, flushing with appropriate solvents ensures no clogs or dried paint hinder future uses. Using proper storage solutions, like a five-gallon bucket with a lid or an airtight container, keeps leftover paint in optimal condition, preventing separation or spoilage, which can compromise the finish in future touch-ups. <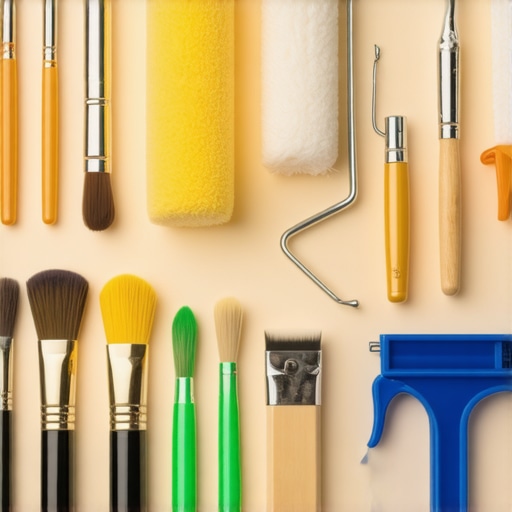 >
>
Long-Term Results: How to Preserve Your Paintwork
Beyond tools, understanding how to care for your painted surfaces extends their lifespan. Regular cleaning with a soft sponge and mild soap keeps dirt and grime from degrading the paint’s outer layer. An overlooked technique is inspecting your walls periodically for signs of wear, such as cracks or peeling, and addressing them early. For instance, if you notice small cracks developing, applying a touch-up with matching paint and a light sanding can prevent further damage. Preservation also involves avoiding harsh chemicals and scrubbing tools that can damage the finish; instead, opt for gentle cleaners and sponges.
Scaling Up: Preparing for Larger Projects
When your projects grow in scope, organization and planning become pivotal. I recommend two software tools—paint calculators and project management apps—that streamline estimating material needs and scheduling. These tools help prevent costly overordering or underestimating timelines, reducing stress and ensuring consistent quality. As trends forecast a rise in environmentally conscious painting, integrating eco-friendly tools and water-based paints not only benefits the environment but also enhances surface longevity, as detailed in industry reports. Anticipate that future painting methods will lean towards smart paints with self-healing properties and moisture regulation, making maintenance even easier in the long run.
How do I maintain my tools and paint jobs over time?
To keep your tools performing at their best and your paintwork intact, regular maintenance is key. Clean brushes and rollers immediately after use, store them properly, and replace worn-out equipment promptly. For your painted surfaces, routine inspections for peeling or cracking and timely touch-ups extend the life of your paint. Additionally, protecting walls from excessive moisture and direct sunlight reduces the risk of paint deterioration. Implement these practices, and you’ll maximize your investment, ensuring your home stays beautiful with minimal upkeep. For more advanced tips, try using a hairdryer technique when removing painter’s tape—it softens adhesive residues and prevents peelage, especially on delicate paints. Remember, consistent care today guarantees stunning results tomorrow.
What My Testing Taught Me About Flawless Edges
One of the most valuable lessons I learned was the importance of patience and timing when removing painter’s tape. Rushing this step often led to tears and smudges, but waiting until the paint was dry to the touch, usually around an hour, made a world of difference. I realized that quick decisions or impatience can undo hours of careful work, so I now always set a timer and trust the process.
How I Discovered the Power of Gentle Peeling
Peeling at a 45-degree angle became my new standard after experiencing jagged edges from pulling straight up. This gentle approach reduces stress on the paint edges and creates crisp, professional lines. The first time I tried it, I was amazed at how smoothly the tape came off, and it’s now a step I recommend to anyone aiming for perfect borders.
The Utility Knife Moment That Saved My Paint Job
Getting resistance while peeling led me to use a utility knife along the tape edge. Scoring lightly helps release stubborn adhesion points without damaging the surface. This small tweak minimized touch-ups and kept my paint looking fresh and sharp, especially on textured walls where tape tends to stick harder.
Unexpected Benefits of Warm Water and Solvent Tricks
When tape refused to budge or started lifting paint, applying warm water or a mild solvent like mineral spirits softened the adhesive. This trick prevented accidental paint tears and saved me from re-painting entire sections. Always testing first is key, but this added step greatly improved my results and confidence in tape removal.
Realizations About Surface Prep and Layering
Beyond tape techniques, I learned that skipping surface prep or rushing coats undermines long-term durability. Proper priming, cleaning, and applying multiple coats in the right environment significantly extend the life of your paint job. Taking these extra steps might seem tedious, but the payoff is visible in the finish’s vibrancy and resilience, as discussed in these insights.
Choosing Tools That Endure Over Time
Investing in high-quality brushes, rollers, and sprayers has transformed my work. From synthetic brushes that hold paint evenly to sprayers that prevent drips, the right tools make tedious jobs easier and results longer-lasting. Regular cleaning and proper storage preserve their performance, saving money and effort in the long run.
Preserving Your Artistic Effort for Years
Simple maintenance like gentle cleaning, inspecting for cracks, and quick touch-ups can preserve your walls for years. Protecting from excess moisture and sunlight prevents early deterioration, while periodic gentle cleaning keeps surfaces looking fresh. These habits, combined with the right paint products, ensure your investment stands the test of time, as detailed in this article.
Transforming Larger Projects into Achievable Goals
When scaling up, using tools like paint calculators or project management apps helps maintain control and quality. Planning ahead means fewer surprises and a more streamlined process. Embracing eco-friendly paints and upcoming innovations like self-healing coatings will further simplify maintenance and extend durability. Keeping organized and informed makes even the biggest projects manageable.
My Biggest Pitfalls and How You Can Dodge Them
Avoid rushing surface prep or applying only one coat; these shortcuts often lead to quicker deterioration. Instead, emphasize proper priming, environmental considerations, and following recommended coat layers. Recognizing signs of inexperience early allows for corrective actions, saving time and money. Always remember that meticulous attention to detail today yields stunning, lasting results tomorrow.
Those Little Secrets That Make a Difference
Small, deliberate steps—like testing your paint adhesion with a simple rub test—can prevent major issues later. Knowing when and how to properly warm up surfaces, clean tools, and select finishing options turns a good paint job into a durable masterpiece. Embracing these nuances elevates your skills from DIY to craftsperson.
Push Forward and Get Inspired
Achieving professional-quality house painting is within your reach. With patience, the right tools, and attention to detail, you can create stunning spaces that last. Embrace each project as a learning experience, and don’t be afraid to try new techniques or tackle bigger challenges. Progress might be slow at first, but each step brings you closer to mastery—your future walls will thank you.
What’s one painting tip you wish you’d learned earlier? Drop your thoughts below and let’s grow together in this colorful journey!