

I remember the first time I rushed into painting a stucco house without checking if the surface was ready. I was eager to finish, brush in hand, only to realize days later that the paint was peeling like dandruff on a winter sweater. That lightbulb moment taught me a hard lesson: never skip the Chalk Test. It’s an overlooked step that can make or break your entire project.
Proper surface prep is the foundation of a lasting paint job, especially on textured surfaces like stucco. If you paint before your stucco is completely dry and properly cured, you’re setting yourself up for peeling, bubbling, and even costly redo work. Today, I’ll share my journey from trial and error to mastering the art of recognizing when stucco is truly ready for paint—saving you time, money, and frustration.
Why Testing Your Stucco’s Readiness Is a Game Changer
Before I dive into the step-by-step Chalk Test, a quick confession: I once ignored this crucial step, only to watch my freshly painted stucco turn chalky within weeks. The mistake? I thought the surface was dry enough, but the moisture was still lurking inside. This mishap reminded me that the key to a durable finish lies in understanding moisture levels and surface texture.
The importance of proper moisture testing isn’t just anecdotal; experts have shown that moisture content significantly impacts paint adhesion and longevity. For example, PaintSquare notes that moisture levels above 15% can cause paint failure, especially in porous materials like stucco. That’s why the Chalk Test is my go-to method—it’s simple, effective, and doesn’t require fancy equipment.
Are you tired of peeling paint and wasted supplies? If so, understanding how to accurately assess when your stucco is ready for a fresh coat can transform your project from a flop to a flawless finish. Now, let’s get into how you can perform this crucial test yourself—step by step, in my own tried-and-true way.
Performing the Chalk Test Precisely
Start by selecting a small, inconspicuous area on your stucco surface. Dampen a piece of chalk with water—think of it as preparing a tiny paintbrush that reveals moisture levels. Press the chalk firmly against the surface for about 30 seconds, then lift it away gently.
Observe the chalk. If it leaves a clear mark without powdery residue, your stucco is dry enough to paint. If you notice a dusty, chalk-like deposit or the chalk has crumbled, it indicates excess moisture inside the surface. In that case, wait and repeat the test in a few hours or days, depending on weather conditions.
Timing and Repetition Matter
I learned this the hard way during a project where I skipped the multiple tests—resulting in peeling paint just weeks later. To avoid this, I recommend performing the chalk test in multiple spots, especially in shaded or shaded areas where drying may lag. Repeating the test over several days ensures that moisture levels have stabilized.
What to Do if Your Stucco Isn’t Ready yet
If the test shows high moisture, give the stucco more time. Improve drying by increasing ventilation or using fans, especially in areas with high humidity. Avoid painting during or immediately after rain, as this can trap moisture inside. Remember, patience now saves time and money later.
Applying the Test to Different Areas
Different zones of your house may dry at different rates. For example, shaded corners or north-facing walls typically retain moisture longer. Personally, I once applied a quick chalk test on my shaded porch and found it wasn’t ready—leading me to delay my project by a couple of days. That decision prevented peeling issues and prolonged the lifespan of my paint job.
Integrate the Test into Your Painting Routine
Make the chalk test a regular part of your prep process, especially when tackling textured surfaces like stucco that trap moisture. Combine this with a visual inspection for cracks or dampness, and you’ll greatly improve adhesion. Remember, even a tiny moisture pocket can cause peeling or bubbling, so don’t rush the drying process.
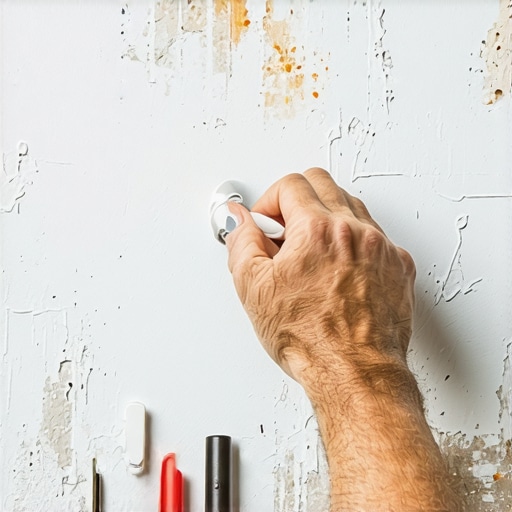
Visual guide to performing the chalk test on stucco walls, highlighting proper chalk application and interpretation of results.
Many homeowners and DIY enthusiasts believe that brushing a few coats of paint and calling it a day guarantees a long-lasting finish. However, even seasoned painters often overlook critical nuances that can make or break their project. A common myth is that prep work is only necessary for visible surfaces, but in reality, neglecting detailed surface preparation—like properly cleaning and removing existing coatings—can lead to peeling and bubbling down the line. For instance, applying water-based paint over oil-finished doors without proper adhesion primer can cause the paint to peel prematurely; check out how to properly prep an oil-finished door for water-based paint for expert tips.
Another pervasive misconception is that lighter colors always require fewer coats. In truth, pigmentation, underlying wall color, and even lighting conditions influence coverage more than simple color choice. Giving extra attention to primer quality and applying multiple thin coats—rather than thick, uneven layers—ensures durability and a smooth finish.
One advanced mistake many overlook involves moisture testing. While most know the importance of checking surface dryness, few consider compatibility issues between different materials. For example, painting over areas with hidden rot or water damage can exacerbate the problem, leading to structural decay. Regularly inspecting for signs of rot or moisture infiltration—like using a flashlight or moisture meter—can prevent costly repairs later. Read more about why your exterior trim is rotting underneath the new paint.
Are you aware of the right timing for painting in different weather conditions? High humidity and low temperatures slow the drying process, creating an environment conducive to mold growth and paint failure. Waiting for optimal weather conditions and understanding the humidity rule for exterior painting is key—don’t fall into the trap of rushing the job and paying the price afterward.
Even experienced painters can fall prey to the trap of inconsistent surface texture and color mismatch. Advanced techniques, such as blending new paint with existing walls and understanding color fading over time, help achieve seamless results. This requires meticulous color matching and sometimes, a special primer to prevent bleed-through.
Have you ever fallen into this trap? Let me know in the comments.
Remember, mastering these hidden nuances elevates a basic painting project into a professional-quality finish. Investing time in proper surface prep, moisture testing, and technique can greatly enhance the longevity of your work. To avoid common pitfalls in household painting, check out detailed guides on the simple reason your wallpaper peels at the top corners or how to paint over stubborn stains effectively.When it comes to achieving a professional-looking, durable finish in house painting, having the right tools and knowing how to maintain them is crucial. My experience has taught me that investing in quality equipment not only improves results but also saves money and time in the long run. For instance, I personally swear by high-quality brushes and rollers, which I clean meticulously after each project. Using a specialized paint-specific cleaner ensures brushes stay in excellent condition, preventing bristle loss and contamination of color. Additionally, I recommend storing brushes in a tight-sealing bucket with a small amount of water or paint thinner for overnights—this tiny step preserves their shape and softness. Another indispensable tool is an extendable roller pole, which helps reach high ceilings and eaves without the need for ladders, reducing fatigue and safety risks. For small, detailed work, a fine-point brush, such as a 1-inch angled brush, offers superior control, especially when cutting in around trim or fixtures.
Keep Your Equipment in Prime Shape
Proper maintenance involves thorough cleaning immediately after use. I always rinse brushes and rollers with the appropriate solvent—water for latex paints and mineral spirits for oil-based paints—and let them dry completely before storage. Regularly inspect your tools for signs of wear or damage; replacing worn-out brushes and rollers prevents streaks and uneven coverage. For larger equipment like sprayers, routine lubrication and filter replacement ensure consistent performance. To stay ahead, I also recommend scheduling annual tune-ups for your sprayer units, just as you would for a car, to prevent breakdowns mid-project. This proactive approach minimizes downtime and guarantees smooth application during critical moments. Looking toward the future, I believe automation in paint application might become mainstream, with robotic sprayers offering precision and efficiency. However, until then, maintaining your manual tools with care remains essential for quality results.
How do I maintain my painting tools over time?
Easy, thorough cleaning is the key—immediately after each use, use the right solvents, and avoid letting paint dry on your tools. Store them properly in a cool, dry place, preferably hanging or lying flat to prevent bristle warping. Regular inspections and replacing damaged items ensure a consistent finish. Remember, well-maintained tools not only last longer but also contribute significantly to achieving a smooth, professional look that stands the test of time. Want to elevate your next project? Try the trick of submerging brushes in a small bucket of water or solvent overnight—it’s a simple step that extends their lifespan dramatically. For more insights on maintaining your equipment, check out our comprehensive guide on proper paint cleanup techniques.
Throughout my years of tackling house painting projects, I’ve realized that some of the most valuable lessons aren’t found in tutorials but in personal experiences and honest reflections. These insights have transformed my approach and can do the same for you, turning a simple paint job into a durable, professional-looking finish.
Lessons That Made Me Rethink My Technique
- Patience is a virtue: Rushing to finish often leads to costly mistakes. Waiting for a surface to properly dry—using simple tests like the chalk method—ensures better adhesion and longevity.
- Every wall tells a story: Spotting moisture, cracks, or hidden damage before painting saves time and money. These details guide your prep work and help avoid future issues.
- Materials matter: High-quality primers, brushes, and tools might seem expensive initially but pay off by delivering smoother finishes and lasting results. Proper maintenance of your equipment extends their lifespan and performance.
- Know your environment: Weather conditions dramatically influence drying times. Waiting for optimal humidity and temperature conditions prevents peelings and bubbles, especially for exterior projects.
- Inspect beyond the surface: Identifying underlying problems like rot, mold, or old layers of paint helps you choose the right products and techniques, ensuring the finish lasts decades.
Tools That Changed How I Approach House Painting
- Proper surface prep is essential—trust me, a well-prepped surface makes all the difference.
- Quality brushes and rollers wear out less and produce a more polished look.
- Moisture meters or simple tests like chalk help determine the right moment to paint, preventing future peeling.
- Weather monitoring tools keep you ahead of environmental challenges.
Let Yourself Grow Through Every Brushstroke
I want you to know that every paint project is a chance to learn, adapt, and improve. Don’t be discouraged by early setbacks; use them as stepping stones toward mastery. Your next project could be your best yet—filled with confidence, patience, and a keen eye for detail.
Which lesson has already changed how you approach house painting? Share your experiences below—I’d love to hear your story.