

The afternoon sun is a brutal truth-teller. Last summer, I spent three grueling days prepping my hallway for what I thought would be a masterclass in local painting. I felt like a pro. I filled the holes, sanded them down until they felt smooth as glass to my fingertips, and rolled on that beautiful new sage green. Then 5:00 PM rolled around. As the sun dipped low, a long shadow hit the wall and revealed every single ‘invisible’ patch I’d made. They didn’t look smooth anymore; they looked like raised welts or sunken scars beneath the finish. It was a gut-punch moment that every DIYer knows too well. If you are seeing those same ghostly outlines on your walls, don’t panic. We are going to fix those ‘flashing’ patches today so they actually disappear for good.
Stop Chasing the Ghost of a Bad Repair
When a patch shows through, it’s usually because of ‘flashing’—a difference in texture or sheen between the patch and the rest of the wall. One of my biggest early mistakes was thinking that a tiny bit of spackle and a quick swipe with a 2-inch putty knife was enough. It never is. You have to feather that compound out much further than you think. I’ve learned the hard way that why your new drywall is drinking your paint so fast is often because you haven’t sealed the porous compound properly before the topcoat goes on. To get a seamless look, you need to address the ‘halo’ effect where the patch meets the old paint. It’s also vital to realize that the difference between contractor-grade and premium paint can be the deciding factor in how well a repair hides.
Can a bad patch really be fixed without tearing out the whole wall?
It’s the question I get most often from skeptical neighbors. The answer is a resounding yes, but it requires patience and the right light. According to the Gypsum Association, achieving a ‘Level 4’ finish—the standard for most residential walls—requires multiple thin coats of joint compound, not one thick glob. If you can see the edges of your patch now, it’s because the transition isn’t gradual enough. You aren’t just ‘filling a hole’; you are creating a microscopic ramp that the eye can’t detect. I used to rush this and end up having to learn how to fix a run in your paint without starting over because I was trying to hide bad drywall work with heavy layers of liquid. That never works. Have you ever stepped back from a finished project only to realize your patches look like Braille for ‘I didn’t sand enough’? If so, tell me about it in the comments. We’ve all been there, and the fix is simpler than you might think, starting with a wide taping knife and a bit of humility. To avoid other common pitfalls, you might also want to check out how to avoid those ugly roller marks on your ceiling while you’re at it.
Level the Playing Field with a Wide Knife
To stop a patch from looking like a sore thumb, you have to stop thinking about the hole and start thinking about the horizon. Most DIYers use a 4-inch putty knife for everything, which is like trying to flatten a dough ball with a spoon. You need a 10 or 12-inch taping knife to ‘feather’ the edges. I remember a humid Tuesday in July when I was fixing a fist-sized hole in a client’s living room. I thought a small patch would suffice, but under the harsh afternoon light, the edges stood out like a topographic map. I had to go back, apply a fresh layer of compound, and pull it out 12 inches in every direction. The goal is to create a slope so gradual that light doesn’t break when it hits the edge. If you aren’t sure if the surface is ready, check how to tell if your drywall is too damp for the first coat before you even think about opening a paint can.
Don’t Trust Your Eyes in Broad Daylight
Your biggest ally in house painting isn’t your brush; it’s a high-lumen flashlight held parallel to the wall. This is called ‘side-lighting.’ By placing the light against the wall and shining it across the patch, the tiniest ridges cast long, dark shadows. It turns a seemingly smooth surface into a mountain range. I once spent four hours on a ‘five-minute fix’ because the side-light kept revealing ridges I couldn’t feel with my hands. Sand those ridges down with 220-grit sandpaper until the shadows disappear. If you’re working near stairs, you might also want to learn how to choose a paint sheen for high traffic stairways because higher sheens will amplify every single bump you miss. 
Seal the Surface Before the Color Goes On
Drywall compound is a sponge. If you paint directly over it, the patch will suck the moisture out of the paint, leaving a flat, dull spot known as ‘flashing.’ This is why why your new home needs a third coat of white paint if the walls weren’t sealed correctly. You must use a dedicated drywall primer—not a ‘paint and primer in one’—to seal that porosity. Once the primer is dry, you’ll notice it’s much smoother than the surrounding wall. This brings us to the final hurdle: texture matching.
Mimic the Roller Nap to Hide the Patch
If the rest of your wall has a slight ‘orange peel’ texture from years of rolling, a perfectly smooth patch will still stand out. To fix this, don’t just brush the paint onto the patch. Use a small 4-inch ‘weenie’ roller with the same nap thickness as the original job. Apply your primer and your first coat of paint with the roller, feathered out into the existing paint. This creates a stipple that mimics the surrounding area. For those dealing with difficult layouts, knowing the blue tape trick for getting clean lines on texture can help you keep your ‘invisible’ repair from bleeding onto your baseboards or crown molding. When you apply the final topcoat, roll over the patch and then ‘dry roll’ the edges to blend the new wet paint into the old dry paint, effectively erasing the transition line.Most DIY marketing will tell you that a single can of ‘paint and primer’ is a magic wand for your walls. In my years of local painting, I’ve found that to be a flat-out lie for repair work. While these products are great for color changes on pristine surfaces, they lack the high-solids content needed to truly seal a porous patch. If you skip a dedicated sealer, you’re just setting yourself up for failure. Have you ever fallen into this trap and wondered why the sheen still looked ‘off’ despite three coats? Let me know in the comments. The truth is, why that expensive low-odor paint still makes you dizzy isn’t the only concern; it’s how the chemical bond fails when we ask one product to do two diametrically opposed jobs.
Stop Believing the One-Coat Miracle Myth
Professional results demand a separation of powers. Primers are designed to bite into the surface and create a uniform seal; paint is designed for pigment and durability. When you mix them, you get a compromise. The Painting Contractors Association (PCA) notes in their standard P1 that ‘proper surface preparation is the foundation of a quality finish,’ and often, that foundation requires a specialized sealer that ‘self-priming’ paints cannot replicate. If you’ve been struggling, you might find that local painting secrets elevate your space effortlessly once you go back to the fundamental basics of layering.
Avoid the Deadly Trap of Over-Working Your Paint
The biggest ‘oops’ I see from intermediate painters is the urge to keep ‘fixing’ a spot while it is drying. Once the paint starts to ‘set,’ every brush stroke or roller pass is actually tearing the microscopic film that is trying to level out. This leads to heavy texture and visible ‘lapping.’ I’ve seen homeowners try to compensate for a fast-drying edge by thinning their product, but you should always how to tell if your painter is diluting the paint with water because over-thinning destroys the structural integrity of the resin. 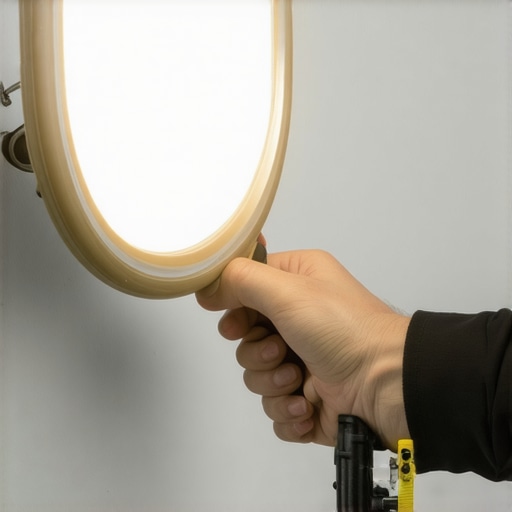
Can Ambient Humidity Actually Ruin a Perfect Patch?
Sophisticated painters know that the air in the room is just as important as the paint in the can. If the humidity is over 50%, the water in your latex paint cannot evaporate at the correct rate, which prevents the resin from coalescing into a hard, durable shell. This is the reason you should never paint over peeling paint or damp patches—the moisture gets trapped and eventually pushes the new layer right back off the wall. You are essentially building a house on a swamp. Always use a hygrometer; if it’s a rainy day, wait for the weather to clear. It’s better to lose a day of work than to lose the entire project to a ‘flash’ that refuses to disappear.If you are serious about local painting, you need to stop using the dollar-store masking tape that leaves sticky residue or, worse, pulls your new finish right off the wall. I personally swear by the 3M Hand-Masker M3000. It is a handheld tool that applies tape and masking film simultaneously. It might sound like overkill for a single room, but it is the only way I know how to properly mask a hardwood floor before painting baseboards without losing my mind or my lower back. When you have prepped the perimeter with precision, the actual painting becomes a victory lap rather than a stressful chore. Most homeowners underestimate the math involved in a project, so learning how to estimate how much paint you actually need for a room is a vital skill. I always recommend adding a 10% buffer for those inevitable future touch-ups.
How do I keep my walls looking fresh for years?
The work does not stop when the tape comes off. To truly master house painting, you need a long-term maintenance plan. I tell all my clients to keep a ‘touch-up kit’—a small, airtight mason jar of the exact paint used, clearly labeled with the date and the specific room. This is much more effective than keeping a rusty five-gallon bucket in the garage that will eventually skin over. For those focused on the exterior, you should learn how to maintain your newly painted exterior for ten years or more by simply washing off salt, pollen, and dust once a year with a low-pressure garden hose. According to the Master Painters Institute (MPI) maintenance manuals, aggressive cleaning or using the wrong chemicals can ‘burnish’ the paint, which changes the sheen and makes a small dirty spot look like a permanent, shiny blemish. 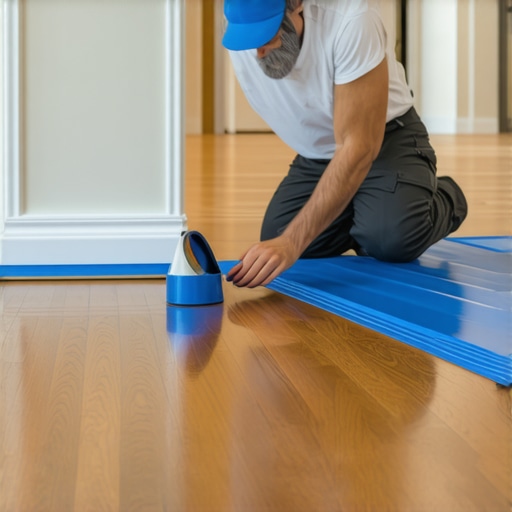
The Tech Revolution Coming to Your Living Room
As we look toward the future, the world of house painting is getting incredibly high-tech. We are already seeing the rise of graphene-infused coatings that are practically scratch-proof and help regulate room temperature. In my opinion, the biggest shift in color your world expert house painting advice for 2025 will be the widespread integration of Augmented Reality (AR). You will soon be able to wear a headset and see exactly how a specific shade interacts with your home’s unique architectural shadows at noon versus midnight before you even buy a single sample pot. Before you wrap up your current project, I want you to try one pro trick: ditch the cheap brushes and buy a 2.5-inch angled sash brush with synthetic filaments. It is the only way to get a sharp line between your wall and woodwork without relying entirely on tape. It takes about ten minutes to practice your ‘cut-in’ technique on a scrap piece of drywall, but it will change the way you approach painting forever. Give it a shot on your next trim repair and see how much faster you move when you trust your tools.
Hard Lessons from My Most Embarrassing Patch Jobs
Over the years, I have realized that the difference between a patch you see every day and one you forget exists comes down to a few lightbulb moments. First, the size of your knife is directly proportional to your success. I spent years fighting small 4-inch blades only to realize that a 12-inch taping knife does 90% of the work for you by bridging the gap between the old wall and the new repair. Second, never trust a patch until you have seen it under side-lighting. A simple flashlight held against the wall will tell you more than five minutes of staring ever will. Third, the halo effect isn’t just about the paint; it’s about the absorption. If you don’t seal that sponge-like compound, you are doomed to see a dull spot forever. If you have already hit a snag, you can learn how to fix paint that is already cracking on your window sills or walls before you add another layer.
My Must-Have Gear for an Invisible Finish
I do not get paid to promote these, but I wouldn’t step onto a local painting job site without them. To master the art of house painting with these pro tips, start with a dedicated LED work light. I use a 2000-lumen stand light to catch ridges early when they are still easy to sand. Next, invest in a weenie roller—a small 4-inch microfiber roller—to match the stipple of the existing wall. Finally, a vacuum-attached sanding block is a game changer for keeping your house clean while you work. These tools turn a frustrating chore into a predictable system. If you are hiring out the work instead of DIYing, make sure you know how to spot fake reviews for local painting contractors so you get someone who actually uses these professional methods.
Walk Past Your Walls with Pride Again
The ghosts on your walls do not have to be permanent. By moving from a quick fix mindset to a surface preparation mindset, you can achieve results that even the most seasoned pros would envy. Whether you are following expert house painting tips for 2025 or sticking to the classics, the key is patience. Take the time to feather, prime, and roll correctly. You will find that house painting is much less stressful when you stop fighting the physics of the wall and start working with it. For more advanced techniques, our guide on top local painting strategies revealed covers everything from room flow to color psychology. You have the knowledge; now it is time to pick up the knife and make those scars disappear. Which part of the patch process usually gives you the most trouble—getting the surface smooth or matching the paint texture? Let me know in the comments below!