

I’ll never forget the Saturday morning I realized I’d totally botched my curb appeal. I was standing there, mug in hand, admiring the way the sun hit the trim, when I noticed these weird, puffy blisters right along the bottom of my garage door. It looked like the door had a bad case of hives. I reached out, gave one a little press, and—splat—cold water squirted right onto my shoes. It wasn’t just a cosmetic fluke; I had a real problem. If you’re seeing those same ugly bubbles, you’re probably feeling a mix of frustration and the dread of another weekend project. But here’s the good news: you aren’t alone, and it’s not a mystery. Today, we are going to pin down exactly why this moisture is trapped and how you can fix it so it stays fixed for good.
That Sink-in-Your-Gut Feeling When the Paint Starts to Peel
I made a classic rookie move years ago. I figured that as long as the top looked good, the bottom would take care of itself. I even ignored the reason your exterior paint is bubbling just weeks after application. I thought a thick layer of premium paint would act like a raincoat. Spoiler alert: it acted like a Ziploc bag for moisture instead. When you see those bubbles near the pavement, it’s usually because the door is wicking up water from the ground or rain splashback. According to the Painting and Decorating Contractors of America (PDCA), moisture is the leading cause of coating failure, often resulting from improper surface preparation or poor drainage. If your garage door sits too close to the concrete, it’s basically drinking from every puddle.
Is my garage door basically ruined now?
I get it. You’re worried you’ll have to shell out thousands for a whole new door. Take a breath. Unless the wood is soft as a sponge or the metal is rusted through to the other side, we can usually save it. But you have to stop the “slap more paint on it” cycle. I’ve seen neighbors try how to paint your garage door to look like real wood only to have the base bubble away because they didn’t address the bottom seal. Have you ever poked one of those bubbles and wondered if you were just making it worse? Let me know in the comments if yours are filled with water or just air—it actually tells us a lot about the culprit.
The Real Reason Your Bottom Edge Is Bubbling
Most people think it’s just bad paint. In my experience, it’s almost always a failure of the seal or a lack of back-priming. When I first started messing with house painting, I didn’t realize that the bottom edge—the part that actually touches the ground—needs more protection than the front. If that bottom edge isn’t sealed, it’s an open door for humidity. This is especially true if you’ve recently had work done nearby. For instance, I’ve seen homeowners waste money on a fresh coat when they really needed to look at their surroundings—like why fixing your drainage is the only way to save your exterior paint. If the water has nowhere to go, it’s going into your door. We need to talk about how to stop that intake before we even think about opening a new can of satin finish.
Strip it back to the bare essentials
Before you even think about grabbing a brush, we have to deal with the damage. You cannot just paint over the problem; the reason you should never paint over peeling exterior paint is that the bond is already broken. If you leave even a tiny bit of that compromised coating, moisture will find its way back in. I remember one summer I tried to ‘spot-fix’ a single bubble on my neighbor’s door. I thought I was being efficient. Two weeks later, that spot looked like a topographical map of the Andes. To do this right, use a stiff 3-inch scraper to remove every flake of loose paint until you hit a solid, well-adhered edge. Then, take 80-grit sandpaper and feather those edges so you can’t feel the transition between the bare surface and the old paint. It’s messy, it’s loud, but it’s the only way to ensure your new coat actually has something to hold onto. 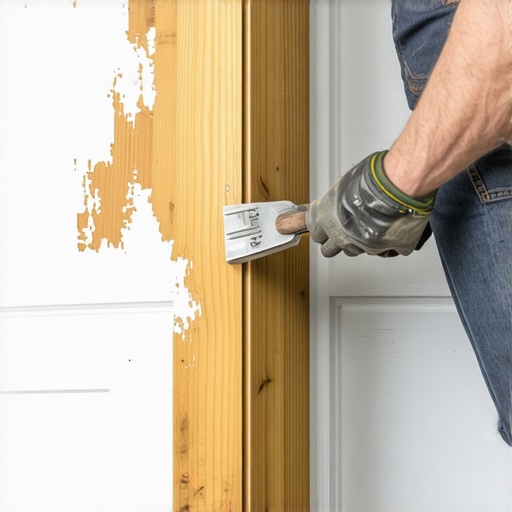
The secret move most painters skip
Here is the part where most DIYers—and even some pros—drop the ball: the bottom edge. When you look at your garage door, you see the face, but the bottom-most surface (the part that faces the ground) is often left as raw wood or exposed metal. This is the ‘wick.’ If this edge isn’t sealed, it sucks up groundwater like a straw. When I finally figured this out on my own door, I realized I’d been leaving the front door wide open for rot. You need to get down on the ground and apply a generous coat of sealer or primer to that bottom edge. If you are working with an older door, the secret to keeping paint from peeling on old porch floors applies here too: you need a product that penetrates the grain rather than just sitting on top.
Pick a primer that actually fights back
Standard latex primer is great for drywall, but for a garage door facing the elements, it’s often too weak. You need a high-quality, oil-based or specialized exterior primer that blocks moisture. I’ve seen countless projects fail because someone grabbed the ‘all-purpose’ bucket from a big-box store. Using the wrong base is exactly why using the wrong primer causes your trim paint to chip and bubble prematurely. When you apply it, don’t just ‘dust’ it on. Work it into the grain. If you’re dealing with metal, look for a rust-inhibitive primer. I once skipped this step on a steel bulkhead and the rust bloomed through the paint before the weekend was over.
Master the art of the thin coat
It is tempting to glob the paint on thick to get it over with, but thin, even layers are your best friend. This allows each layer to dry properly and creates a harder, more durable shell. If you want a specific aesthetic, like learning how to paint your garage door to look like real wood, you have to be even more disciplined with your layering. Thick paint stays soft for longer, which traps tiny amounts of gas and moisture underneath, leading right back to the bubbles we’re trying to kill. Use a high-quality synthetic brush for your edges and a small, 4-inch mohair roller for the flat panels to get a finish that looks like it came straight from the factory. To really level up your results, you can master the art of house painting with these pro tips to ensure your brushwork remains invisible and professional.
The expensive paint myth that costs you more in the long run
Most homeowners—and even some local painting crews—believe that a $100 gallon of paint is a magic shield. I’ve seen people insist on the priciest all-in-one products, thinking they can skip the hard labor. Here’s the contrarian truth: a mediocre paint applied over a perfectly prepped, bone-dry surface will outlast a premium paint applied in the wrong conditions every single time. If you don’t understand the difference between contractor-grade and premium paint, you might be overpaying for chemicals that your door isn’t even ready to absorb.
Does the weather really matter if the door feels dry to the touch?
This is where the “Oops” factor kicks in. You might think a sunny, 80-degree afternoon is the perfect time to finish the job. Wrong. If you paint while the sun is beating directly on the door, the top layer of paint skins over too quickly. This traps the solvents and moisture underneath, which then expand as they heat up, creating those signature bubbles. It’s a phenomenon often called thermal shock. This is precisely why your local painting crew prefers early morning starts in summer; they want the surface to be cool so the paint can cure from the inside out, not the outside in.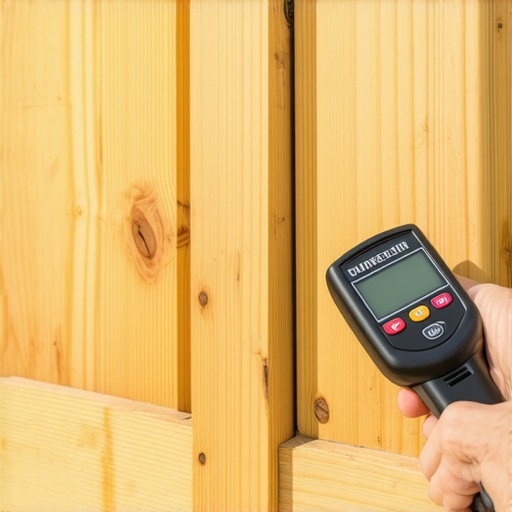
The invisible enemy hiding inside your door panels
The most overlooked nuance in local painting strategies is the relative humidity of the substrate itself. Wood shouldn’t just look dry; it needs to be functionally dry. According to the Forest Products Laboratory, wood should ideally have a moisture content below 15% before any coating is applied. If you’ve just pressure washed your door—which, by the way, is a huge risk—you might need to wait three or four days, not three or four hours. This mistake is exactly the danger of pressure washing wood siding before house painting. If you seal that moisture in, it has nowhere to go but out, and it will take your new paint with it. Have you ever fallen into this trap of rushing the job because the sun was out? Let me know in the comments. I’ve definitely been guilty of trying to beat a rainstorm, only to find myself scraping the whole door again a month later.
Why your perfect seal might be causing the rot
There is a fine line between sealing a door and suffocating it. While we want to protect that bottom edge, using a non-breathable, high-gloss oil over a damp core is a recipe for disaster. If you’re dealing with an older home, you might find that the logic behind why mineral-based paints are better for brick actually offers a lesson for doors too: sometimes the material needs to breathe slightly to allow internal vapor to escape. When you’re ready to finish, make sure you choose the right roller nap to ensure a thin, even distribution that doesn’t create heavy, moisture-trapping pockets. If you’re still unsure about the process, you can always contact us for a professional evaluation of your door’s moisture levels.I finally stopped playing the guessing game with moisture when I invested in a pin-style moisture meter. For years, I relied on the touch test, but I learned the hard way that your fingertips are terrible at detecting the deep-seated dampness that causes catastrophic coating failure. If that meter reads anything above 12% to 15%, I put the brush down and walk away. Using a tool like this is one of those local painting secrets that separates the weekend warriors from the professionals who never have to deal with callbacks. It’s about data, not hope. To get that factory-smooth finish, I also stopped buying the ‘bargain’ multi-packs of brushes. I strictly use a 2.5-inch angled sash brush from a reputable brand like Wooster or Purdy. Cheap bristles shed, and those tiny hairs act like wicks, pulling moisture through the paint film. When you’re dealing with different textures, remember that the best roller nap for rough exterior surfaces isn’t going to work on a smooth metal door; you need a 1/4-inch mohair roller to prevent air entrainment which causes—you guessed it—more bubbles. According to the Master Painters Institute (MPI), over 80% of all coating failures are directly attributable to poor surface preparation or moisture trapped in the substrate. This technical reality is why I spent three hours sanding and only forty minutes painting. Looking ahead, I predict we will soon see more widespread use of ‘smart’ bio-based coatings that can actually regulate moisture vapor transmission, but until that technology hits the local hardware store, we have to rely on meticulous technique.
How do I maintain my garage door finish for the long haul?
Maintenance isn’t a massive project; it’s a series of small habits. Every spring, I take a bucket of warm water, a splash of mild dish soap, and a soft microfiber cloth to the door. This isn’t just about aesthetics; it removes the salt, pollen, and acidic bird droppings that chemically etch the paint and create microscopic holes. If you want to know how to maintain your newly painted exterior for ten years or more, the secret is preventing the breakdown of the topcoat’s UV inhibitors. Washing the door once or twice a year keeps the surface cool and prevents the ‘chalking’ that leads to peeling. 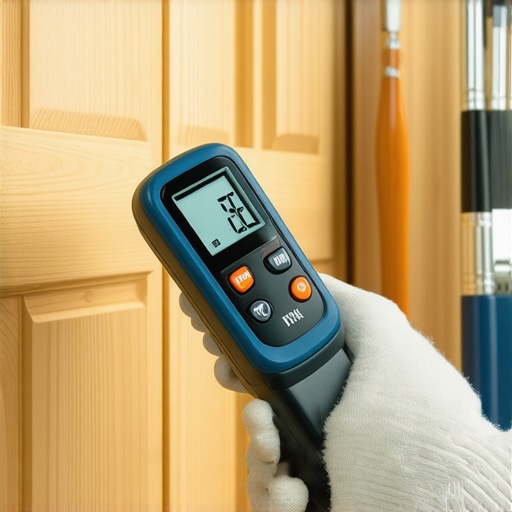 If you notice any small chips from a stray pebble or a bike handle, touch them up immediately. Don’t wait for the next full repaint. Keeping a small, airtight jar of your specific trim color in the garage makes this a five-minute fix. This proactive approach is exactly how you master the art of house painting and keep your curb appeal at its peak without constant labor. I strongly encourage you to try the ‘annual wash’ method this year. It sounds too simple to be effective, but it’s the primary reason my own garage door hasn’t needed a full scrape-and-paint in nearly a decade.
The Subtle Signs I Finally Learned to Spot
After years of trial and error, I’ve realized that the perfect day to paint is often actually the enemy of a long-lasting finish. If you’ve ever wondered how expert house painting advice for 2025 is evolving, it is centered heavily on surface temperature and substrate chemistry. I now use an infrared thermometer; if the metal or wood surface is over 90 degrees, I do not touch it with a brush. Another lightbulb moment for me was realizing that bubbles often form where the garage door weather stripping is actually too tight, creating a greenhouse effect that traps condensation against the fresh film. I also found that local painting secrets to elevate your space effortlessly often involve simple airflow—leaving the door cracked open six inches while that bottom edge cures can be the difference between a ten-year bond and a six-week failure.
My Go-To Gear for a Flawless Finish
I no longer leave my curb appeal to chance or guesswork. My toolkit always includes a Pin-style Moisture Meter to verify the wood’s core is below 15% before I even think about opening a can of primer. For the topcoat, I strictly use Purdy Clearcut brushes because they maintain a stiff edge against the rough lower tracks of a garage frame. I also highly recommend looking into The Painter’s Handbook by Mark Dixon for deep technical insights on coating adhesion. If you truly want to unlock the power of professional painting for a stunning home, you must start with a high-quality 1/4-inch mohair roller—it prevents the micro-bubbling known as air entrainment that common foam rollers often cause.
Ready to Take Back Your Curb Appeal
Dealing with bubbling paint is a frustrating rite of passage for many homeowners, but it does not have to be an annual tradition. By focusing on the prep work, selecting a specialized moisture-blocking primer, and respecting the hidden moisture levels in your door, you can achieve a factory-smooth finish that lasts. This is the ultimate goal of successful house painting: doing the invisible labor so the visible results can shine for a decade. Don’t be afraid to slow down and wait for the right weather window; the best results are grown through patience, not rushed through a single weekend. Have you ever discovered actual liquid water hiding inside a paint bubble on your door? Let me know your experience in the comments below!