

I’ll never forget the pride I felt after finishing my home office last spring. I’d picked out the perfect moody charcoal, spent eighteen hours prepping, and the result was magazine-worthy. Then, my son walked in with his backpack, brushed against the wall once, and left a giant, chalky white streak that looked like a crime scene. I tried to wipe it off with a microfiber cloth, and—I’m not kidding—the paint literally rubbed off onto the rag. I stood there, staring at the patch of drywall I’d just exposed, feeling like a total amateur. That was the moment I realized that “fresh” paint isn’t synonymous with “durable” paint. If you’re seeing marks on your walls within weeks of a project, you haven’t failed as a painter; you’ve likely fallen into the same trap I did.
The Frustrating Reality of the Three-Week Scuff
It’s a heartbreaker, isn’t it? You invest time and money into expert house painting advice for 2025, only to have the room look “lived-in” (and not in a good way) before the paint smell has even faded. The most common culprit is something we often overlook: the cure time. Most of us think that because a wall is dry to the touch, it’s ready for the chaos of a working office. In reality, I made the classic mistake of ignoring the 48-hour rule for moving furniture back against new walls. In fact, many latex paints take up to 30 days to fully “snap” and reach their maximum hardness. When you lean a chair against a wall that hasn’t fully cured, you aren’t just touching the paint; you’re denting a chemical structure that’s still in flux. Another big issue is the type of paint we choose when we’re trying to save a buck. I once grabbed a few cans of “contractor grade” flat paint for a project, thinking I was being savvy. Big mistake. High-traffic areas like offices need resins that can take a beating. If you didn’t prime properly, you might also find that your new drywall is drinking your paint so fast that there isn’t enough binder left on the surface to resist friction. Have you noticed that your walls seem to catch every single mark, or is it just my office that feels like a magnet for scuffs?
Is “Washable” Paint Actually a Marketing Lie?
You see the “washable” or “scrubbable” label on the can and assume it’s invincible. I used to think that too. However, according to the American Coatings Association, the “burnish resistance”—the ability of a paint to be rubbed without changing its appearance—depends entirely on the quality of the binders used by the manufacturer. If you use a cheap flat finish, “washing” it usually just results in a shiny, permanent spot where the matte finish was destroyed. Sometimes, even the lighting can make these imperfections stand out more; I’ve found that why your office walls look different depending on the bulb often comes down to how shadows fall across those micro-scuffs. To truly stop the cycle of repainting every six months, we have to look deeper than just the color on the lid and unlock the power of professional painting for a stunning home by focusing on the chemistry of the coating itself.To move past the frustration of “delicate” walls, you have to treat the painting process like building a house: if the foundation is shaky, the roof will eventually cave. The core of a durable finish isn’t in the final brushstroke; it’s in the chemical bond between the substrate and the coating. If that bond fails, the paint sits on the surface like a loose skin, waiting to be snagged by a bag or a chair.
Stop the Scuffs with Better Preparation
I once spent three days painting a nursery, only to have the paint peel off in sheets behind the crib a month later. Why? Because I skipped washing the walls. Even if a room looks clean, it’s often coated in a microscopic layer of dust and skin oils. Think of it like trying to put a sticker on a sandy beach—it just won’t grab. Before you open a can, use a TSP substitute or a specialized cleaner to degloss and clean. This is one of those master the art of house painting with these pro tips that separates DIYers from the pros. If you aren’t sure if the surface is ready, try the damp rag test for checking if your wall is too chalky. If the rag comes away white, your paint will never stick correctly.
Pick a Finish with Real Backbone
Not all paints are created equal. In high-traffic zones, a flat finish is essentially a sponge for scuffs. You need a satin or eggshell finish with high-quality resins. These resins act like a protective shield, locking the pigment in place so it doesn’t rub off. Using the right tools is equally vital; knowing how to choose the right roller nap for your specific wall dictates how much of that protective coating actually makes it onto the drywall. Too thin, and you have no protection; too thick, and you get “orange peel” texture that catches every passing shoulder and creates shadows that look like dirt. 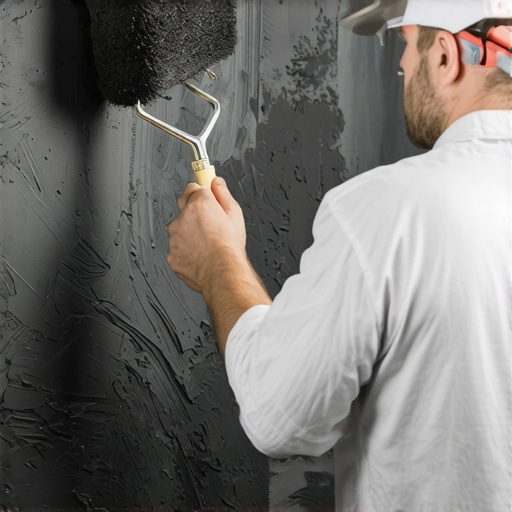
Seal the Surface Before the Color Goes On
New drywall is incredibly porous. If you skip primer, the drywall acts like a thirsty sponge, sucking the liquid out of your paint before it has a chance to level out. This leaves the binders—the “glue” that holds the paint together—starved and brittle. This is exactly why your new drywall is drinking your paint so fast. Without that primer barrier, your topcoat will be prone to chipping because it never truly anchored. Furthermore, why using the wrong primer causes your trim paint to chip is usually down to the lack of an interface layer that allows the paint to grip the substrate tightly.
Respect the Chemistry of the Cure
Finally, you have to respect the chemistry. Drying and curing are two different worlds. Paint dries when the water evaporates—usually in a few hours—but it cures when the molecules cross-link and harden into a plastic-like film. This is why the 48-hour rule for moving furniture back against new walls is the absolute minimum. If you want to be certain your finish is bulletproof, use the knife test for checking if your paint is truly dry and fully hardened. If you can still make a mark with a fingernail, it’s not ready for the backpack-carrying kids or the heavy office chairs.
We often mistake volume for value in the world of home improvement. We think if we pile on the paint, we’re creating a thicker armor for our walls. In truth, you’re creating a structural nightmare. One of the most pervasive myths in house painting is the “one-coat miracle.” We see the marketing on the can promising total coverage in a single pass and we jump at the chance to save time. However, a single thick coat is significantly more prone to failure than two thin, even coats. When paint is applied too heavily, the outer surface dries and skins over while the layer underneath remains wet. This creates an unstable foundation that leads to sagging, wrinkling, and eventual peeling. It is often the primary reason why your new home needs a third coat of white paint to actually look uniform and hold up to daily life.
The Marketing Trap of the One-Coat Miracle
In my years of consulting on local painting projects, I’ve seen homeowners spend hundreds on “premium” paint only to have it fail because they were chasing speed. The real nuance lies in the science of coalescence. According to the Paint Quality Institute, the mechanical strength of a paint film is derived from the fusion of polymer particles as the liquid evaporates. If you apply a layer that is too thick, those particles can’t align correctly. You end up with a surface that looks okay from a distance but is structurally brittle. This is also where you might see “runs” or “drips” forming minutes after you move on to the next section. If you encounter this, don’t panic; knowing how to fix a run in your paint without starting over is a vital skill for any serious DIYer.
Another subtle “trap” is the temptation to thin the product. If the paint feels too sticky or thick on the brush, some people add water or spirits to make it flow better. This is a disaster for durability. Dilution breaks down the ratio of binders to pigments, meaning your paint won’t stick and the color will fade prematurely. It is actually a common way for low-quality contractors to stretch their materials, so you should learn how to tell if your painter is diluting the paint with water before the job gets too far along. Professionals focus on master the art of house painting with these pro tips by controlling the environment and the tools rather than altering the chemistry of the paint itself.
Does Humidity Actually Prevent Paint From Ever Fully Curing?
This is the question that separates the amateurs from the experts. The answer is a resounding yes. If the ambient humidity is above 50% or 60%, the water in latex paint cannot evaporate at the correct rate. This traps moisture inside the film, leading to a phenomenon called surfactant leaching—where brown or sticky spots appear on your walls weeks later. This is especially problematic when you are transforming spaces: local painting solutions for every budget because the urge to “just get it done” often outweighs the patience required to wait for a dry day. Furthermore, if you are working on an older home, you have to be careful with your sheen choice. Many people think high gloss is more durable for high-traffic halls, but why high gloss paint is a nightmare for older walls becomes clear the moment the sun hits it; every bump and patch from the last fifty years will be magnified. Have you ever fallen into this trap of thinking thicker is better or rushing a project during a rainy week? Let me know in the comments.
To really stop the cycle of endless touch-ups, I had to stop treating my tools like disposable afterthoughts. I used to go through cheap brushes like they were napkins until I realized that a high-quality angle sash brush is the only way to get a sharp line between your wall and woodwork without losing my mind. Now, I swear by my stainless steel brush comb. Most DIYers just rinse their brushes under a tap and call it a day, but that leaves dried paint deep in the ferrule, which eventually causes the bristles to splay. By combing through the bristles while rinsing, I’ve kept the same three brushes for over four years. Another sanity-saver is the rubber band trick for keeping paint cans mess-free; I stretch a heavy-duty band across the open top of the can to wipe my brush instead of using the rim. This prevents paint from gunking up the seal, meaning I can actually open the can again six months later for a quick touch-up without needing a crowbar.
How do I keep my walls looking fresh for years?
Maintenance is where most people drop the ball. We spend forty hours painting and zero hours protecting. For my high-traffic hallways, I’ve started applying a very thin, clear matte scuff-guard over the base color in the most vulnerable areas. It’s a trick I learned from local painting pros who work in commercial lobbies. If you don’t want to go that far, at least keep a small ‘touch-up kit’ ready. I use baby food jars filled with each room’s specific color and labeled with the date and sheen. This is essential because how to maintain your newly painted exterior for ten years or more often comes down to catching small cracks or chips before water can get behind the film. According to the SSPC (Society for Protective Coatings) in their SP 1 standard, even a surface that looks clean can harbor microscopic oils that eventually cause delamination. This is why I always do a quick wipe-down with a 50/50 water and vinegar solution every spring; it removes the dust that can actually ‘eat’ into the paint’s finish over time. 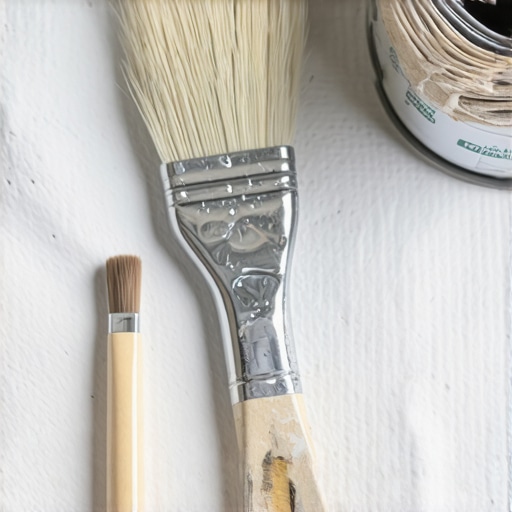
The Future of Your Walls Is Smarter Than You Think
Looking ahead to 2025 and beyond, I predict we are going to see a massive shift toward bio-based resins and ‘smart’ coatings. We are already seeing the emergence of graphene-infused paints that conduct heat, potentially helping with climate control inside the home. But more practically, I think ‘self-healing’ polymers—which were once reserved for high-end automotive finishes—will soon be available for your living room. Imagine a wall that can literally ‘re-knit’ itself after a minor scratch. Until those futuristic cans hit the shelves, you can still unlock the power of professional painting for a stunning home by simply slowing down and using the right equipment. If you’re tired of the amateur look, I challenge you to try just one advanced move on your next project: ditch the cheap plastic trays and use a dedicated five-gallon bucket with a metal screen. It’s how the experts master the art of house painting with these pro tips, and it will keep your paint cleaner and your application much more consistent.
Hard-Won Truths from My Toughest Painting Failures
Reflecting on those early days in my home office, I realize that most of my frustrations came from believing myths rather than chemistry. First and foremost, patience is a chemical requirement, not just a virtue. You cannot rush the cross-linking process of modern resins. Second, I learned that high-quality paint is actually cheaper in the long run because it requires fewer coats and withstands much more scrubbing. I’ve gathered many of these local painting secrets to elevate your space effortlessly over the years, and they all point to the same thing: preparation is where the battle is won or lost. If your wall feels chalky or dusty, no amount of expensive paint will save it from eventually peeling. #IMAGE_PLACEHOLDER_E#
The Gear That Actually Saved My Sanity
If you are serious about a professional-grade finish, stop buying the ‘all-in-one’ kits from the big-box stores. My personal toolkit now includes a high-quality 2.5-inch angle sash brush, which is the only way to get a sharp line between your wall and woodwork without using a mountain of tape. I also never start a project without a dedicated stainless steel brush comb; it’s the secret to keeping those bristles perfectly aligned for years. For those tricky textured surfaces, I always rely on the blue tape trick for getting clean lines on texture to ensure there is no bleed-under. Finally, swap your plastic tray for a five-gallon bucket and a metal grid—it keeps your paint cleaner and prevents the dreaded ‘skin’ from forming on the surface during long sessions.
Your Journey Toward a Scuff-Free Sanctuary Starts Now
House painting shouldn’t be a cycle of constant repair and disappointment. By slowing down, respecting the cure time, and investing in the right materials, you can create a space that looks just as good in three years as it does on day one. It’s time to move past the ‘good enough’ mindset and transform your home with expert house painting tips for 2025. You’ve got the knowledge and the strategy to handle any high-traffic zone in your house with confidence. What’s the one wall in your house that always seems to attract the most scuffs and marks? Share your struggle in the comments below!