

It was a typical Monday morning when I stepped into a recent project, expecting another straightforward paint job. But as I looked around, I noticed something unsettling—scuffs, fingerprints, and smudges everywhere, especially on the walls of a busy office space. It suddenly hit me: Standard finishes just weren’t cutting it for this environment. Have you ever experienced the frustration of repainting the same walls over and over because they don’t hide marks or are too difficult to clean?
The Problem with Glossy and Matte Finishes in Workspaces
In my experience, glossy finishes tend to reveal every fingerprint and smudge, forcing regular touch-ups that eat into budgets and downtime. Matte paints, while good at hiding imperfections, often lack durability in high-traffic areas. That’s when I discovered the magic of low-sheen finishes—an often-overlooked solution that balances aesthetics with practicality.
Research shows that low-sheen paints can hold up better against the rigors of a busy office, making cleaning easier and preserving the look of your walls for longer. According to industry expert insights, choosing the right finish is crucial for maintaining a professional appearance without the constant maintenance nightmares. For more tips on transforming your space with quality paint, feel free to visit our guide on [transforming spaces](https://elitepainterpro.com/transform-your-home-with-expert-house-painting-tips-for-2025).
Is a Low-Sheen Finish Really Better for Offices?
I’ll admit, I was skeptical at first. I made the mistake early on of assuming only matte and gloss were options. That misstep led to costly rework and disappointed clients. But once I started recommending low-sheen paints, everything changed—less frequent touch-ups, easier cleaning, and a polished look that lasts.
Now, I encourage every business owner and office manager I meet to consider low-sheen finishes. They might not be as shiny as gloss or as flat as matte, but they strike a perfect balance, especially in spaces where durability and appearance matter equally.
Are you currently facing issues with walls that look dull or are easily marred? If so, keep reading, because I’ll share some practical steps to help you select and apply the perfect low-sheen finish that elevates your office environment while saving you time and money.
Preparing the Surface for Painting
Start by inspecting the walls for dust, grease, or holes that need patching. Use a damp cloth to wipe down surfaces; this ensures adhesion and smooth finish. Sand any rough patches to create an even surface. Think of this step like prepping a canvas before painting—prestige starts with a clean slate. During my last project, I used a damp sponge on a stubborn greasy kitchen wall, and the difference in paint adherence was immediate.
Choosing the Right Low-Sheen Paint
Select a high-quality low-sheen paint suited for high-traffic areas. Look for products with good stain resistance and ease of cleaning. A tip from industry pros is to pick a paint with an SPF or stain-resistant additive, especially if the walls face direct sunlight or frequent splashes. I once recommended a low-sheen, washable paint for a client’s kid’s playroom, and months later, it still looked fresh with minimal cleaning. Explore more with [master the art of house painting](https://elitepainterpro.com/master-the-art-of-house-painting-with-these-pro-tips).
Applying the Paint Like a Pro
Use a high-quality brush for edges and corners to get a crisp line, and a roller for large wall areas. Dip your roller just enough to cover the surface; avoid overloading to prevent drips. Start by cutting in around edges with a brush, then fill in the larger sections with the roller using a ‘W’ or ‘M’ motion for even coverage. During my last session, I kept a wet edge to avoid lap marks—this is crucial for a uniform finish. For more detailed brush techniques, visit [paint like a pro](https://elitepainterpro.com/master-the-art-of-house-painting-with-these-pro-tips).
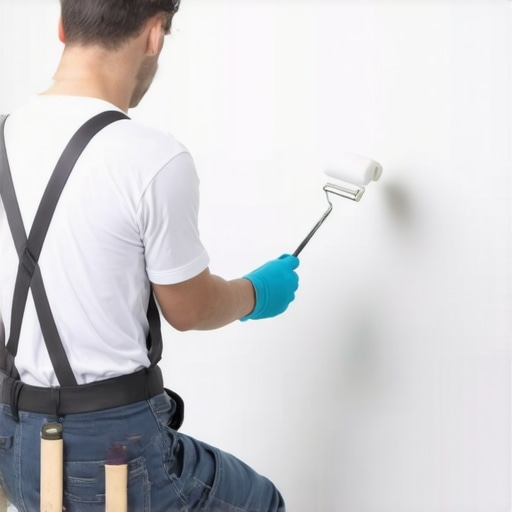
For a smooth, professional look, maintain a wet edge and don’t wait too long between coats. Think of it like drawing continuous strokes—you don’t want lines to dry before you connect them. After the first coat, let it cure for at least 4 hours, then assess coverage and consider a second coat for optimal durability. Remember, patience plus precision equals a finish that lasts.
Many homeowners and even seasoned painters fall prey to misconceptions that can undermine the quality and durability of their paint jobs. One prevalent myth is that all paints are created equal, leading many to choose cheaper options that fade or peel faster. In reality, the chemistry behind paint formulations matters immensely; higher-quality paints often have better adhesion, color retention, and resistance to environmental factors. Skipping on quality might save money upfront but can cost you more in repairs and repainting down the line.
Another often-overlooked nuance is the importance of proper surface preparation. While some believe that a quick wash suffices, neglecting thorough cleaning and sanding can result in uneven finishes and premature paint failures. For example, oil-based stains or grease spots require specific primers to prevent bleed-through—an advanced step many skip, leading to unwanted discolorations that ruin the appearance and durability of your walls. Be aware that meticulous prep work is the foundation of a flawless paint job, and rushing through it can undo your efforts quickly.
What Do Experts Say About the Most Common Painting Mistakes?
According to industry professionals, one critical mistake involves ignoring environmental conditions during painting. Painting in high humidity or extreme temperatures can cause uneven drying, blistering, or peeling. Experts recommend painting in moderate weather and ensuring adequate ventilation—details that often escape casual DIYers. For a comprehensive guide on preparing your space and timing your project, explore [local painting strategies](https://elitepainterpro.com/painting-your-home-top-local-painting-strategies-revealed).
Moreover, many assume that applying fewer coats saves time, but in reality, it compromises coverage and longevity. Thin coats might dry faster but tend to appear streaky and less resistant to wear. Applying multiple, even coats, and allowing proper drying time between them ensures a richer color and better protection. This nuanced understanding can make the difference between a mediocre finish and a professional-looking result.
Be cautious of the trap of choosing the same finish for every surface. For example, using a high-gloss paint on interior walls can highlight imperfections, while low-sheen finishes are more forgiving and easier to maintain. Recognizing the unique properties of each finish enables you to make informed decisions that match your specific needs. Want to dive deeper? Check out [transforming spaces with local painting](https://elitepainterpro.com/transforming-spaces-local-painting-solutions-for-every-budget) for expert insights.
Remember, mastering these hidden nuances takes experience and attention to detail. If you’re eager to elevate your painting projects and avoid costly mistakes, consulting with professionals can provide tailored advice and quality assurance. We’ve covered some of the most common misconceptions and advanced pitfalls—so next time you plan a paint job, go beyond the basics and apply these insights for a flawless finish.
Have you ever fallen into this trap? Let me know in the comments! For more expert tips on achieving stunning results, don’t hesitate to explore our comprehensive [painting resources](https://elitepainterpro.com/unlock-the-power-of-professional-painting-for-a-stunning-home).
Keeping It Working: Essential Tools and Maintenance Strategies
Investing in quality tools is the foundation of durable, professional-looking paint jobs that stand the test of time. I personally swear by a high-grade Wagner spray gun for large surfaces—its adjustable nozzle and consistent flow rate allow for smooth, even coats, reducing the risk of drips and brush marks. Over the years, I’ve learned that cheap sprayers often clog or unevenly distribute paint, leading to costly touch-ups. For detailed work or tight corners, I rely on Purdy brushes with tapered handles, which provide superior control and minimize fatigue during extended projects. Master the art of house painting by choosing tools tailored to each task—this not only saves time but enhances finish quality.
Maintaining your equipment is equally crucial. After every project, thoroughly clean brushes and rollers with warm, soapy water or the appropriate solvent, depending on your paint type. Using the vinegar hack for brushes is a game-changer—soak brushes in vinegar to loosen dried paint and restore flexibility. Regularly inspect spray tips and replace worn nozzles to ensure consistent spray patterns. A tiny investment in preventative maintenance extends the life of your equipment, saving you money long-term. Remember, clean and well-maintained tools contribute directly to a cleaner, more precise finish, reducing the need for re-coating and repairs down the line.
Choosing the Right Protective Coatings
Applying durable topcoats like elastomeric paint on exterior stucco or using low-VOC primers for interior walls significantly influence long-term performance. I recommend using elastomeric coatings in areas prone to cracks or water intrusion because of their flexibility and water resistance, which prevent peeling and cracking. For interior projects, Opt for high-quality primers that block stains and facilitate better adhesion for your topcoat, especially if you’re painting over previously stained or damaged surfaces. Proper application techniques—such as using a high-quality roller and maintaining a wet edge—are vital for creating seamless finishes that endure harsh weather and daily wear. These small, consistent maintenance practices can double the lifespan of your paint job and keep your home looking fresh for years.
Predicting Future Trends in House Painting Tools
Looking ahead, I believe automation and smart tools will revolutionize local painting. Automated spray systems with integrated color-matching technology could make touch-ups quicker and more precise, while AI-powered maintenance apps might alert homeowners when brushes or sprayers need servicing. Embracing these innovations now prepares you for more efficient projects in the future. For now, master current advanced techniques like multi-coat application and proper surface prep, which are proven to enhance longevity and aesthetics—these foundational skills will always be relevant despite technological advances. Check out this guide for contemporary ideas that complement your tool investments.
How do I maintain my equipment over time?
Regular cleaning after each project is non-negotiable. Use appropriate brushes, solvents, and cleaning routines to prevent paint buildup and corrosion. Store tools in a dry, cool place to avoid warping or rusting. Periodic inspection and replacing worn parts, like spray tips or roller covers, prevent subpar finishes and extend the life of your gear. Investing a little time in maintenance pays dividends by reducing repair costs and ensuring consistent quality. For detailed tips on equipment upkeep, visit this resource. Experiment with cleaning brushes in vinegar solution for stubborn paint and see how much longer your tools last while maintaining optimal performance—it’s a simple step that can add years to their usability. Remember, well-cared-for tools deliver professional results and can be a game-changer in your long-term painting endeavors.
Lessons That Changed How I Approach Painting Forever
One of the most profound realizations I made was the importance of patience and attention to detail. Rushing through surface prep or applying thin coats might save time initially but ultimately leads to uneven finishes and repeated work. Taking the extra time to sand, prime, and build multiple coats, especially when working with low-sheen paints, pays off with a flawless, durable result.
I also learned that not all tools are created equal. Investing in top-quality brushes and rollers, along with proper maintenance, dramatically improves the quality of your work. A tiny bit of vinegar in cleaning brushes can extend their usability, saving money and ensuring smooth application every time. These small investments in equipment and care can transform your projects from mediocre to professional-looking.
Another lightbulb moment was understanding finish selection. Choosing the right paint sheen—like low-sheen—can significantly reduce maintenance efforts while enhancing appearance. It’s a balance I now prioritize, especially in high-traffic areas where durability is key. Remember, the right finish makes your walls easier to clean and more resistant to everyday knocks and smudges.
Tools and Tactics That Keep My Projects Running Smoothly
Over the years, I’ve curated a set of reliable tools that I trust for every job. A high-capacity Wagner spray gun consistently delivers even coats on large surfaces without drips. For edges and corners, I depend on Purdy brushes, giving me superior control and less fatigue during prolonged work sessions. I highly recommend exploring these expert painting tips to elevate your tool game.
Proper maintenance of these tools is equally vital. Regular cleaning—using warm, soapy water or appropriate solvents—and inspecting spray tips or replacing worn parts ensure consistent results. A simple vinegar soak can revitalize dried paint on brushes, making them nearly as good as new. This level of care prevents costly rework and guarantees a professional finish for each project.
Choosing the right protective coatings—like elastomeric paint for exteriors or high-quality primers for interiors—can greatly extend the lifespan of your work. Applying these with correct techniques, such as maintaining a wet edge, results in seamless, lasting surfaces. Consistent maintenance and thoughtful choices in products can make your paintings stand the test of time, sparing you future touch-ups and repairs.
Your Next Steps Toward Perfecting House Painting
Understanding the nuances of paint formulations and surface prep is only part of the puzzle. Embracing innovation—like smart tools or eco-friendly paints—can further refine your craft. Yet, mastering foundational skills such as multi-coat application and thorough surface cleaning remains essential, regardless of technological advances. If you’re eager to step up your painting game, check out this guide to unlock new potential in your projects.
Remember, every good painter begins with a willingness to learn and improve. Your journey toward impeccable walls starts with a single brushstroke, and I hope these insights inspire you to approach each project with confidence and care. Whether you’re repainting a single room or refreshing an entire building, your dedication will shine through in the end result.
Stay Inspired and Keep Achieving Greatness
Every wall you transform is a testament to your skill and meticulous attention. Don’t be afraid to experiment with finishes, tools, and techniques—each experience builds your expertise. Keeping an eye on evolving trends and continuously honing your craft will ensure your work remains top-tier. If you’ve faced challenges or discovered your own tricks along the way, share your story below. Your insights could inspire others to master the art of house painting and enjoy its long-lasting rewards.