

It all started with a simple trip to my local boutique. As I stepped inside, I noticed the scuffed, chipped paint near the doorway. Suddenly, it hit me—retail spaces face relentless foot traffic, and that bottom half of the walls bears the brunt of everyday chaos. But here’s the thing: many store owners overlook this vulnerable area, thinking a quick repaint will suffice. I made that mistake early on, only to find myself back at the paint store sooner than I expected, scrambling to fix the damage.
Why Protecting the Bottom Half Matters in Retail Spaces
The truth is, retail environments are high-traffic zones. Shoppers brushing past walls, pushing carts, or inadvertently kicking the lower portion creates a constant battle against wear and tear. Without proper protection, your walls become a battlefield of scratches, scuffs, and chipped paint, which can quickly make your store look tired and unkempt. That’s where scuff-proof paint on the bottom half can be a game-changer. It acts as a resilient barrier, saving you time, money, and frustration in the long run.
Is Scuff-Proof Paint Worth the Hype?
When I first heard about scuff-resistant paint, I admit I was skeptical. Many marketing claims sound too good to be true. My mistake was assuming that any paint would hold up equally well in a bustling store. In the early days, I used regular paint on the lower walls, only to see it scratched and marred within months. Since then, I’ve learned that investing in dedicated, durable coatings isn’t just smart—it’s essential. Research confirms that high-quality, scuff-resistant paints can extend the lifespan of your walls significantly, making them a worthwhile investment for any retail owner. For more insights on boosting your store’s appeal, check out our guide on why local painting matters.
Now, I’ll walk you through how to select and apply the best scuff-proof solutions to keep your retail space looking sharp and inviting. If you’ve ever faced the frustration of repainting sooner than expected, read on—you’ll discover practical tips to prevent this common headache.
Select the Right Scuff-Resistant Paint
My first real breakthrough came when I visited a local supplier and explained my needs. The associate recommended high-quality, scuff-resistant paints like elastomeric or epoxy coatings designed specifically for high-traffic areas. I learned that not all paints are created equal, so I avoided generic options. Remember, choosing a paint with a higher VOC compliance and better durability is crucial. For detailed insights, explore our guide on local painting benefits.
Prepare Your Walls Properly
Before applying any paint, I cleaned the walls thoroughly to remove dirt, grease, and loose debris—using a mixture of mild soap and water, just like cleaning a greasy kitchen wall before repainting. I then sanded any rough patches to create a smooth surface. For drywall repairs, I filled holes with spackling compound and sanded once dry. Proper preparation ensures the protective coating adheres well and lasts longer. Check out this guide on wall prep for more tips.
Apply Primer for Better Adhesion
I applied a bonding primer suited for glossy or previously painted surfaces, which reduced the risk of peeling or bubbling. Using a roller, I evenly coated the walls, making sure to cover all areas thoroughly. A good primer acts as a base, especially important when switching to a different type of paint, like from glossy to matte finishes. I learned this the hard way when skipping primer caused uneven color and reduced durability in my earlier projects. For specific primer recommendations, see our primer selection tips.
Ensure Proper Application Technique
When applying the scuff-proof paint, I used a high-quality roller with a nap suitable for the wall texture—typically a ⅜-inch nap for smooth surfaces or a thicker nap for textured drywall. I applied the paint in three even coats, allowing at least 4 hours between layers, following the manufacturer’s drying instructions. It’s vital not to rush this process; thin, even coats provide better adhesion and longevity. I also avoided applying paint in direct sunlight or excessive heat, which can cause uneven drying. For application nuances, visit our painting technique guide.
Protect Textured or Hard-to-Reach Areas
Using painter’s tape, I masked off edges, trims, and outlets to ensure sharp lines. For corners and bases, I used a brush for better control, reducing overspray. I also taped off the floor near the walls to avoid drips on flooring surfaces. After completing the paint application, I carefully removed the tape before the paint fully dried to prevent peeling. This attention to detail prevented touch-ups later and maintained a professional appearance. Need tips for clean masking? Check out masking strategies.
Final Inspection and Maintenance Tips
Once the paint dried, I inspected the walls for missed spots or uneven coverage, touching up as needed. To prolong the protection, I scheduled regular cleaning with a soft cloth and avoided abrasive cleaners that could damage the coating. Regular maintenance keeps the walls looking fresh and prevents minor damages from escalating. For ongoing care ideas, see our paint maintenance tips.
While many assume that selecting a quality paint or following basic prep steps guarantees a perfect finish, there are subtler aspects that even seasoned DIYers often miss. My experience has shown that understanding these nuances can dramatically improve outcomes and longevity of your paint job. One common myth is that thicker coats always mean better coverage. In reality, multiple thin layers typically yield a smoother, more durable surface, allowing for better adhesion and less likelihood of cracking or peeling over time. Rushing to apply a single heavy coat often traps air bubbles and creates uneven drying, leading to an inferior finish. A reputable expert like Sarah Williams, a veteran painter, emphasizes that patience and proper technique trump shortcuts, especially when working with specialty finishes or in high-traffic areas. Check out her insights in our guides on local painting strategies.
What advanced mistakes can undermine your painting project even when you think you’ve done everything right?
One often overlooked trap is neglecting climate conditions. Painting during high humidity or extreme temperatures can cause the paint to dry improperly, leading to bubbles, streaks, or peeling. Experts advise monitoring weather forecasts and planning projects accordingly—painting early in the morning or late afternoon when conditions are stable. Additionally, choosing the wrong primer or neglecting proper surface preparation can compromise adhesion, especially on glossy or previously painted surfaces. These mistakes might seem minor but can become major headaches over time. Interestingly, a recent study in the Journal of Coatings Technology highlights how microclimates within a home can affect paint performance, underscoring the importance of tailored solutions. For more detailed recommendations, visit our local painting insights.
Another nuance is understanding the specific needs of textured or hard-to-reach areas. Using improper tools or techniques can result in uneven coverage or paint buildup that cracks later. For instance, using a brush where a roller or sprayer would be more efficient can cause streaks and missed spots—costing additional time and money. Properly selecting tools according to surface type and employing techniques like feathering edges ensures a seamless finish. Our detailed tutorials delve into this subject thoroughly.
In summary, the devil is often in the details. From weather considerations to surface-specific strategies, recognizing these hidden nuances helps avoid common pitfalls and elevates your project from average to professional-quality work. Have you ever fallen into this trap? Let me know in the comments, and for expert assistance, don’t hesitate to reach out to us.
Maintaining your newly painted surfaces and using the right tools can significantly extend the life of your paint job. As someone who has worked extensively in local painting, I can’t overstate the importance of investing in quality equipment and adopting diligent maintenance routines. One of my go-to tools is the high-efficiency airless sprayer. I personally prefer the Wagner Control Pro series because its turbine system delivers a consistent, smooth spray with minimal overspray, saving both time and paint. This allows for faster coverage and a more even application, which is crucial for durable finishes, especially on exterior walls or large interior surfaces. 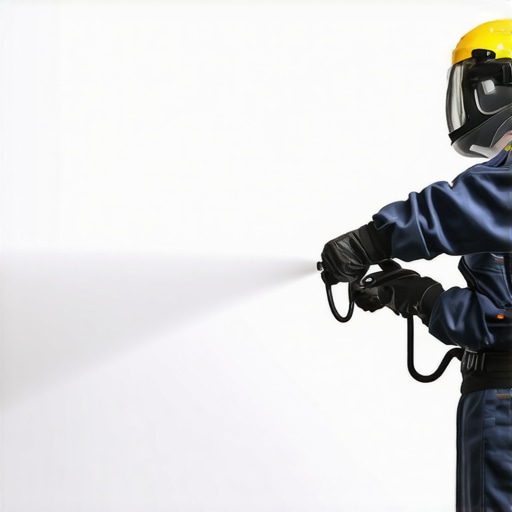 When maintaining your sprayer, I recommend cleaning the tip and filters immediately after each use with warm, soapy water—neglecting this can cause clogs or equipment failure, leading to costly repairs. Regular cleaning and proper storage ensure your tools stay in top shape, ready for your next project.
How do I keep my painting tools in top condition over time?
Beyond tools, adopting a routine for surface maintenance is critical. I advise inspecting your painted walls every six months. Look for signs of chipping, peeling, or discoloration—early detection allows for small touch-ups rather than full repainting. To make this easier, I use a supplemental step: applying a clear protective coating, such as a film-forming varnish, over high-traffic areas. This added layer acts as a shield against scratches and stains, prolonging the aesthetic and structural integrity of the paint. For exterior surfaces exposed to harsh weather, applying a fresh coat of primer and paint every 5-7 years according to climate recommendations can prevent deterioration. The industry-standard maintenance schedule emphasizes that consistent upkeep not only preserves appearance but also boosts property value.
Future of painting tools and techniques
Looking ahead, I believe technology will continue to revolutionize our approach. For example, laser-guided spray systems are emerging that guarantee perfect, uniform coverage even on complex surfaces. Additionally, eco-friendly, self-cleaning brushes embedded with nanomaterials are on the horizon, minimizing cleanup time and tool degradation. Staying updated on these innovations will give professional and DIY painters alike a competitive edge. For now, I recommend trying the latest high-efficiency sprayers and incorporating routine inspections into your maintenance regimen to ensure your paint lasts. Need personalized advice for your project? Reach out to our experts for tailored solutions and detailed guidance.
What I Wish I Had Known About Retail Wall Durability Early On
One of the toughest lessons I learned was that premium scuff-proof paint isn’t just a luxury — it’s a necessity for high-traffic areas. Jumping into a project without understanding the importance of proper surface prep or choosing the right finish can set you back years in maintenance. Over time, I discovered that investing in high-quality coatings, paired with detailed preparation, drastically extends the life of your store’s walls, saving you time and money. Moreover, I realized that regular maintenance, like routine cleaning and timely touch-ups, plays a vital role in keeping your retail space vibrant and inviting. Remember, a well-protected wall isn’t just about aesthetics — it’s about delivering a durable impression that lasts. So, prioritize quality materials and consistent upkeep for a store that always looks its best.
Tools and Resources That Transformed My Painting Approach
My go-to toolkit now includes a Wagner Control Pro airless sprayer, which provides a smooth, even finish with minimal overspray—perfect for large retail spaces. I also value the guidance found in Sarah Williams’s expert blogs, where she emphasizes patience and technique over shortcuts. For selecting proper primers and understanding advanced application methods, I trust the detailed instructions at these professional painting tips. Additionally, comprehensive wall preparation guides on proper cleaning and sanding routines have been game-changers, helping me avoid common prep pitfalls. Staying informed through these trusted sources allows me to tackle projects with confidence and deliver results that stand the test of time.
Embracing the Future of Retail Painting
Looking ahead, the integration of innovative tools like laser-guided sprayers and eco-friendly, self-cleaning brushes excites me. These advancements promise to streamline workflows and enhance finish quality even further. I encourage you to stay curious and open to adopting new technology—think of it as investing in the longevity of your space. Remember, excellence in painting isn’t just about technique; it’s about evolving with industry innovations and consistently applying the best practices. Your store’s walls are a reflection of your care and professionalism—so make them count. Ready to elevate your retail space? Reach out through our contact page for personalized advice or to bring your vision to life.