

It was a warm Saturday morning when I eagerly stepped outside, paintbrush in hand, ready to transform my neglected fence. But as I pulled back the tarp and gazed at the surface, a sinking feeling hit me. The wood looked damp, almost like I was about to lay fresh paint on a sponge. I shrugged it off initially—after all, the sky was clear, and the sun was shining. But as the hours passed, I noticed the paint wasn’t drying properly; instead, it was peeling and bubbling in ways I knew weren’t supposed to happen.
Why humidity can sabotage your outdoor painting project
That lightbulb moment taught me a harsh lesson: moisture in the air is one of the sneakiest enemies when you’re trying to paint outside. The truth is, if you paint too damp, the paint won’t adhere correctly, leading to cracks, peeling, and all those frustrating touch-ups later. I realized I’d overlooked the clues—like the feel of the surface or the humidity forecast—and paid the price. According to experts, painting when the moisture level in the air is high can cause adhesion problems that won’t become obvious until months down the line. It’s a mistake I made early in my DIY journey, and one I’d hate for you to repeat.
Is the humidity rule really that critical? You might wonder if all this fuss is necessary or just another painter’s myth. I used to brush it off, thinking a bit of damp wouldn’t matter. But, in reality, ignoring the humidity can turn a weekend project into a months-long ordeal. For instance, I underestimated the impact of dew in the early mornings, which resulted in paint failures that could have been avoided with just a simple check. That’s why understanding the humidity rule isn’t just about following some strange superstition—it’s about protecting your work and saving yourself time and money. If I had known earlier how crucial it was to check the moisture levels, I’d have skipped countless headaches. You can learn from my mistake by starting with the basics of when it’s actually too damp to paint outside—something I’ll help you master in upcoming sections.Test Moisture Levels Rigorously
Before you pick up that brush, ensure the surface is truly dry. Use a moisture meter, which works like a thermometer for moisture, inserting the probes into the wood or concrete to get a precise reading. Aim for moisture levels below 15%. I learned this the hard way when I skipped this step and ended up peeling paint after just a few months. Carefully testing the moisture content can save you from those costly reworks.
Prepare the Surface for Optimal Adherence
Next, strip away any loose paint, dirt, or mold. Use a stiff brush or a pressure washer for stubborn grime. Think of it like cleaning your car engine—thorough prep ensures everything runs smoothly. Pay special attention to areas with peeling or cracked paint, and sand them down to create a smooth, even canvas. This step is crucial; skipping it is like trying to stick wallpaper over a dusty wall—disasters happen.
Address Existing Damage Before Painting
If your surface has cracks, holes, or rot, repair them first. Fill small cracks with exterior-grade filler, and replace rotten wood. For larger issues, consider consulting professionals or checking out this guide on why your exterior caulk is cracking. Proper repairs prevent moisture intrusion and extension of the paint’s lifespan. I once tried to skip repairs on a fence, and water seeped behind the paint, causing it to bubble and peel. A quick fix now can avoid bigger headaches later.
Choose the Right Painting Equipment
Use rollers and brushes designed for outdoor use. For flat surfaces, a good synthetic roller yields smooth, even coverage; for edges and tricky spots, a high-quality angled brush is essential. This is akin to using the right tools for carpentry—it makes the job easier and results better. I usually keep a 3-in-1 combo of brushes and rollers, which I bought from this resource. Proper tools make a significant difference in achieving a professional finish.
Apply Primer When Necessary
For surfaces with stains, previous dark colors, or uneven textures, apply a high-quality primer first. Primer acts like a primer coat on a canvas—it ensures the paint adheres properly. Skipping primer might cause uneven color or peeling later on. For example, I painted over a stained wall once without primer, and the stains bled through. Remember, primer not only improves adhesion but also enhances color vibrancy, giving your project a durable foundation.
Paint in Suitable Conditions
Check the weather forecast meticulously. Best conditions are dry with humidity under 70% and temperatures between 50°F and 85°F. Painting in the rain or high humidity is like trying to bake bread on a humid day—results will be compromised. I learned this when I attempted a late afternoon painting session; the moisture in the air caused the paint to dry unevenly, leading to a textured surface. Planning your painting schedule around favorable weather can prevent these issues.
Use the Wet Edge Technique for Even Coverage
This method involves maintaining a ‘wet edge’—working with fresh paint before it dries—to avoid lap marks. Think of it as blending colors seamlessly in a painting; stopping and starting leaves streaks and inconsistencies. When I painted my porch, I kept a wet edge by planning my strokes strategically, which resulted in a smooth, uniform surface. Practice this technique with a good-quality brush or roller and keep an organized workflow for best results.
Final Inspection and Touch-Ups
Once the paint has dried, examine your work with a bright flashlight held at an angle. This helps you spot uneven areas or thin spots needing touch-up. I did this on my last project and caught a patch I missed, saving me from calling a professional later. Don’t rush this step; it ensures a professional finish and long-lasting results.
Many DIY enthusiasts and homeowners operate under misconceptions about local painting that can compromise the quality and longevity of their projects. One widely held belief is that choosing the cheapest paint ensures cost savings, but in reality, low-quality paints often require more coats and tend to fade or peel faster, leading to higher expenses in the long run. Another misconception is that lighter colors always reflect heat better; however, finish type and paint formulation play crucial roles in thermal performance, making some dark shades surprisingly energy-efficient when properly applied.
A common trap many fall into is neglecting proper surface preparation, thinking that a fresh coat can mask imperfections. Skipping cleaning, sanding, or priming can lead to uneven texture, poor adhesion, and early failure of the paint. This oversight often results in a DIY project resembling a patchwork rather than a seamless finish.
Let’s tackle a more nuanced question: **Is there ever a time when skipping primer is acceptable?** Expert advice suggests that for bare or stained surfaces, primer is essential to ensure adhesion and prevent bleed-through, especially in high-traffic or outdoor areas. However, advances in paint technology have introduced self-priming paints that can save time on small or clean surfaces, but these are not a one-size-fits-all solution. For instance, applying self-priming paint over shiny or uneven surfaces without proper preparation may still result in poor coverage or peeling over time.
Beware of the myth that all paint finishes are interchangeable without consequence. Choosing the right sheen—like eggshell instead of matte for an office—can dramatically improve durability and ease of cleaning, as highlighted in this detailed guide on why your office needs eggshell finish. Additionally, some misunderstand the importance of weather conditions, mistakenly assuming that painting outdoors is flexible regardless of moisture or temperature levels. As I’ve emphasized before, painting when the humidity exceeds recommended levels can cause bubbling and peeling, negating all previous efforts.
The nuances of local painting demand attention to detail, not just the basic steps. For advanced results, consider the composition of your paint, the surface’s current state, and environmental factors—all of which intertwine to determine a successful, long-lasting finish. Skipping these insights might seem like saving time initially but can lead to costly corrections later.
In conclusion, let’s shed light on common pitfalls and misconceptions that can trip up even seasoned DIYers. Have you ever fallen into this trap? Let me know in the comments and share your experience so others can learn from your story.
Keep Your Painting Equipment in Top Shape for Long-Term Success
Maintaining your tools is just as important as selecting the right paint. Regular cleaning and proper storage prevent rust and buildup that can compromise application quality. I swear by using a combination of mineral spirits for brushes and pressure washers for rollers—these methods ensure pristine tools that deliver smooth finishes every time. When cleaning brushes, I dip them in mineral spirits immediately after use and then wash with warm soapy water to remove residual paint, extending their lifespan and performance. Maintaining your equipment doesn’t just save money—it guarantees professional-looking results that stand the test of time.
Smart Storage Solutions Prevent Damage and Waste
Storing tools properly, like hanging brushes on a dedicated rack and sealing unopened paints with airtight lids, helps prevent drying out and contamination. Consider investing in a dedicated toolbox with compartments for brushes, rollers, and trays—organizing your gear cuts down on time and frustration during touch-ups or future projects. I also recommend labeling your paints and storing them upright in a cool, dry place; this prevents accidental spills and portioning issues that can ruin your work. Proper storage practices ensure your equipment remains ready for the next big project or routine maintenance.
Use Innovative Tools to Enhance Efficiency
Investing in specialized tools can make your long-term painting efforts smoother. For example, I personally favor high-quality extension poles with adjustable heads, which allow you to reach tricky spots without scaffolding—saving time and reducing fatigue. Additionally, a paint sprayer with variable settings speeds up large-area projects while minimizing overspray when used correctly. Advanced tools like edge-rolling systems can produce perfectly crisp lines, reducing the need for touch-ups later. As painting technology evolves, staying updated with the latest equipment—such as ergonomic brushes designed for precision—gives you a significant edge in achieving professional results.
How do I maintain my paints and tools over time?
Properly cleaning and storing your paints and tools prolong their effectiveness. For instance, sealing leftover paint with a silicone gasket lid prevents skinning and spoilage, so you can reuse it later. Regularly inspecting your brushes and rollers for bristles or fibers that might have frayed ensures smooth application in your ongoing projects. Using a dissolving agent like denatured alcohol for cleaning oil-based brushes, and warm water for latex paints, maintains their pliability and performance. These practices not only protect your investments but also uphold the quality of your work—ultimately leading to longer-lasting, better-looking results. I recommend checking out expert advice on how to clean paint splatters without damaging the finish for additional cleaning strategies. Don’t shy away from trying a professional-grade brush cleaner—it could be the game-changer for preserving your tools.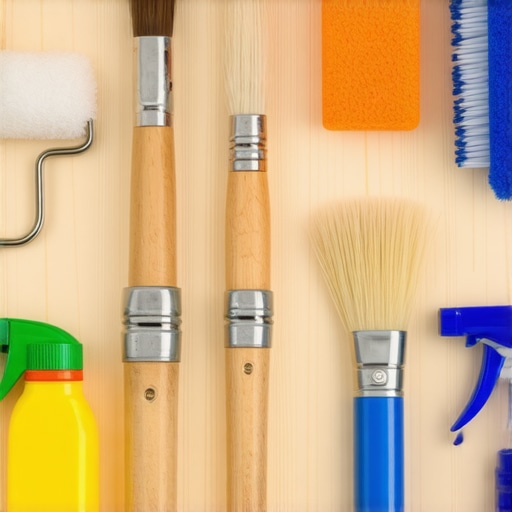
Looking ahead, the trend in house painting tools points toward smarter, eco-friendly equipment that reduces waste and improves accuracy. Automated paint dispensers and sensor-guided sprayers are being developed to ensure consistent coverage with minimal effort. These innovations promise to make maintenance even easier while boosting the durability of your paint jobs. Embracing these advancements now will prepare you for a future of effortless, high-quality painting—so why not start with regularly inspecting and cleaning your current tools today? Maintaining your equipment with precision and care is the foundation for a lasting paint finish that resists peeling, cracking, and weathering over the years.
What I Wish Someone Told Me Before I Started Painting
One of the most eye-opening lessons I learned was that surface prep isn’t just a step—it’s the foundation of a flawless finish. Skipping thorough cleaning or sanding can turn a DIY project into a peeling nightmare months later. I once painted over peeling paint without addressing the underlying issues, and the whole effort was wasted when it started bubbling again. Patience here saves time and money in the long run.
Another revelation was the importance of environmental awareness. Painting in high humidity or when rain’s forecasted is like trying to bake bread on a humid day—results are compromised. Using a moisture meter and checking weather conditions has become my routine to ensure perfect adhesion and durability. It’s a small step that can save you from premature peeling or cracking.
Choosing quality tools and paints was something I underestimated initially. Investing in the right brushes, rollers, and premium exterior paints may seem costly upfront but pays dividends in smoother application and longer-lasting results. For example, a high-quality roller can cut your application time while delivering an even coat that resists peeling over time. It’s about working smarter, not harder.
Tools and Resources That Transformed My Approach
Over the years, I’ve come to rely on some key resources that elevate my painting projects. The favorite brushes and rollers from this guide have made a noticeable difference in achieving professional-looking results with less effort. They provide better control and finish, especially on tricky edges and textured surfaces.
For tackling stubborn paint, the cleaning techniques I learned from trusted sources have extended the lifespan of my brushes and tools, saving me money and ensuring consistent quality. Additionally, books like “Mastering Exterior Painting” have provided me with deeper insights into surface preparation and environmental factors, reinforcing the importance of foundational work.
Embracing a Growth Mindset in Your Painting Journey
One of the most inspiring realizations is that mistakes are part of growth. When I first started, I worried about imperfections, but over time I learned to see them as lessons. For example, a poorly cut edge became an opportunity to master the wet edge technique, which now helps me achieve seamless lines effortlessly. Approaching each project with curiosity and patience transforms the process from chore to craft.
Remember, every painter begins somewhere. With each project, you refine your skills, understand environmental nuances, and choose tools that match your style. Don’t shy away from experimenting—embrace the learning curve as part of the journey towards professional quality. The more you invest in understanding these insider lessons, the more confident you’ll become in producing durable, beautiful results that stand the test of time.
Your Next Step Forward
Now that you’ve uncovered some of my personal insights and trusted resources, it’s time to apply them to your own projects. Whether you’re tackling a fence, walls, or specific features like trim or concrete floors, remember that patience, preparation, and the right tools make all the difference. For more detailed strategies on surface preparation and paint selection, I recommend exploring this essential guide. Share your experiences below—what’s the biggest lesson you’ve learned in your local painting journey? Your story might help others avoid common pitfalls and achieve lasting results.