

It was a frustrating weekend. I had just finished repainting my bathroom, feeling proud of how fresh and clean it looked. But within a few weeks, I noticed the paint was cracking, peeling, and worse—actually looking worse than before I started. That lightbulb moment hit me hard: I realized I’d fallen into a common trap that many homeowners do—underestimating what causes bathroom paint to crack in the first place.
Why Your Bathroom Paint Is Cracking and What You Can Do About It
If you’ve ever spent time and money on a bathroom paint job only for it to fall apart prematurely, you’re not alone. Believe me, I’ve been there, and it’s disheartening. These cracks and peels aren’t just cosmetic nuisances; they can signal deeper issues—like moisture problems or incorrect painting techniques—that, if left unaddressed, can lead to mold, rot, or even more costly repairs down the line.
Got Your Skeptical Side Ready? Think Again
Here’s a truth I learned the hard way: early on, I thought applying a single coat of high-quality paint would solve everything. I skipped thorough surface preparation, especially moisture testing, and went straight to painting. That mistake, an all-too-familiar rookie error, set the stage for failures. If you’ve rushed through prepping your walls or ignored the moisture levels, you might be setting yourself up for the very cracking problems you want to avoid. Want to see how moisture plays a role? Check out this wet sponge test and get real about what’s lurking behind your walls.
In this post, I’ll walk you through the real reasons your bathroom paint cracks—beyond just bad luck—and, more importantly, how to fix and prevent it for good. Ready to tackle the root causes and achieve a flawless finish that lasts? Let’s dive in.
Prioritize Surface Preparation
Start by thoroughly cleaning the walls with a mild dish soap to remove grease and dirt, as these can prevent paint from adhering properly. Use a dish soap trick to test for grease; if a greasy film remains after cleaning, the paint will likely peel later. Next, inspect the walls for moisture damage or mold. Applying a moisture meter or performing a simple wet sponge test helps identify hidden issues that could cause future cracking.
Address Moisture Problems First
Moisture infiltration is a common culprit behind paint failure in bathrooms. Fix any leaks, improve ventilation, and consider installing exhaust fans. For existing moisture issues, use a dehumidifier and wait until walls are fully dry before proceeding. A handy method I used was to run a blue light over the surface to identify areas with residual moisture or earlier repairs that might not have dried completely.
Choose the Right Products for the Job
Select high-quality, mold-resistant, bathroom-specific paints that adhere well in humid environments. Remember, cheaper paints might seem tempting but can crack or peel prematurely. I once tried a budget paint and watched my efforts fade in just a year. For durability, consider paints with added polymers that create a flexible film, accommodating wall movement—saving you from future cracks.
Prep Your Walls Properly
Sand any rough patches and fill holes with a suitable primer or filler. When sanding, use a good brush or a sanding sponge to smooth surfaces. If you’re dealing with glossy or oil-based paint remnants, lightly sand the area or apply a deglosser to ensure proper adhesion. For tricky edges or corners, use painter’s tape carefully and avoid rush jobs, as uneven tape application leads to paint bleed and touch-ups, which can crack over time.
Apply Primer Carefully and Uniformly
Primers create a stable base and block stains. Use a high-quality primer suitable for high-moisture areas, and apply with a roller or brush in thin, even coats. Allow proper drying time—usually 24 hours—before painting. Skipping primer or rushing the process can cause incompatibility, leading to cracks and peeling. Remember, imperfections or moisture trapped beneath primer can manifest as cracks down the line, so patience here pays off.
Use Proper Painting Techniques
When applying paint, use a high-quality roller designed for bathroom walls, and work in overlapping passes to prevent streaks. Avoid overloading your brush or roller; dipped brushes should have just enough paint to avoid drips. Don’t paint in thick layers; multiple thin coats will deliver a smoother, more durable finish. I once learned this the hard way—applying thick coats caused drips and cracked as the paint dried unevenly. Gentle, even strokes yield the best results and prevent future problems.
Allow Adequate Drying and Curing Time
After painting, give the walls ample time to dry and cure—at least 48 hours—before exposing them to moisture or cleaning. If you’re in a hurry, using a hairdryer trick on low heat can speed up drying, but avoid direct heat to prevent uneven curing. Rushing this step can trap moisture beneath the surface, which later causes cracks or peeling as it escapes.
Maintain Your Finish
Keep humidity levels in check with proper ventilation, and clean walls gently with a damp cloth—avoiding harsh chemicals that can weaken paint. If you notice any early signs of cracking or peeling, address them immediately with light sanding and touch-ups. Regular upkeep helps your bathroom paint stay flawless and crack-free for years.
When it comes to house painting, many believe that picking the right color or high-quality paint guarantees a lasting finish. However, as an experienced painter, I can tell you that this oversimplification overlooks crucial nuances that can make or break your project’s durability. One common misconception is that surface preparation isn’t as critical for local projects as it is for large-scale jobs. In reality, neglecting detailed surface prep—like thoroughly inspecting for moisture or previously applied coatings—can lead to early cracking or peeling, regardless of paint quality. Another often-missed detail is understanding the interaction between different paint types or brands. Mixing oil-based primers with latex topcoats without proper compatibility checks can trap moisture or cause adhesion issues, leading to bubbling or flaking over time. Many homeowners also underestimate the importance of climate considerations; applying paint in high humidity or low temperatures can significantly delay curing and increase susceptibility to cracks, as noted by industry experts. A specific trap I advise everyone to avoid is rushing the finish! Applying thicker coats to save time might seem tempting but can cause trapped solvents, resulting in surface cracks during drying or curing phases. To ensure your project’s success, pay close attention to the subtle factors—like the condition of existing paint layers, moisture levels, and environmental conditions—that might seem minor but wield major influence in the long run. Have you ever fallen into this trap? Let me know in the comments.
Keeping Your Paint Job Healthy Over Time
Maintaining your painted surfaces is crucial for ensuring longevity and preserving their fresh appearance. The right tools and routine checks can make all the difference. Personally, I rely on a few specialized items that have proven their worth in my home renovation projects, especially for local house painting endeavors.
Invest in Quality Solvent and Water-Based Cleaners
Regularly cleaning your painted walls with a mild, pH-neutral cleaner helps keep dust, grease, and mold at bay. I prefer using a gentle dish soap combined with distilled water, which prevents buildup and maintains the paint’s integrity. For stubborn stains, a solution of vinegar and water packs a punch without damaging the finish. This proactive approach curtails early deterioration, saving you time and money in the long run.
Keep Paint Tools in Prime Condition
High-quality brushes and rollers are an investment that pays off in smooth, even coats. After each project, I thoroughly clean brushes with a specialized brush cleaner or warm soapy water, depending on the paint type. For brushes used with oil-based paints, I use mineral spirits. Proper cleaning and storage—such as wrapping brushes in plastic wrap—extend their lifespan and ensure impeccable results for future touch-ups or projects.
Use Specific Equipment for Moisture Control
Moisture is a silent enemy leading to peeling or mold growth. I consistently check wall moisture levels using a reliable moisture meter, especially before repainting or touch-ups. Additionally, a dehumidifier can actively control humidity, especially in areas prone to dampness like bathrooms or basements. Incorporating these tools into your maintenance routine reduces the risk of paint cracking or blistering over time.
Employ Visual Inspection and Spot-Treatments
Regular inspections using a bright flashlight can reveal cracks, peeling, or mold early. Techniques like the blue light inspection help identify hidden moisture issues behind walls. Address small problems immediately with patching compounds and touch-up paint to prevent them from escalating into costly repairs.
Planning for the Future: Scaling and Upkeep
If your property expands or you plan routine renovations, selecting scalable tools and maintaining a comprehensive schedule is vital. Modern spray systems, for example, can handle larger projects efficiently, provided they are cleaned correctly after use. Investing in a versatile range of brushes and rollers suited for different surfaces ensures you can adapt to new demands without compromising quality. Remember, consistent maintenance extends the lifespan of your paint and saves money over time.
How do I Keep My Painted Surfaces in Top Shape?
To keep your painted walls looking fresh, make it a habit to clean surfaces gently, monitor moisture, and perform routine checks for chips or cracks. Implementing a scheduled repainting or touch-up plan—every 3-5 years—helps prevent minor issues from worsening. Also, stay vigilant about environmental factors like humidity and temperature, which can impact paint performance. By sticking to these maintenance practices, you’ll enjoy beautiful, durable finishes that stand the test of time.
Looking to improve your maintenance routine? Try adopting a moisture meter to objectively assess wall conditions before repainting—it’s a game-changer. Additionally, integrating a dehumidifier during humid months can drastically reduce mold and peeling risks. For resourceful homeowners, setting up a dedicated cleaning kit with tools like soft scrub brushes, microfiber cloths, and gentle cleansers simplifies upkeep and preserves your investment in house painting.
In the coming years, the trend towards smart home integrations might see moisture sensors and automated climate controls becoming standard in paint maintenance. Staying ahead with these innovative tools will keep your walls flawless longer, making the expense worthwhile. Remember, the key to long-lasting paint isn’t just careful application—regular, smart maintenance is your best defense against premature deterioration.
What I Wish I Knew When Painting Bathrooms
One of the most impactful lessons I learned was the importance of patience before sealing the deal. Rushing through surface prep or applying thick coats seemed like a time-saver initially, but it only led to cracks and peeling later. The real game-changer? Allowing ample drying time and understanding the delicate balance of moisture—these small adjustments made a huge difference in durability and appearance.
Another lightbulb moment came when I realized that not all paints play nicely with existing layers. Compatibility issues can trap moisture or cause adhesion problems, which become visible as cracks down the line. I now always check the compatibility of primers and topcoats, especially when working over older paint, to ensure the finish lasts.
Lastly, I’ve come to appreciate the value of environmental awareness. Painting in high humidity or cold temperatures increases failure risk. Waiting for optimal conditions, or using moisture meters, significantly extends the lifespan of your work. These insider tips, gathered from my own experiences, help create a bathroom that not only looks great but stays flawless for years.
Tools and Resources That Elevate My Craft
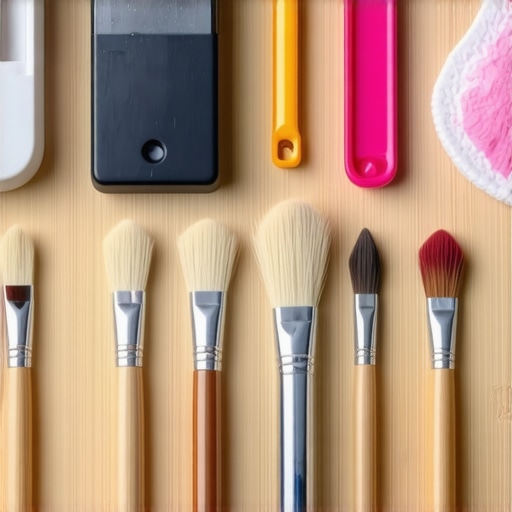
For any homeowner serious about long-lasting bathroom paint jobs, investing in quality tools makes all the difference. I swear by the best brushes and rollers — they provide smooth coats and reduce streaks, especially on tricky edges. Keeping brushes in top condition with proper cleaning routines ensures they last longer and perform better over time.
When it comes to selecting paints, I rely on brands that offer mold-resistant, bathroom-specific formulas. To verify wall conditions before starting, a blue light inspection helps spot hidden moisture or previous repairs. For moisture testing, a reliable wet sponge test provides quick insights into underlying issues. Staying equipped with these tools allows me to troubleshoot early and avoid costly repairs later.
Books and articles by seasoned painters have been invaluable. I particularly recommend resources that delve into surface prep and moisture management—they’ve saved me from countless pitfalls. Combining practical tools with expert knowledge creates a strong foundation for any bathroom painting project, ensuring results that truly last.
Your Next Move Starts Now
Armed with insider insights and the right resources, you’re well on your way to mastering bathroom painting. Remember, the secret isn’t just in applying paint but in understanding the environment, selecting the right materials, and respecting proper techniques. Each successful project builds confidence and sets new standards for durability and beauty in your home.
So, are you ready to tackle your next bathroom painting job with newfound knowledge? The difference will show in the walls, and in your satisfaction. What’s the biggest challenge you face when painting bathrooms? Share your experiences below, and let’s learn together!
**Note:** For tips on fixing common issues like peeling ceilings or moldy surfaces, explore related articles such as why your bathroom ceiling is moldy despite new anti-mildew paint.