

I remember the day I first noticed my freshly stained fence looking worse for wear. Just six months after a promising start, those once-rich, beautiful wood tones had turned dull and flaky. It felt like I’d been duped by a quick-fix solution that simply didn’t last. That lightbulb moment made me realize how easily DIY projects can turn into costly lessons if we don’t understand the real reasons behind common problems like peeling.
Learning from My Mistakes: The Hidden Causes of Fence Stain Peeling
When I dove into staining my fence, I thought choosing a reputable brand was enough. But I overlooked some crucial preparation details and environmental factors. Early on, I made the mistake of applying stain in humid conditions, not realizing that high humidity can significantly hinder adhesion and drying. Did you know that excessive moisture can prevent stain from penetrating properly, leading to peeling and flaking? According to industry experts, inadequate surface preparation and unfavorable weather are among the top reasons why stains fail prematurely (source). Now, I want to guide you through avoiding these pitfalls so your stain lasts years, not months.
Is the Peeling Problem Actually About the Paint?
My initial assumption was that the stain I bought was defective. But after some digging, I discovered that improper prep work and environmental neglect are often the real culprits. Have you ever rushed the preparation process or applied stain over dusty, dirty, or damp wood? If so, you’re setting yourself up for failure. Proper surface cleaning and weather checks are essential. For instance, checking the humidity level before applying paint or stain can make all the difference. You can learn more about the best humidity levels for painting here.
In my case, ignoring these details led to peeling that surprised everyone—including my neighbors, who kept asking when I was going to redo the job. But understanding these common mistakes has empowered me to fix my fence and prevent others from making the same errors. So, if your stain is peeling too soon, don’t despair. The solution starts with understanding the science behind proper staining and the importance of correct application techniques.
Prepare the Surface Methodically
Start by removing any peeling paint, loose fibers, or mold. Use a scraper for flaking areas, ensuring a clean, smooth surface. Next, wash the fence thoroughly with a stiff brush and a cleaning solution to eliminate dirt, dust, and grease. Rinse well and let it dry completely, ideally for 48 hours. Skipping these steps is like trying to paint a greasy window—nothing adheres properly. To be certain the wood is dry, perform the penny test: place a coin in a crack—the water test will reveal humidity levels. High humidity prevents stain adhesion, leading to peeling sooner. For optimal drying conditions, choose a day with temperature between 50-85°F and low humidity, checked with a moisture meter or by referencing this guide.
Prime for Strong Adhesion
If your wood is very porous or previous paint is uneven, apply a primer designed for wood. This creates a sealed base, ensuring even absorption of the stain and reducing peeling risk. Use a high-quality brush or roller to apply the primer evenly, following the grain, and let it dry thoroughly—usually 2-4 hours. I once rushed this step and applied stain over a tacky surface; the stain didn’t penetrate well, resulting in uneven color and early flaking. Don’t skip the primer if you’re working with untreated or weathered wood.
Choose the Right Stain and Apply Correctly
Select a stain suitable for your wood type and environmental exposure. Oil-based stains penetrate deeper and last longer, especially in harsh weather. Read the label for application temperature and humidity limits—applying outside these ranges can cause peeling. When ready, stir the stain thoroughly to mix pigments evenly, avoiding the formation of lumps. Use a high-quality brush or a sprayer for smooth, even coats—preferably a 3-inch brush for railings and a roller for flat surfaces. Work in long, overlapping strokes to prevent lap marks. I once used a cheap brush, which loaded up with dried paint and left streaks. To prevent this, clean brushes regularly with the recommended solvent and switch to a new brush if the bristles become clogged.
Control Environmental Conditions During Application
Timing is crucial. Apply stain only when the weather forecast predicts no rain for at least 24 hours and temperatures stay between 50-85°F. Avoid applying in direct sunlight, which can cause uneven drying and lead to peeling. Use a fan or gentle breeze to improve air circulation, but watch for sudden humidity spikes. If humidity rises above 85%, as checked with a hygrometer, postpone staining. Additionally, avoid staining under high humidity conditions; the moisture in the air prevents proper drying, mimicking how high humidity can hinder adhesion, as discussed in this resource. Sitting in my driveway during a humid afternoon, I noticed the stain dried tacky and peeled in patches within weeks. That’s why timing and weather checks are vital.
Apply Stain in Well-Executed Layers
Begin with a thin, even coat—thick layers take longer to dry and are prone to peeling. Use a brush or sprayer to work the stain into the wood grain, moving with the wood’s natural lines. For vertical surfaces, start at the top and work downward to avoid drips. I recommend two coats for durability, letting each dry completely—usually 4-6 hours or as per manufacturer instructions. Sand lightly between coats with fine-grit sandpaper to remove raised fibers and create a smooth surface. This step is often overlooked, but it improves adhesion significantly, reducing peel risk. Be cautious not to sand through the stain; just smooth the surface. If you notice puddles or thick spots, use a clean rag to wipe away excess and prevent uneven absorption.
<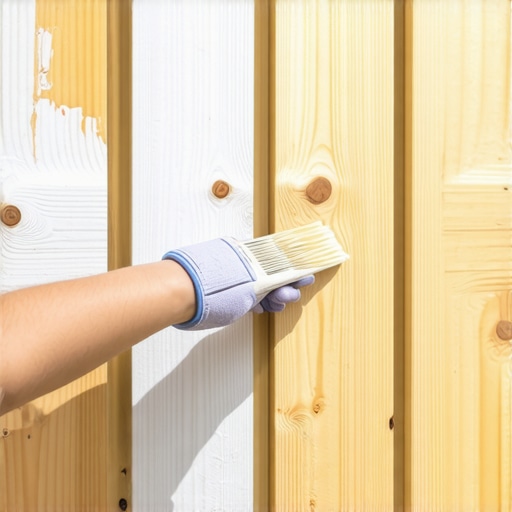 >Even seasoned DIYers and homeowners often believe that selecting a good quality paint and applying it carefully guarantees a flawless finish. However, the truth is that many pitfalls in house painting are rooted in overlooked nuances and misconceptions. One widespread myth is that a single coat of paint is sufficient for a durable, attractive result. In reality, many expert painters recommend at least two coats to ensure even coverage and longevity, especially when covering bold or dark colors. Skipping this step can lead to uneven textures, visible brush strokes, or quick fading, which is often mistaken for poor-quality paint rather than an application issue.
Another common misconception is that all paints are created equal. Many assume that picking any brand or type will produce similar results. But the reality is that choosing the wrong finish or formulation can drastically affect durability and appearance. For example, oil-based paints generally offer better adhesion and hardness, making them more suitable for areas exposed to wear and moisture. Meanwhile, newer eco-friendly paints with low VOCs might require different application techniques or longer drying times. Learning to select the appropriate paint formulation for your specific project is a key advanced step after mastering basic painting skills.
A trap many fall into involves environmental considerations. It’s often believed that painting can be done regardless of weather conditions, but external moisture, temperature, and humidity play critical roles in paint adhesion and drying. For instance, applying paint when humidity exceeds 85% can lead to peeling and bubbling down the line. Be sure to check local weather and consult guides on ideal painting conditions, like this one, to avoid costly rework.
Why does paint peel even when I follow all the instructions?
This question surfaces frequently among homeowners who’ve experienced premature peeling despite careful preparation. The answer lies in understanding the hidden nuances of surface preparation and environmental control. Even if you apply paint on a seemingly dry, clean surface, microscopic moisture trapped inside the substrate can cause issues later. For example, if you don’t power wash old surfaces with buildup or fail to assess humidity levels properly—reviewing the humidity rule for painting around your home—you risk peeling and other problems. Experts emphasize that thorough surface cleaning, proper priming, and climate awareness are crucial steps often underestimated by DIY painters. You can learn more about why your professional painting quote includes a power wash here.
Adding to the confusion is the belief that a quick fix or shortcut saves time and money. Skipping necessary steps like priming or multiple coats might seem like a wise shortcut but often leads to rework and additional costs. Conversely, neglecting environmental conditions, such as painting during a humid spell or under direct sunlight, can compromise even the best materials. Remember, patience and attention to nuanced details like drying times and surface readiness set professional results apart from amateur attempts.
So, next time you contemplate your house painting project, consider these hidden nuances. It’s not just about choosing the right color or the best brush—understanding how environmental factors, material choices, and meticulous preparation intertwine with your application techniques can make the difference between a lasting finish and costly failure. Have you ever fallen into this trap? Let me know in the comments.
Investing in Reliable Tools for Better Results
Using high-quality brushes is non-negotiable. I personally prefer the 3 essential brushes I recommend because they improve paint application, reduce drips, and last longer. For larger surfaces, I swear by a professional-grade roller with an ergonomic handle, which minimizes fatigue when working on big projects.
Spray equipment, such as a HVLP sprayer, has revolutionized my approach. Not only does it deliver a smooth, even coat, but it also significantly cuts down on application time. I’ve found that maintaining the equipment with regular cleaning—using specialized sprayer cleaners—extends its lifespan and ensures consistent performance. Proper maintenance of tools translates directly into cleaner lines and longer-lasting finishes.
Harnessing Software and Accurate Planning
Digital tools have become my secret weapon. For estimating project scope, I rely on apps like paint calculators. Accurate estimations help avoid waste and ensure you have enough material, especially when matching faded or existing colors. A well-planned schedule using project management software keeps the workflow smooth and minimizes downtime, which can compromise paint adhesion if left unaddressed.
In the future, I predict that AI-powered project planning tools will further optimize resource allocation, making DIY home improvement even more efficient. Embracing these technological innovations can elevate your maintenance routine and help your projects stand the test of time.
Maintaining Your Paint Job Over Time
Regular inspections are key. Check your painted surfaces at least twice a year for signs of peeling, fading, or mold. Cleaning with gentle solutions and touching up small areas promptly prevent more extensive repairs later. I also recommend applying a clear protective coating on high-traffic areas or exposed surfaces; this adds a barrier against weather and wear, extending your paint’s lifespan. Remember, the secret to lasting results lies in consistent upkeep and using the right tools for repairs.
Scaling Up Without Compromising Quality
When expanding your painting projects, invest in professional-grade equipment like commercial sprayers and dust extraction systems. These tools ensure efficiency without sacrificing detail, a crucial factor when dealing with larger areas or intricate designs. Properly calibrated equipment prevents over-application, which can lead to peeling or bubbling, especially on expansive surfaces like exterior siding or decks.
Adapting your toolset as your project scales is essential. Consider consulting with professionals or reading expert guidelines—such as those found in back-rolling techniques—to understand best practices for larger, more complex jobs.
Keep Everything Running Smoothly
Finally, establish a maintenance schedule for your tools and equipment. Regularly check for worn-out brushes, clogged nozzles, or damaged hoses. Proper storage—keeping tools clean, dry, and organized—prevents deterioration and ensures they’re ready when needed. This kind of disciplined maintenance saves money and time in the long run, ensuring your investment in quality tools pays off with durable, professional-looking results.
To get started with a game-changing tip, try cleaning your sprayer with a dedicated cleaner after each use—this simple step can dramatically extend its lifespan and improve spray quality. Would you like to explore more advanced maintenance techniques? Verify your tools now by performing the simple tape test to ensure your tools are in top shape for your next project!
Throughout my journey with house painting, I’ve realized that the most valuable lessons come from mistakes and unexpected outcomes. One lightbulb moment was understanding the subtle art of surface preparation, which, if overlooked, can undermine years of effort. Properly cleaning and priming surfaces might seem tedious, but these steps are the foundation of durability. I once thought that a quick brush over already painted walls would suffice, only to see the paint peel within months. That experience taught me to respect the intricate dance between materials, weather, and technique.
Lessons No One Tells You About Achieving Perfect Finish
- Patience is a Virtue: Rushing any stage—be it drying time or surface prep—can lead to disappointing peeling or streaks. Waiting for paint to cure fully can double your project’s longevity.
- Cold and Humidity Are Hidden Killers: I learned to check forecasts meticulously. Applying paint during high humidity or cold weather nearly guarantees issues, as moisture sabotages adhesion.
- Tools Matter More Than You Think: Using high-quality brushes and sprayers not only saves time but improves the finish. A cheap brush can cause uneven coats and brush marks that are impossible to fix later.
- Understanding Your Material Changes Everything: Oil-based versus water-based paints react differently under various conditions. Knowing when and where to use each can be the difference between a thriving paint job and a future headache.
Tools and Reads That Reshaped My Approach
- The three brushes I swear by have transformed my painting experience, offering control and smooth application. These tools are trusted because they stand the test of time, even after multiple projects.
- Paint calculators changed how I plan projects, preventing costly waste and ensuring matching colors seamlessly. Proper estimate saves money and frustration.
- Guides on ideal weather conditions have become my go-to resources for scheduling. Knowing when the weather will support my work makes all the difference in the outcome.
- The tape test reminds me always to double-check my tools and paints before starting, leading to cleaner lines and longer-lasting results.
Your Next Success Starts Now
Remember, house painting is more than just applying color—it’s about embracing a process that respects materials, weather, and techniques. Every project is an opportunity to learn, adapt, and perfect your craft. With a mix of patience, knowledge, and the right tools, you can turn your house into a durable masterpiece that stands tall for years to come. Don’t shy away from starting—your perfect paint job is just a careful brushstroke away.
What challenges have you faced with peeling or uneven finishes? Share your experiences below and let’s learn together!