

It was a typical Saturday afternoon, and I decided to do a little touch-up painting in the living room. I grabbed my brush, a fresh can of paint, and of course, a good old drop cloth. Everything was going smoothly until I accidentally knocked over the can. Bright white paint splattered across my plush carpet like an abstract masterpiece I didn’t intend to create. The worst part? It dried overnight, and I thought the stain was permanent. Sound familiar? If you’ve ever faced that gut-wrenching realization—the dried, stubborn paint blot—you know exactly how frustrating and disheartening it can be. But here’s the thing: you don’t have to live with those ugly spots forever.
Why Dried Paint Stains Feel Impossible to Remove
Paint spills, especially when they dry, seem to embed themselves in the fibers of your carpet, almost like they’ve become part of the fabric. Early on, I made the mistake of trying to scrub it out with water and a towel—nothing worked. In fact, I made it worse by pushing the paint deeper. This is a common faux pas. Many folks underestimate how stubborn dried paint can be, particularly with oil-based or latex paints. According to industry experts, once paint dries, it forms a chemical bond with the carpet fibers, making classic cleaning methods ineffective. But don’t despair! With some patience and the right techniques, those stains can be defeated.
Have You Faced This Exact Problem?
If you’ve ever stared at a drying paint spill during a home project, wondering if you’ll ever get it out, you’re not alone. Well-meaning DIYers often rush into cleaning without understanding the chemical nature of paint and the best removal strategies. Early mistakes—like scraping with a dull blade or using harsh chemicals—can permanently damage your carpet. Trust me, I learned this the hard way. For a more comprehensive understanding of typical pitfalls, check out why your painter refuses to work when it is too humid.
In the following sections, I’ll share proven methods that transformed my stained carpet into a clean, vibrant surface—and I promise, they can do the same for you.
,
Prepare Your Tools and Workspace
Before diving into stain removal, gather everything you’ll need: a putty knife, a clean cloth, white vinegar, dish soap, a spray bottle, a scrub brush, and peephole the carpet for loose debris. Protect surrounding areas with painter’s tape or additional drop cloths. I once tried to remove a dried paint spill in a single attempt, only to realize I lacked proper tools, leading to more mess. Proper prep sets the stage for success.
Loosen the Dried Paint
Gently scrape off the excess paint with a putty knife, holding it at a shallow angle. Be cautious not to press too hard, which can embed the stain further or damage fibers. When I removed dried latex paint from my carpet, slow, steady scraping loosened the bulk without harming delicate fibers. Think of it like scraping ice off a car window—careful, deliberate actions prevent breakage.
Apply an Effective Cleaning Solution
Use a Vinegar Solution
Mix equal parts white vinegar and water in a spray bottle. Spray liberally onto the stain, ensuring the area is saturated. Let it sit for 10-15 minutes. Vinegar is a natural solvent that weakens paint pigments’ bonding to fibers. During my last attempt, this method significantly loosened stubborn paint, making removal easier.
Introduce Dish Soap for Deep Cleaning
Add a few drops of dish soap into warm water, creating a sudsy solution. Drench a clean cloth in the mixture and blot the stain, working from the outside inward to avoid spreading. Repeat until the paint starts to lift. When I cleaned my carpet, this step prevented over-wetting and minimized fiber damage.
Agitate and Lift the Stain
Use a soft-bristled scrub brush to gently agitate the area, working in circular motions. This helps dislodge remaining paint particles. Be gentle; aggressive scrubbing can fray fibers or embed paint deeper. I once scrapped too hard and caused a noticeable fuzz in the carpet, so patience is key.
Rinse and Remove Residue
Dampen a clean cloth with plain water and blot the area to remove cleaning solutions and loosened paint. Repeat until the area is free of soap and vinegar residue. This prevents sticky buildup that can cause new dirt accumulation and keeps the fibers healthy. After rinsing, dab dry with a towel to minimize moisture soak.
Dry the Area Properly
Use a clean, dry towel or paper towels to absorb excess moisture. For quicker drying, you can employ a hairdryer set on cool, keeping it at a safe distance. During my experience, thorough drying prevented mold growth and preserved the carpet’s integrity. Avoid walking on the damp spot until it’s fully dry.
Additional Tips and Precautions
For oil-based paints, white mineral spirits might be necessary, but always testing in an inconspicuous corner first avoids damage. Also, avoid using harsh chemicals like bleach, which can discolor the fibers.
If the stain persists despite these efforts, it might be time to consult professional advice. Remember, patience and gentle techniques yield the best results, preventing further damage. By following these steps, you turn a stubborn dried paint stain into a manageable problem that’s well within your control.
When it comes to house painting, there’s a common misconception that choosing quality paint or hiring a skilled painter guarantees flawless results. While these factors are important, many homeowners and even some DIY enthusiasts miss the subtle but critical nuances that can make or break a painting project. This oversight often leads to premature deterioration, uneven finishes, or the need for frequent touch-ups. Let’s explore what most people get wrong about local painting and uncover the advanced practices that can elevate your results.
Myth Busting: Is Top-Brand Paint Always the Best Choice?
Many believe that opting for the most expensive, well-known paint brands automatically yields superior longevity and appearance. While brand reputation matters, the key lies in selecting the right type of paint for your specific surface and conditions. For example, high-gloss paints are excellent for trim but can highlight imperfections if not properly prepared, as discussed in this guide on painting over high-gloss surfaces. Failing to choose the appropriate finish and ignoring surface preparation can lead to issues like peeling or gloss irregularities, regardless of brand quality.
Don’t assume that just buying premium paint solves all your problems; understanding the nuances of paint formulation and surface compatibility is essential. For instance, choosing low-VOC or zero-VOC paints can be healthier and environmentally friendly, but they might require different application techniques to achieve durable results, as explored in this article on VOC labels.
Advanced Mistake to Avoid: Skipping Proper Surface Preparation
One of the most underestimated yet critical steps is thorough surface preparation. Many skip sanding, cleaning, or priming, thinking that applying paint directly will suffice. However, neglecting these steps can cause adhesion failure, uneven coverage, and early peeling. For example, in exterior painting projects, surface contamination from dirt or oil can compromise paint adherence, leading to flaking within a few years. Proper prep is especially vital around areas prone to moisture or high traffic. More insights on this can be found in this detailed post on exterior trim prep.
What About Overpainting? When Safe, When Not
A common advanced mistake is attempting to repaint over existing glossy or oil-based paints without adequate prep or primer, which can lead to poor adhesion and visible imperfections. Many homeowners are tempted to skip this step to save time, but it significantly affects the durability of the finish. Sometimes, the best approach is to sand or use a bonding primer, especially when tackling high-gloss surfaces, as explained in this tip on surface prep. Recognizing these nuances is essential for achieving seamless results that last.
Understanding these nuances and avoiding advanced pitfalls is what separates a professional-looking paint job from a mediocre one. Remember, little details—like proper surface prep, appropriate paint selection, and technique—are what ensure your investment pays off. Want to dive deeper into how to perfect your painting projects? Check out this guide on achieving smooth finishes and boost your skills. Have you ever fallen into this trap? Let me know in the comments!”}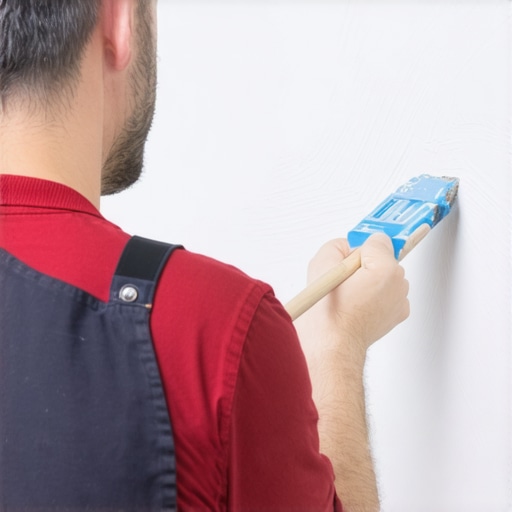 }
}
How do I keep my house paint looking fresh over time?
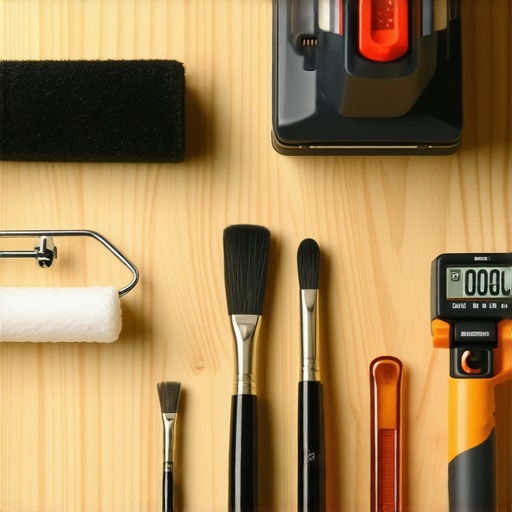
Maintaining a beautiful house finish requires more than just initial effort; it involves using the right tools and following disciplined routines. Personally, I swear by a high-quality electric sander for prep work, especially in areas prone to chipping or peeling. It saves time and provides a consistently smooth surface, which is crucial for long-lasting results. Additionally, a microfibre roller is invaluable for touch-ups, offering even coverage without the roller lines often seen with cheaper alternatives.
To monitor your project’s health, I recommend investing in a moisture meter. Excess moisture is one of the leading causes of paint failure, particularly on exterior surfaces. Regular checks can alert you early to potential issues, allowing you to address them before symptoms appear. Also, keep a detailed paint log: note the brands, batches, and dates of application, which simplifies troubleshooting or touch-up work down the line.
What tools are essential for effective long-term maintenance?
Beyond initial tools, I rely heavily on a dedicated paint sprayer for periodic refresh coats. Modern HVLP (High Volume Low Pressure) sprayers provide controlled application, reducing waste and ensuring even coverage, especially in hard-to-reach spots. They are ideal for extending the lifespan of exterior paint on siding or fences. For interior surfaces, a handheld detail sander allows for precise removal of minor imperfections, preventing them from evolving into bigger issues. These tools streamline ongoing maintenance and help retain your home’s aesthetic appeal.
In the future, I predict that advancements in smart paint sensors and surface analysis will revolutionize maintenance routines. Imagine devices that can detect deterioration or moisture intrusion before visual signs appear—saving homeowners significant repair costs.
How can I scale maintenance efforts effectively?
Routine inspections, scheduled twice a year—ideally in spring and fall—help catch issues early. Create a maintenance check-list that includes inspecting gutters, sealing cracks, and cleaning surfaces. Utilizing extendable poles with brushes for high areas reduces the need for ladders, making frequent upkeep manageable and safe.
Remember, the key to preserving your house’s paintwork is consistency. Regularly cleaning your surfaces with gentle, non-abrasive cleaners prevents dirt buildup that can degrade paint. Also, avoid harsh chemicals; they can strip the protective layer and compromise your work. For stubborn dirt and stains, a vinegar solution can do wonders without damaging your finish—just be sure to test in a small area first. You can learn more about this cleaning hack here.
Start incorporating these specific tools and routines into your maintenance plan, and you’ll extend the life of your paint projects significantly. Remember, a little proactive care goes a long way toward saving money and preserving your home’s charm.
What I Wish I Knew Before Tackling My First Paint Job
- Patience is paramount. Rushing through prep or cleaning may save time upfront but costs you in longevity and appearance later. I underestimated how crucial proper surface prep truly was, leading to early peeling on my exterior walls.
- Quality tools make a difference. Investing in a good sprayer or a premium roller can turn a mediocre finish into a professional look. The difference in ease and result is astonishing, and I recommend trying tools like HVLP sprayers for large surfaces.
- Understanding paint chemistry saves headaches. Knowing when to use primer or how different finishes interact with surfaces can prevent costly mistakes, such as yellowing or cracking down the line. Dive into resources on VOCs and paint formulations to make informed choices.
- Long-term maintenance starts early. Regular inspections, gentle cleaning, and timely touch-ups preserve your work. I now keep a paint log and use moisture meters, which help me catch issues before they become visible problems.
- Don’t overlook climate factors. Humidity and temperature heavily influence paint performance. For exterior projects, understanding the humidity rule ensures durability and color stability.
Tools and Guides That Elevated My Painting Journey
- High-quality paint brushes and rollers from brands like Purdy or Wooster—they last longer and provide smoother finishes. Trust me, cheap brushes compromise your work.
- Professional-grade primers tailored for your surface, whether wood, drywall, or metal. They ensure better adhesion and color accuracy.
- Learning from detailed tutorials such as this guide on factory-finish interiors has helped me master techniques that give my walls a seamless look.
- Advanced tools like moisture meters or paint gauges assist in making smarter, more durable decisions for outdoor and indoor painting.
- Books and online courses from trusted industry professionals broadened my understanding of finishes, surface preparation, and maintenance. Sites like this resource provide invaluable insights.
Your Next Step Towards Perfect Results
Remember, every project is an opportunity to learn and fine-tune your skills. The journey from a novice to a confident painter is paved with patience, knowledge, and strategic investment in the right tools. Embrace these lessons, and you’ll enjoy beautiful, long-lasting finishes that boost your home’s value and curb appeal. If you’re eager to improve your techniques and avoid common pitfalls, explore more expert tips and product recommendations in my curated list of resources. Share your experiences below—what unexpected challenge taught you the most about local painting or house painting? Let’s grow together and create spaces we’re proud of.