

I remember the first time I watched a professional painter pack up their brushes on a muggy summer afternoon. The humidity was soaring, and I was desperate to get my living room walls refreshed before a big family gathering. But the painter hesitated, then shook his head, saying, “It’s just too humid to paint safely today.” That moment was an eye-opener for me—and perhaps for you too, if you’ve ever wondered why some painters suddenly become Ghosts when the weather turns sticky.
Decoding the Humidity Puzzle: Why Your Painter Stops in the Heat
Humidity isn’t just a minor inconvenience; it’s a critical factor that can make or break a paint job. When moisture levels in the air climb, they interfere with how paint adheres and dries. I’ve learned from experience—and from talking to seasoned pros—that applying fresh paint in high humidity can lead to issues like bubbling, prolonged drying times, and even peeling in the long run. In fact, excessive moisture can cause the paint film to fail prematurely, which is why most professional painters strictly avoid work during these conditions. If you’re curious about the science behind this, check out this article that explains how moisture affects exterior painting.
Is Waiting for the Perfect Weather Really Worth It?
Early in my painting adventures, I made a big mistake. I thought I could beat the weather—squeeze in a quick coat before a forecasted rain. Spoiler alert: it didn’t end well. The paint cracked, and I ended up redoing sections later. That taught me a valuable lesson about respecting weather conditions. Never underestimate the impact of humidity on your paint project. Instead of risking frustration, I now understand why pros like to wait for those ideal dry days. But what if you’re on a tight schedule? That’s a common concern. Let’s explore whether you can still get quality results despite the weather—coming up next.
Timing Is Everything: Choose the Right Weather Windows
To ensure a successful paint job during humid days, monitor the weather forecast closely. Aim for days with humidity below 60% and temperatures between 50°F and 85°F. Use a digital hygrometer to measure air moisture accurately. I once waited for a window where the humidity dropped from 80% to 55%, and the difference in the finish quality was astonishing—less bubbling and smoother application. Planning your painting schedule around these conditions saves time and prevents costly rework.
Prep the Surface Properly for Better Adhesion
Proper surface prep under humid conditions is crucial. Start by cleaning walls thoroughly to remove dirt and grease, then sand glossy areas to create a mechanical bond. For surfaces prone to moisture, consider applying a high-quality primer designed for humid environments. I once used a bonding primer on a bathroom wall before repainting, which prevented peeling caused by residual humidity. Additionally, lightly abrade painted surfaces with fine sandpaper to promote better paint adherence, especially on glossy or previously painted areas.
Use the Right Paint and Application Techniques
Select paints formulated for humid conditions, such as acrylic latex variants with added mildewcides. Avoid oil-based paints since they dry slowly and are more susceptible to humidity issues. During application, use a high-quality roller with a nap suitable for your surface texture—generally, ¾ inch for rough surfaces and ½ inch for smooth walls. Apply thin coats, allowing ample drying time between layers. I learned this the hard way when applying too thick a coat; it trapped moisture and extended drying, leading to uneven finish. If you’re facing persistent moisture, sometimes a quick spray of a dehumidifier or fan can accelerate drying, but avoid over-drying the surface as that can cause cracking.
Manage the Environment Inside and Out
Controlling ambient humidity during painting can make a significant difference. Use fans, dehumidifiers, or open windows during dry periods to help moisture escape. For exterior painting, choose early mornings or late evenings when the humidity dips, avoiding peak daytime heat that escalates moisture. I’ve set up portable fans and dehumidifiers in poorly ventilated rooms, which helped achieve a smooth finish even when the weather was less than ideal. Remember to keep doors and windows closed while applying paint to maintain a stable environment and prevent drafts that carry moisture in.
Finish and Cure for Long-lasting Results
Allow sufficient curing time before exposing freshly painted surfaces to humidity or moisture. This may mean waiting 5-7 days in high-humidity conditions—longer than usual. Protect painted areas from rain and condensation during curing. Use a light touch when cleaning or touching up, as excess handling can damage the still-curing paint. I experienced a minor touch-up mishap where humid air caused a new layer to lift, so patience here truly pays off. For optimal durability, consider applying a clear weather-resistant coat after curing if the surface is exposed to high humidity regularly.
When it comes to house painting, many homeowners believe that selecting the right color and applying a few coats are all it takes for a flawless finish. However, even experienced DIYers often overlook the subtle yet critical nuances that determine the longevity and appearance of a paint job. One common misconception is that primer is optional or that any generic primer will do. In reality, using the correct primer tailored to your surface and environmental conditions can make the difference between a lasting finish and immediate peeling or bubbling. For example, if you’re painting a brick house, skipping a masonry primer can cause moisture to seep through, leading to paint failure. I recommend reading more about this in the article on why your brick house should never be painted with standard latex paint.
Another often-missed detail is surface preparation — not just cleaning or sanding, but also addressing underlying issues like water seepage or mold before painting. Many assume that paint will conceal imperfections or issues, but in truth, painting over problems often exacerbates them. For instance, applying paint over mold without proper cleaning can trap moisture, resulting in persistent bubbling or health hazards. Proper prep, including fixing leaks and applying fungicide treatments, is essential for a durable finish.
A frequently ignored aspect is the choice of paint sheen. While matte finishes are popular for hiding imperfections, they can be more susceptible to staining and less durable. Conversely, high-gloss paints are easier to clean but tend to highlight surface flaws. The key lies in matching the sheen to the room’s function and lighting, which many overlook. For expert insights on sheen selection, check out tips on avoiding common pitfalls with high-gloss paint.
Now, a question that even advanced painters might stumble upon involves paint compatibility and layer adhesion. Applying a new coat of paint over an existing finish without considering chemical compatibility can cause cracking, peeling, or uneven texture. This is especially true when switching between oil-based and water-based paints. A common trap is assuming that all paints are compatible when, in fact, they require proper sealing or sanding beforehand. To avoid such issues, it’s best to consult manufacturer guidelines or conduct key tests like the denatured alcohol test to determine old paint types.
Don’t forget the environment inside your home or outside in the elements. Humidity levels, temperature fluctuations, and surface moisture dramatically affect how paint cures. A little-known nuance is how high temperatures can cause paint to dry too quickly, trapping solvents and leading to blistering or cracking later. For outdoor projects, specific paints formulated for extreme weather conditions exist, but many skip this consideration, resulting in premature failures.
Are you guilty of overlooking these finer points? Many fall into traps that compromise their paint’s durability and look. For comprehensive solutions and expert advice, exploring resources like the article on why your interior paint is bubbling after a heavy rainstorm can provide invaluable guidance. Remember, a successful house painting project hinges on attention to detail — not just broad strokes. Have you ever fallen into this trap? Let me know in the comments.
Keep Your Tools in Prime Condition for Flawless Results
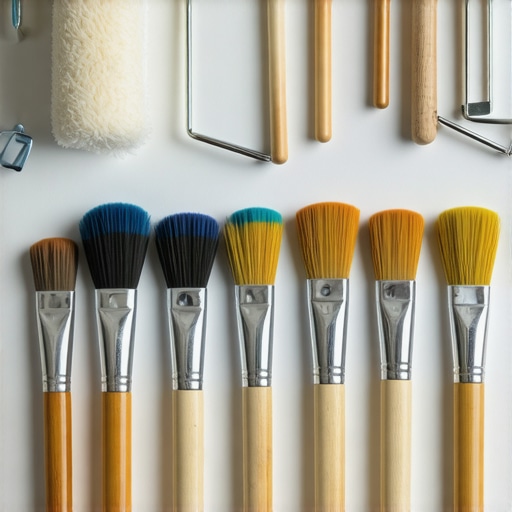
Proper maintenance of painting tools ensures consistent quality and extends their lifespan. I highly recommend investing in high-quality brushes with synthetic bristles, such as Purdy or Wooster, which maintain their shape and are easier to clean, making them perfect for both interior and exterior work. After each project, thoroughly wash brushes in warm water with a bit of mild detergent, avoiding harsh solvents that can damage the bristles. For rollers, use a fine-nap cover suited to your wall texture—this minimizes lint and fuzz left behind. Storing tools properly, such as hanging brushes to maintain their shape, prevents deformation and makes your next job smoother.
Embrace Tech to Monitor and Improve Long-Term Results
Use a digital hygrometer to keep an eye on environmental moisture levels during and after painting. Maintaining optimal humidity and temperature is vital to curing paint evenly. Consider applying a clear weatherproof sealer on exterior surfaces, especially in regions with fluctuating weather, to preserve the paint’s integrity. Additionally, I find that using an infrared thermometer helps check curing times—waiting until surfaces reach the proper internal temperature before exposing them to humidity can prevent issues like bubbling and cracking. As technology advances, smart paint sensors are emerging, promising real-time monitoring for professional-grade results in the future.
Longevity of Your Paint Job Means Regular Check-Ups
Every few years, conduct surface inspections, especially in high-traffic or harsh weather zones. Use a putty knife to gently lift any peeling sections and plan reapplication accordingly. Applying a touch-up coat of matching paint can prevent minor issues from escalating into larger repairs. If you notice early signs of peeling or bubbling, addressing the problem promptly—perhaps by removing failing paint layers and re-priming—can save you money and extend the life of your initial investment. Keep an eye on environmental changes that might accelerate deterioration, like increased humidity or UV exposure, and adjust your maintenance routine accordingly.
Scaling Up with Efficiency and Precision
Planning your projects with systematic tools like painter’s tape, plastic sheeting, and innovative masking techniques can speed up workflows, especially for larger-scale endeavors. Use edge, or “cut-in,” brushes carefully to achieve crisp lines, and consider purchasing a professional-grade spray gun for expansive surfaces—this not only speeds up the process but also results in more even coverage. I recommend trying the blue tape trick for razor-sharp corners, which reduces cleanup time and mistakes. As the industry moves toward eco-friendly paints with longer-lasting finishes, investing in proper tools and maintenance will become increasingly vital for professional results that stand the test of time.
How do I maintain my painting setup over time?
Regularly clean and inspect all tools after each project, store them in a dry, dust-free environment, and replace worn-out equipment promptly. Maintaining a ready-to-go toolkit ensures your projects go smoothly and reduces downtime caused by faulty tools. Protective covers for brushes and rollers can prevent dust accumulation, preserving their performance. Additionally, keep your sprayers and airless equipment calibrated and clean to prevent clogs and uneven spray patterns. By nurturing your tools like this, you’ll enjoy consistently excellent results and extend their lifespan significantly.
To make your painting projects more efficient, try adopting the sandpaper trick for better adhesion, which involves lightly scuffing glossy surfaces before repainting. This small step dramatically improves paint grip, especially on surfaces like plastic shutters, which often resist paint adhesion. Pair this with regular maintenance routines, and you’ll see your house paint last longer, look better, and cost less in repairs over time. For more in-depth strategies, I suggest exploring our guide on the hidden reason why your interior paint is bubbling after heavy rainstorms.
What I Wish I Knew Before Starting My First Exterior Paint Job in Humid Weather
One of the most overlooked aspects of house painting is understanding how climate impacts your work. I used to think that simply choosing the right color was enough—until I learned that humidity can make or break your project, often in subtle but critical ways. My lightbulb moment came when I painted outside on a day with high humidity, and by the next morning, I had bubbling and peeling not previously evident. That taught me to listen to the weather—not just the forecasted temperature, but real-time humidity levels. Trust me, investing in a reliable digital hygrometer changed my approach and saved countless hours of rework.
The Golden Rule of Surface Prep That No One Talks About
Proper surface preparation under humid conditions is the secret ingredient for achieving a durable finish. I discovered that cleaning walls thoroughly, then lightly sanding and priming with a moisture-resistant primer, prevents future issues like peeling and mold growth. For instance, I once skipped the primer on a bathroom wall and watched my effort bubble within weeks. Now, I always apply a high-quality bonding primer designed for humid environments, and it’s paid off with smooth finishes that last. Learning this lesson saved me from costly repairs and disappointment and should be a cornerstone principle for anyone serious about house painting in tricky weather.
Stepping Beyond the Basics: Tackling Environment Accessorizing
Controlling interior and exterior conditions during painting can be a game-changer. My go-to strategy is to use fans and dehumidifiers inside, and schedule exterior work in the early morning or late evening when humidity dips. Once, I set up portable fans and sealed windows to create a stable environment on a particularly muggy day, and it made all the difference. Incorporating small tools like these can elevate your painting from just good to professional grade—making sure your paint adheres properly and cures to last for years. The difference is striking and well worth the extra effort.
The Hidden Power of Tools You Might Not Be Using
Don’t underestimate the right brushes, rollers, and sprayers. My go-to tips include using high-quality brushes for precision, and storing tools properly to preserve their shape. I also learned the importance of cleaning brushes immediately after use, especially in humid conditions, to prevent damage and contamination. For large projects, a quality spray gun combined with Masking techniques like the blue tape trick ensures crisp edges without sacrificing time. Invest in these tools, and your finished look will be noticeably better, longer-lasting, and more efficient—transformations worth experiencing firsthand.
Make Humidity Work for You: The Final Step to Success
Patience during the curing process is my ultimate advice. Even after hours of painting, I wait an extra day or two before exposing surfaces to moisture. Applying a weatherproof sealer afterward can also shield your masterpiece from future humidity harm. I’ve learned that rushing this step often results in peeling or bubbling within months. So, embrace patience, monitor environmental conditions, and give your paint the time it needs to fully cure. These small adjustments create a huge impact on the resilience and beauty of your house painting project. Want more insights? Check out how to avoid peeling paint on your exterior or tips for painting in challenging weather conditions to strengthen your skills.
Insider Wisdom for Building Confidence in Every Stroke
- Test and Trust Your Supplies: Always do a quick test of the paint’s adhesion before full application, especially in high-humidity areas. I once painted a closet with new primer and promptly faced peeling; now I always do a spot test!
- Invest in Preparation Tools: High-quality sanders, primers, and brushes make your finish last longer. Cheap tools often compromise the project, especially when moisture is involved.
- Understand Your Environment: Weather affects every stroke. Monitoring humidity with a hygrometer and waiting for the right window is key to success.
- Patience Pays Off: Rushing to finish on a humid day causes problems. Allow paint to cure fully, and seal surfaces to extend their lifespan.
- Seek Expert Advice}: Never hesitate to reach out or read specialized articles, like why your exterior trim may rot under paint. Learning from experts saves me from repeated mistakes and elevates my craftsmanship.
Explore Your House Painting Potential—Every Wall Deserves a Masterpiece
Remember, mastering humidity’s effects means your home’s paintwork not only looks fantastic but endures through seasons. Each project is an opportunity to apply these insider lessons and build confidence in your skills. With attention to environmental details, proper tools, and patience, you’ll create finishes that impress and last. Ready to transform your space with this new knowledge? Dive deeper into trusted resources and start your next project today—your home deserves it.
What’s the biggest challenge you’ve faced when painting in humid weather? Share your experience and tips below—I’d love to hear your stories!