

Ever since I decided to finally fix up my aging deck last summer, I thought I was on the right track—until I saw that massive, unsightly flaking that looked more like peeling wallpaper than a sturdy surface. I remember my frustration bubbling over as I scraped away what seemed like years of neglect, only to find the stain peeling in gigantic sheets, leaving me scrambling for answers. That moment was a lightbulb for me—discovering why something so seemingly simple can turn into a long-term headache.
Unraveling the Mystery of Flaky Deck Stain
Today, I want to share what I learned about why your deck stain might be doing the same thing. Spoiler alert: It’s not just about the paint or stain itself—it’s about doing things the right way from the start. So, if your deck’s looking more like a flaky mess than a beautiful outdoor oasis, don’t worry! We’ll walk through the common mistakes, how to fix existing issues, and how to avoid this problem in the future.
Is Deck Flaking Actually Worth the Hype?
Honestly, I initially thought that once I had my deck stained, that was the end of it. But it turns out, many of us make mistakes that cause stains to peel prematurely. For example, I once skipped thorough prep work and used low-quality stain—big mistake. According to experts, inadequate surface preparation is one of the leading causes of flaking. (You can read more about this common mistake and how to fix it here.)
So, before you start throwing more stain at it or assuming a new product will fix everything, let’s get to the root cause. Trust me, understanding the why behind this peeling will save you time, money, and frustration in the long run. Are you tired of re-staining your deck every couple of years? If yes, keep reading—your perfect, flake-free finish might be closer than you think.
Now, let’s dive into the key reasons why your deck stain might be peeling in huge sheets, and what you can do to stop it in its tracks.
,
Prep the Surface Like a Pro
Start by removing all loose paint or stain with a sturdy scraper and brush. I once skipped this step, thinking a quick rinse was enough, but the stain peeled within months. Use a power washer if needed, but ensure the surface is completely dry before proceeding. Sand rough spots to create a smooth, even surface, much like sanding a wooden spoon before applying paint. This step is crucial for proper adhesion.
Clean for Perfect Bonding
Next, rid the surface of dirt, mold, and grease. I used a mixture of trisodium phosphate and water, scrubbing with a stiff brush. Rinse and let it dry thoroughly—any residual dirt can compromise the stain’s grip. Think of it as cleaning your skin before applying sunscreen; the cleaner the surface, the better the coating sticks.
Prime with Compatibility in Mind
Apply an exterior primer suitable for wood and compatible with your stain type. I employed a bonding primer, which helps prevent peeling. For instance, if you’re applying a dark stain over lighter wood, primer prevents uneven absorption and blotching. Check product labels to ensure compatibility, or you risk issues like uneven color or peeling later. Learn more about primer selection.
Choose the Right Stain and Application Method
Select high-quality stain designed for outdoor use, preferably oil-based for durability. I stared with a brush for edges and corners, then used a roller for large flat areas. Applying thin, even coats prevents runs and drips, akin to layering thin coats of makeup for a natural look. Wait at least 24 hours between coats if needed, and avoid pooling—dried stain should look uniformly matte.
Ensure Ideal Conditions During Application
Weather matters. Avoid staining in direct sunlight or when rain is forecasted. I scheduled my project on a cloudy day with temperatures between 50-70°F. Too much heat causes the stain to dry too quickly, leaving uneven patches, while cold can extend drying time and trap moisture. Use a digital hygrometer if needed to monitor humidity—aim for below 85%.
Check weather tips for painting.
Properly Seal and Maintain
After the stain has cured, apply a clear sealant to lock in the color and protect from wear. Regular maintenance, like cleaning with gentle soap and water, prolongs its life. I learned that neglecting sealing and maintenance led to peeling in just a couple of years, even with the best products. Proactively inspecting your deck for signs of wear helps identify issues early before peeling occurs.
By following these concrete steps, you set your deck up for long-lasting beauty and durability—saving you from future frustrations and costly repairs. Remember, patience and attention to detail during preparation and application are your best allies in preventing flaking and peeling.
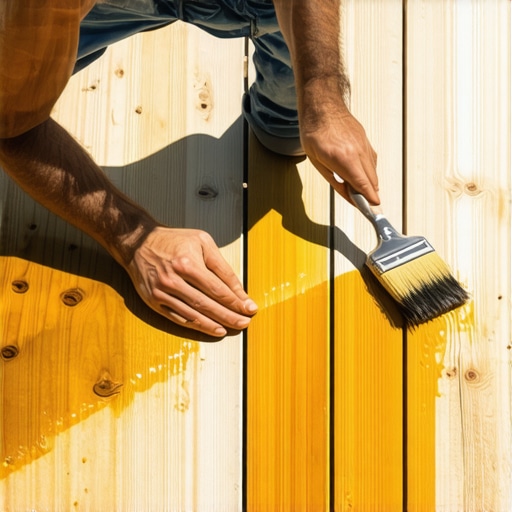 While many homeowners believe that choosing the right paint color or affordability defines a successful painting project, there’s a crucial aspect that often goes unnoticed but can make or break your results: understanding the specific needs of your local environment and surface conditions. This nuance is where many DIY enthusiasts and even some professionals stumble, leading to premature paint failure or inconsistent finishes. Let’s dig deeper into this often-overlooked detail that can elevate your house painting experience.
Contrary to popular belief, one size does not fit all in paint selection. For instance, the climate in your area heavily influences how paint behaves over time. In humid zones, mold-resistant paints are essential to prevent fungal growth and peeling caused by moisture infiltration. Conversely, in dry, hot regions, elasticity and UV resistance become paramount to prevent cracking and fading. Simply picking a top-rated color or the cheapest paint can lead you down a path of disappointment. For a comprehensive understanding, I recommend reviewing expert insights like those found in industry studies about climate-specific paint performance.
Moreover, surface preparation tailored to your local conditions is often underestimated. For example, exterior surfaces in coastal areas are more prone to salt and moisture, accelerating corrosion and paint failure. Using appropriate primers and sealants designed for these conditions is not optional but necessary. Overlooking these nuances can result in peeling paint and costly touch-ups sooner than expected.
A common myth is that all paints are equally durable if applied correctly. However, in reality, the formulation of the product—such as acrylic versus oil-based—affects longevity, adhesion, and resistance to environmental stressors. To illustrate, oil-based paints traditionally excelled in durability but have been increasingly replaced with advanced acrylics that perform similarly while being environmentally friendlier. Choosing the right type involves understanding the substrate material and anticipated weather exposure.
Ever wondered about the advanced mistakes that can sabotage your project? For example, applying paint directly on old, flaking surfaces without proper cleaning and priming can trap underlying moisture, leading to bubbling and peeling. This subtle issue isn’t immediately obvious but can take years to manifest. Expert painters emphasize performing a moisture test and properly stripping old paint to ensure a solid bonding surface.
For a sophisticated approach, consider the technique of testing paint adhesion with the cross-hatching method before full application. This simple step helps identify if the surface is ready and if the paint will bond properly, saving you time and money in the long run.
Finally, selecting eco-friendly paints has become more critical not only for health reasons but also for performance. Brands like those discussed in this article showcase options that excel in coverage and durability while reducing harmful chemicals—an essential consideration in today’s conscientious market.
Are you aware of how the local environment subtly influences your painting results? Recognizing and respecting these nuances can significantly extend your paint’s lifespan and appearance. Don’t get caught in the trap of ignoring these details, which seems minor but is actually vital. Have you ever fallen into this trap? Let me know in the comments.
Keeping It Working: Tools I Recommend for House Painting
To achieve professional-quality results and ensure your paint job lasts, having the right tools is non-negotiable. I personally swear by a high-quality angled brush for precise cutting-in around trim and edges. The tape-less painting technique I use allows me to create razor-sharp lines without the mess of traditional painter’s tape, saving time and reducing potential paint bleed. For large surfaces, a flat synthetic roller with a medium nap ensures smooth, even coverage, especially on rough or textured siding.
Power Washers for Prep Work
Before even thinking about painting, thorough surface cleaning is crucial. My go-to is a commercial-grade pressure washer with adjustable psi settings. It efficiently strips away dirt, mold, and old peeling paint, which are all hidden enemies of adhesion. Using a pressure washer correctly — starting at a lower psi and keeping the nozzle moving — prevents surface damage while ensuring a clean canvas. Proper prep with a pressure washer extends the life of your paint significantly.
Specialized Tools for Detailing
I often use a small, angled detail brush to navigate tight corners or touch-up areas. This helps maintain a crisp look, especially on window frames and decorative trim. Additionally, a high-quality paint sprayer can expedite projects but requires proper technique and masking. I recommend a HVLP sprayer for residential projects due to its precision and reduced overspray, provided you have some experience with spraying techniques. Practice on scrap wood first to avoid costly mistakes.
Long-Term Results Through Proper Maintenance
Maintaining your paint job isn’t just about the initial application; it’s about consistent, simple upkeep. Regularly washing your house with gentle soap and water using a soft-bristle brush or low-pressure washer maintains appearance and prevents dirt buildup. Periodic inspections for cracks or peeling can help you address issues before they worsen. Applying a clear exterior sealant or protective coating every few years enhances durability and maintains color vibrancy. Recognize that investing in quality tools and routine maintenance is the secret to long-lasting beauty.
Future-Ready Painting Strategies
As technology advances, paint formulations are becoming more resilient. Eco-friendly options from top eco-friendly brands now offer excellent coverage and durability without compromising health or the environment. Keeping abreast of these innovations allows you to choose products that can withstand harsh weather conditions, reducing future touch-ups and repainting cycles. Don’t forget, the proper tools combined with these advanced paints set the stage for a paint job that truly stands the test of time.
What’s the Secret to Maintaining Your Paint Effortlessly?
The key is implementing a scheduled maintenance routine—think annual washings and minor touch-ups to prevent small issues from escalating. Also, use high-quality brushes and rollers, as they reduce paint consumption and help achieve smooth finishes. For instance, regularly replacing worn brushes prevents paint streaks and uneven coats. Remember, a well-maintained exterior paint can last 7-10 years with proper care.
Want to maximize your project’s longevity? Try investing in a professional-grade pressure washer and a reliable paint sprayer—these tools make a notable difference in surface prep and application. Proper maintenance doesn’t require much effort but pays off by preserving your home’s curb appeal for years. For more insights on surface preparation, consider reading about how proper siding prep impacts the durability of your paint.
The Secrets That Changed My Painting Game
One of the biggest lessons I learned in my painting journey was that attention to even the smallest details can make or break the final outcome. Over time, I discovered that prepping the surface thoroughly, choosing the right tools, and understanding environmental factors aren’t just tips—they’re essentials. These insights, gained through trial and error, transformed my approach from amateur to confident homeowner. If you’ve ever wondered why a paint job doesn’t last or looks patchy, it might be because of overlooking these subtle but crucial elements.
Tools and Resources That Elevate Your House Painting
After many projects, I trusted a few key tools and resources that consistently delivered professional results. The precision painter’s tape changed the way I tackled edge work, ensuring sharp lines without messy touch-ups. A high-quality angled brush gave me control during detailed work, and a cleaning kit for brushes saved me money and effort. Additionally, I recommend exploring industry insights on eco-friendly paint brands—they’re becoming more durable and safer, especially for family homes.
Step Beyond the Surface—Feel Confident in Your Skills
Taking your house painting to the next level isn’t just about following steps—it’s about cultivating an instinct for great prep and application. My biggest breakthrough came when I stopped rushing and started viewing each project as a craft. It’s incredibly satisfying to see a home transform when you really respect the process—from moisture testing to choosing the right finish. Remember, patience and careful execution pay off with a stunning, long-lasting result that you can be proud of. Have you ever faced unexpected peeling or uneven coverage? Share your story—I’d love to hear what surprised you along the way.