

Have you ever dipped your brush into paint only to realize later that your freshly painted door has started peeling or bubbling? That sinking feeling of wasting time and money on a project that doesn’t hold up is frustrating — I’ve been there myself. I vividly remember rushing through a door prep, eager to see the transformation, only to find the paint peeling off within months. It was a clear wake-up call that I had skipped a crucial step in preparing the surface properly for water-based paint over oil finish.
Why Proper Preparation Can Make or Break Your Paint Job
Here’s the truth — the secret to a durable, beautiful finish on your doors isn’t just choosing the right paint; it’s how you prepare the surface beforehand. When I first started painting, I naively thought simply cleaning the door was enough. Turns out, oil-finished doors need a specific prep process that ensures water-based paints adhere and stand the test of time. Proper prep removes the glossy oil layer, creates a rough surface for the paint to grip, and minimizes future peeling, chipping, or bubbling. According to industry experts, skipping this step can reduce the lifespan of your paint by half. So, before you splash on your water-based paint, taking the time to prep correctly is worth every minute.
Start with a Clean, Dust-Free Surface
First up, make sure the door is thoroughly cleaned. Use a mild detergent and warm water to remove dirt, grease, and any waxy residues. A clean surface allows for better adhesion and reduces the risk of uneven paint layers. Don’t forget to rinse well and let it dry completely — moisture is the enemy here. Trust me, doing this simple step saves you from days of frustration later. For stubborn grime, a gentle solvent like trisodium phosphate (TSP) works wonders and is highly recommended by professional painters. Want tips on cleaning behind tricky spots? Check out our post on painting behind fixtures.
Next Step: Sanding and De-glossing
After cleaning, the next essential step is dulling the glossy oil finish. You might think a quick wipe with a rag suffices, but real adhesion starts with proper sanding. Lightly sanding the door with medium-grit sandpaper removes the glossy layer and creates tiny scratches for the primer and paint to grip onto. If you skip this step, the paint might look good initially but will likely peel or flake in a few months. When I first tried to skip sanding, I ended up doing double work to fix peeling paint — a mistake I won’t make again. For this reason, I always use a sandpaper trick that ensures maximum adhesion. Remember, de-glossing isn’t just about aesthetics — it’s about durability.
Have You Faced This Common Painting Challenge?
Are your previous projects suffering from premature chipping or peeling? Believe me, proper surface prep is the key to avoiding those headaches. By investing just a little extra time now, you’ll be rewarded with a smooth, lasting finish that stands up to everyday use. Ready to learn the step-by-step process? Well, let’s dive into the nitty-gritty of prepping your oil-finished doors for a fresh coat of water-based paint — and make sure your work lasts for years to come.
Sanding: The Foundation of Good Adhesion
Start by selecting the right sandpaper—preferably 120-220 grit. I remember a time I hastily grabbed coarse grit and ended up with scratches that showed through the new paint. Instead, lightly sand the entire surface, focusing on areas with existing gloss or texture. Think of it like scuffing a shoe before painting—it ensures the new layer bites into the surface. Be thorough but gentle; pressing too hard can create uneven patches that will be visible once painted. For tricky corners or intricate details, wrap your sandpaper around a stick or use a sanding sponge for better control. This step breaks the shiny oil layer, making the surface porous enough for water-based paints to adhere securely. Want to streamline this process? Check out our sandpaper trick.
De-Glossing Efficiently
After sanding, it’s essential to remove dust and residual gloss. I once skipped a thorough wipe, and the paint bubbled within a few weeks. Use a damp tack cloth or a lint-free rag slightly dampened with water or a gentle cleaner. For oil finishes, a de-glossing solution like mineral spirits can be helpful, but ensure proper ventilation. Imagine you’re wiping away tiny barriers that prevent adhesion. This cleaning step brings the surface to a neutral state, ready for primer. Remember, residual dust or oil can compromise the bond, leading to peeling sooner than you’d like. If your surface has stubborn residues or old wallpaper adhesive, review our article on peeling wallpaper techniques to ensure clean walls before painting.
Priming with Purpose
Once the surface is prepped and dust-free, apply a high-quality bonding primer designed for oil-based surfaces. This isn’t the time to skimp—using the right primer, such as a shellac or oil primer, will guarantee that water-based paints stick properly. Think of primer as the foundation of a building; skip it, and everything above is at risk. I once missed this step on a pine door, thinking the paint alone would suffice. Within months, the paint started peeling at the edges. Now, I always use a specialized bonding primer, especially on complex surfaces. Apply in thin, even coats, and let it dry thoroughly as per manufacturer instructions. This first layer locks in all the cleaning and sanding work, setting a perfect stage for your water-based paint.
Ensuring Flawless Paint Application
With the surface primed, use high-quality brushes or rollers to apply water-based paint. If you’re painting a door, lay down thin coats—multiple light layers beat thick, heavy ones for durability and smoothness. I learned this the hard way after applying a thick coat and ending up with drips and uneven texture. Think of painting as icing a cake—thin, even layers are far superior to glopping on thick stuff. Use a good roller cover to avoid fuzz or textured finishes. Keep an eye out for drips or brush marks and fix them promptly. For complex areas or sharp edges, delve into cutting-in techniques to maintain crisp lines. Remember, patience and attention to detail during application extend the life of your paint job and improve overall looks.
Many experienced painters and even seasoned contractors make the mistake of oversimplifying the painting process, assuming that surface prep and application are enough. But let’s dig deeper into some often-overlooked nuances that can make or break your results. One common myth is that aggressive scraping or heavy sanding guarantees better adhesion. In reality, over-sanding can damage the surface or create uneven textures, especially on delicate finishes. Subtle surface modifications, like micro-roughening or chemical deglossing, often deliver better adhesion without compromising the material integrity. Professional painters understand that methodical, not brute-force, surface prep is essential for durability and a flawless finish, as highlighted in detailed industry guides.
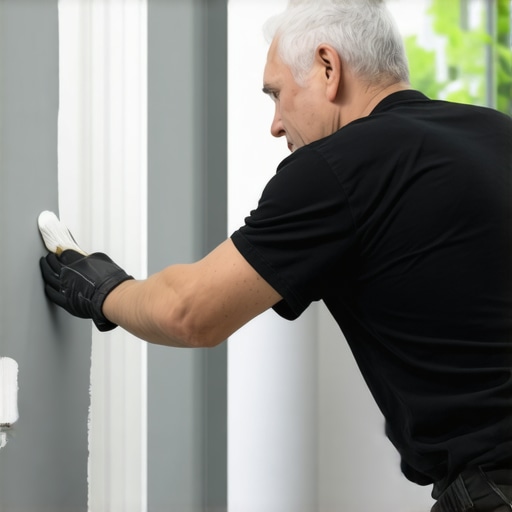
Another misconception involves primer application. Many think that priming is unnecessary if the paint is of good quality. However, even high-quality paints depend on proper primer adhesion, especially when transitioning between incompatible surfaces or over existing finishes like oil or epoxy. Skipping this step invites adhesion failures that lead to peeling or bubbling over time. Advanced painters also consider the type of primer—bonding, stain-blocking, or leveling—to optimize the final coat’s longevity, as discussed in expert reviews.
What advanced mistakes or misconceptions do even experienced DIYers fall for when painting houses?
One sneaky trap is neglecting environmental conditions. Painting in high humidity or extreme temperatures can cause issues such as improper curing, streaking, or even toxic off-gassing. Waiting for optimal weather conditions or adjusting techniques—like extending drying times—are crucial yet often overlooked. An interior painter who skips controlling humidity may find rapid peeling or mold growth, undermining their entire effort. According to recent industry studies, environmental management can be the difference between a lasting finish and a costly redo. For a comprehensive understanding of such pitfalls, visit our guide on exterior paint issues caused by weather.
Have you ever fallen into this trap? Let me know in the comments.
Keeping Your Tools in Top Shape
One of the most overlooked aspects of enduring house painting results is how you maintain your tools. A well-maintained brush or roller can mean the difference between a smooth finish and uneven streaks. I personally prefer using high-quality synthetic brushes for water-based paints, as they resist breakage and keep their shape longer. After each project, I clean brushes immediately with warm water and mild soap, avoiding harsh solvents that can damage bristles over time. Regularly inspecting your tools for wear and tear ensures they perform optimally, saving you time and improving paint adhesion for future projects.
How do I maintain my painting tools over time?
To keep your brushes and rollers working effectively, rinse them thoroughly after each use, removing all residual paint. For brushes, reshape the bristles and store them flat or upright—never on their bristles—to prevent splaying. Olfa or Purdy brushes can last several years with proper care; I recommend applying a light coat of brush conditioner before storage. For rollers, wash in warm, soapy water, then spin or shake out excess moisture. Storing tools in a cool, dry place prevents mold and deterioration, ensuring they’re ready for your next project. Want to optimize your roller technique? Check out our article on preventing fuzz in your paint.
Investing in Quality Equipment
Choosing the right tools is crucial for long-term durability. My go-to roller covers are made with specialized microfiber that minimizes lint and provides even coverage. While cheap foam rollers might seem tempting, they often shed fibers, leading to a patchy appearance. For cutting-in and detailed areas, a high-quality angular brush with fine bristles offers precise control and reduces streaks. As trend shifts towards eco-friendly and zero-VOC paints, I predict more advanced tools will emerge, like self-cleaning brushes and robotic paint applicators. Embracing these innovations could dramatically improve efficiency and consistency in house painting projects.
How to Keep Your Paint Job Looking Fresh Over the Years
Long-term results depend not only on initial surface prep but also on ongoing maintenance. Regularly inspect painted surfaces for signs of wear, cracking, or peeling—address small issues before they escalate. Washing walls with a mild detergent periodically can remove accumulated dirt that dulls the finish. For high-traffic areas, applying an extra coat of clear protective sealant every few years adds resistance against scratches and moisture. Remember, proper maintenance preserves your investment and keeps your home looking sharp. Want to ensure your water-based paints stay adherent and vibrant? Explore expert advice at this resource.
Scaling Your Painting Operations
If you’re considering expanding your local painting business, investing in professional-grade equipment like airless sprayers can boost productivity. High-volume, high-pressure sprayers apply paint evenly over large surfaces and reduce labor time, especially on exterior projects. However, mastering their use requires training, as improper technique can lead to overspray or drips. With the advent of smart tools integrating digital controls, future scaling may involve data-driven project management, ensuring consistent quality across multiple sites. Starting with a reliable, easy-to-maintain sprayer—like the Graco Magnum—is a good investment for serious DIYers and professionals alike.
Ready to Elevate Your Home Painting?
Implementing these maintenance tips and investing in quality tools will pay dividends in the longevity and appearance of your projects. Make a habit of cleaning and inspecting your equipment regularly, and don’t hesitate to upgrade to advanced gear as your skills grow. For instance, properly maintaining your brushes not only improves your current project but also ensures they’re ready for future work, reducing costs over time. As new tools and methods emerge, staying updated will keep your work at a professional level. Want to learn more about selecting the right equipment? Check out the article on pressure washer maintenance or try applying the tip of storing brushes properly—it’s a simple step that makes a big difference.
Lessons That Changed How I Approach Painting Homes
- One of the toughest lessons I learned was that rushing surface prep often leads to costly peeling later. Taking extra time to de-gloss and sand surfaces has saved me from repeat jobs and unhappy clients.
- Investing in quality primers might seem unnecessary, but I realized that they are the unsung heroes preventing future adhesion failures, especially over oil-based finishes.
- Environmental conditions can make or break a paint job—painting in high humidity or extreme temperatures almost always causes issues. Waiting for the right weather has made my work last years longer.
- Maintaining my tools diligently has been underestimated; clean brushes and rollers apply paint smoothly and reduce the need for touch-ups. It’s a small effort for big quality gains.
- Choosing the right equipment, like professional-grade sprayers or quality brushes, elevates a standard job to something durable and beautiful — investing upfront pays off in longevity.
Gear Up With Tried-and-True Resources
For those serious about mastering house painting, I swear by the sandpaper trick for ensuring proper adhesion. It’s a simple swap that prevents future peeling. Understanding why your interior paint might rub off helps me know when to use better prep. And for a comprehensive look at tools, pressure washer tips are game-changers for exterior projects.
Embrace Your Painting Journey and Keep Flawless Results
Your next project is an opportunity to build confidence and skill. Embrace the learning process, invest in proper prep, and select quality tools—your future self will thank you for a finish that stands the test of time. Remember, it’s not just about making a space look good today but ensuring it remains vibrant and intact for years to come. Curious about how to handle tricky surfaces or advanced techniques? Keep exploring reliable advice, and don’t hesitate to share your challenges in the comments below—let’s learn together how to turn house painting into a lasting masterpiece.