

It was late Saturday afternoon when I rolled into my living room, paintbrush in hand, feeling confident. I had carefully prepared, primed the walls the night before, and now I was ready to see that fresh, flawless coat of color. But as I stepped back to admire my work, I was met with a frustrating sight—stripes. Not the intentional design, but uneven patches that looked like a zebra went wild on my walls. That lightbulb moment hit me hard: I had fallen into the common trap that plagues many DIY painters.
Getting that perfect, uniform finish shouldn’t feel like an impossible puzzle
In this post, I’ll share my journey from bewilderment to mastery—bit by bit—so you can avoid the same pitfalls. We’ll explore why walls often look striped after applying two coats and, more importantly, how you can achieve a smooth, even look without spending a fortune on professionals.
Is the Two-Coat Promise Really Worth the Hype?
Honestly, I was naive at first. I believed that applying two coats of paint would automatically hide all imperfections and give me that showroom-quality finish. But early on, I learned the hard way that it’s not just about quantity; it’s about technique.
One mistake I made was assuming that a single heavy coat could do the trick. Instead, I ended up with uneven coverage, which accentuated the stripes. I also overlooked the importance of proper drying time and the consistency of my paint application. You see, even a high-quality paint can produce stripes if not applied correctly.
According to experts at the [Painting & Decorating Contractors of America](https://elitepainterpro.com/transform-your-home-with-expert-house-painting-tips-for-2025), the key to a flawless finish is consistency—priming adequately, applying paint in the right order, and using quality tools.
Have you ever finished a paint job only to realize that your walls look anything but smooth? If yes, you’re not alone. The good news is, with a handful of simple adjustments, you can turn your striped walls into a masterpiece.
In the next sections, I’ll guide you through the practical steps to fix this issue and help you paint your walls like a pro. That way, you’ll not only save money but also gain confidence for your next project. Ready to transform your space? Let’s get started.
Prepping the Walls for Even Coverage
Start by removing or taping off any fixtures, outlets, and baseboards. Use a damp cloth to wipe dust, dirt, and grease, which can cause uneven paint adhesion. I once skipped this step and ended up with patchy spots that took hours to fix, teaching me the importance of thorough prep.
Choosing the Right Tools and Paint Consistency
Use high-quality rollers and brushes suited for your wall type. A roller with a medium nap (about 3/8 inch) is ideal for smooth walls. Keep your paint mixed to a consistent, slightly runny consistency—think of pouring honey versus ketchup. Too thick, and you’ll get uneven patches; too watery, and coverage suffers. I once added a bit of water to my paint and noticed less roller splatter and a smoother finish.
Applying the First Coat Properly
Dip your roller about half an inch into the paint, then roll it on the tray’s ridges to remove excess. Apply the paint in ‘W’ or ‘M’ shapes, filling in the gaps without lifting the roller. Maintain a wet edge to prevent lap marks. I recall painting a living room wall by creating overlapping strokes, which resulted in a patchy look; I then learned to keep the roller moist and move quickly to keep a seamless finish.
Smoothing Out the Stripes and Uneven Patches
The key to eliminating stripes is applying a second coat in a different direction—usually perpendicular to the first. This cross-hatching technique balances out uneven pigment distribution. I once painted a bedroom using only one direction and saw streaks glaring under the lighting; switching to perpendicular strokes made the wall look uniform.
Sand and Re-coat for Perfect Finish
Once the second coat is dry, lightly sand any noticeable bumps or drips with fine-grit sandpaper. Wipe dust off and inspect the surface. If necessary, apply a thin third coat in the same manner. Remember, patience with sanding and re-coating results in walls that appear professionally finished. In my experience, skipping sanding left rough patches that caught the light strangely, so now I always incorporate this step.
Final Tips to Seal the Deal
To further enhance color uniformity and durability, consider applying a clear sealer or paint finish suited to your room’s needs. For high-traffic areas, a semi-gloss or satin finish can hide minor imperfections better than flat paint. Check out [the ultimate guide to house painting](https://elitepainterpro.com/the-ultimate-guide-to-house-painting-boost-curb-appeal) for more tips on finishing touches. Remember, the secret to a flawless look often lies in meticulous preparation and patience during application.
Many homeowners and DIY enthusiasts believe that choosing the right paint color and applying a few coats will guarantee a perfect finish. However, this common belief often masks a deeper misunderstanding of the subtleties involved in quality painting. Contrary to popular opinion, the real mastery lies not just in the initial color choice but in the preparation, technique, and understanding of paint behavior.
One prevalent myth is that all paints are created equal, and therefore, selecting a cheaper brand won’t impact the final outcome. In practice, this couldn’t be farther from the truth. Higher-quality paints contain advanced binders and pigments that ensure better adhesion, coverage, and longevity—elements that are crucial for achieving a truly professional look. According to a study published by the Paint & Coatings Industry, premium paints significantly reduce the number of coats needed and improve durability, saving time and costs in the long run.
Another nuance many overlook is the importance of proper application technique. For example, overloading a roller with paint causes drips and uneven texture, while applying too little can lead to patchy coverage. Additionally, working in the correct sequence and maintaining a ‘wet edge’ are advanced skills that separate amateur results from professional finishes. Many underestimate how critical brushwork remains even when rolling—small, consistent strokes help prevent lap marks and streaks.
Let’s tackle a common mistake—using the wrong tools for specific surfaces. For instance, a low-nap roller is great for smooth walls but disastrous on textured surfaces, where a thicker nap facilitates better paint pickup, resulting in even coverage. Moreover, neglecting to prime surfaces—especially those with stains or previous coatings—can lead to bleeding, peeling, or uneven coloration.
Now, for the advanced question:
Why does paint sometimes look different under various lighting conditions, even after proper application?
The answer lies in the phenomenon of color temperature and how light sources interact with paint finishes. A paint color may appear darker under incandescent bulbs but brighter under daylight. This variability emphasizes the importance of testing colors in your actual environment before committing. Experts at elitepainterpro.com advise doing a small patch test at different times of day to anticipate how your chosen color will look long-term.
In conclusion, proper local or house painting extends beyond choosing the right color and applying a couple of coats. It demands awareness of subtle factors such as paint composition, application techniques, surface preparation, and lighting conditions. Recognizing these nuances helps avoid costly mistakes and elevates your results from amateurish to professional. Have you ever fallen into this trap? Let me know in the comments.
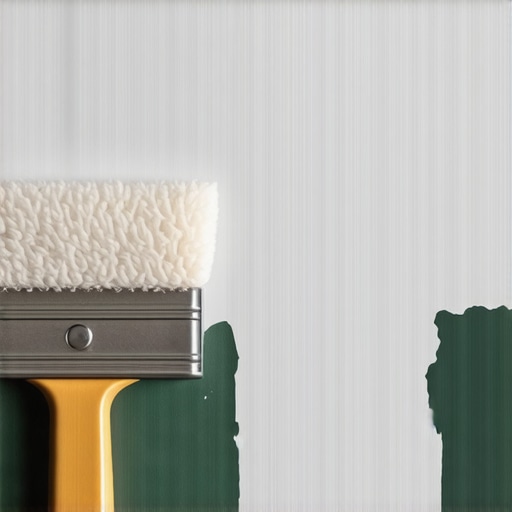 Maintaining your paint job over time requires more than just applying a fresh coat and hoping for the best. The right tools and consistent upkeep can significantly extend the life of your walls, saving you both time and money in the long run. One investment I highly recommend is a high-quality microfiber roller and a fine-tip brush. I prefer microfiber rollers because they provide superior coverage and leave fewer lint particles behind, which can mar the finish. My personal favorite is the Wooster Designer Select series, as it balances durability with a smooth application, especially on smooth walls. For touch-ups and detailed work, a good-quality angled brush like the Purdy Alpha series is perfect—I’ve found it offers excellent control and minimal streaking, even on textured surfaces.
How do I keep my painted surfaces looking fresh over the years?
Regular maintenance is key. I schedule quarterly inspections of high-traffic areas or humid zones like kitchens and bathrooms. Using a gentle cleaner and a soft sponge, I wipe down surfaces to remove dust, grease, and stains. For stubborn marks, I rely on a mixture of warm water and mild soap, avoiding abrasive cleaners that can damage the finish. Applying a clear, protective topcoat can also prolong the vibrancy and durability of your paint, especially in outdoor or high-wear areas. For example, a semi-gloss or satin finish can resist smudges and make cleaning easier, thanks to their non-porous surface.
As trends evolve, I predict that innovative tools like robotic paint rollers and smart paint sensors will become more widespread. These advancements will further streamline the maintenance process, allowing homeowners to monitor and manage their paint health remotely. Digital health trackers for walls could alert you when a repaint is due, based on color fade or surface wear.
To ensure your painted surfaces remain pristine, I suggest adopting a proactive approach: routinely inspect for chips or peeling, clean surfaces regularly, and consider reapplying a protective coat every few years. The secret lies in consistent, gentle care—it’s far easier than stripping and repainting a wall that’s become neglected.
Remember, the best maintenance plan involves using the proper tools for touch-ups, cleaning with suitable products, and applying quality protective finishes. For more advanced strategies, check out my suggestions on [local painting solutions](https://elitepainterpro.com/transform-your-home-with-expert-house-painting-tips-for-2025). Why not try reapplying a clear sealant on a small area this weekend? It’s a simple step that pays off in long-term durability and aesthetic appeal.
Lessons That Changed How I Approach Local Painting
One of the most valuable insights I gained was the importance of patience and proper prep—rushing through initial steps often leads to visible flaws later. I also discovered that quality tools make a noticeable difference in finish, saving time and frustration. Finally, understanding how lighting affects color perception has saved me from costly repainting, reminding me that every detail impacts the final look.
Tools and Resources That Elevated My Painting Game
I trust the pro tips from industry experts because they combine practical advice with scientific understanding. My go-to tools include the Wooster Designer Select series roller for smooth coverage and the Purdy Alpha angled brush for precision. For color testing, I rely on ambient lighting and sample patches to see how hues will look in real life. These resources have consistently helped me achieve professional results.
Taking Action to Transform Your Space Today
Your walls are more than just surfaces—they’re a reflection of your effort and attention to detail. With the right knowledge, tools, and mindset, you can turn a simple paint job into a true masterpiece. Don’t wait for perfection; start small, learn as you go, and enjoy the process of bringing new life to your home. Remember, every great painter started where you are now—what matters is taking that first step.