

Ever been in the middle of a paint job, only to find out later that your wall still isn’t as smooth or vibrant as you’d hoped? I remember the frustration vividly—spending hours or even days, only to see uneven patches, peeling, or inconsistent color. My lightbulb moment came when I realized that the secret wasn’t just in choosing the right paint but in understanding primer layers—specifically, why professional painters often add not just one but two layers of primer. It felt like a behind-the-scenes trick that I was missing out on, and once I understood it, everything changed.
The Power of the Double Primer Approach
In my early days of DIY painting, I used a single primer undercoat and expected perfect results. But time after time, I faced issues like bleeding stains showing through or uneven absorption of paint. That’s when I discovered that many pros swear by applying two layers of primer before the actual paint. This isn’t just a gimmick; it’s a strategic move rooted in ensuring a uniform surface that enhances paint adhesion, prevents bleed-through, and prolongs the lifespan of your paint job. When I started incorporating this approach, I saw dramatic improvements in the final look and durability of my projects. Curious about why this works? Let’s dig into the details and how you can make this technique your secret weapon.
Is Double Primer Just a Fad or Real-World Necessity?
I once dismissed the idea as overkill—after all, how much difference could an extra layer make? That was my mistake. A common error I made early on was skipping a proper etching primer on stained or heavily pigmented surfaces, which led to premature peeling and discoloration. This experience taught me that understanding the specific needs of your surface and the right primer systems can save you time, money, and frustration in the long run. For a comprehensive guide on choosing the primer that suits your project, check out this article.
Now, if you’re thinking,
Prepare Your Surface Thoroughly
Start by cleaning the wall to remove dust, grease, and peeling paint. Use a damp cloth or mild detergent, ensuring the surface is dry before priming. For stubborn stains or damaged areas, sand lightly to create a smooth base. This preparation prevents primer from binding poorly and ensures even adhesion, much like preparing a canvas before painting.
Choose the Right Primer for Your Surface
Select a primer suited to the wall material and the type of paint you plan to use. For stained or new drywall, an alkyd or stain-blocking primer is ideal. If you’re working with porous surfaces, a shellac-based primer helps prevent bleed-through. Accurate primer selection saves you from double priming unnecessarily or facing issues later, akin to choosing the correct primer for a specific fabric before dyeing.
Apply the First Primer Layer
Use a high-quality roller or brush to apply the first coat evenly, working in manageable sections. Maintain a wet edge to avoid lap marks. Let it dry completely, following the manufacturer’s recommended drying time. I once applied a single coat and skipped the waiting time, which led to uneven absorption. The first layer acts as a foundation, sealing the surface much like laying a primer coat on a tired piece of wood to block stains and create a smooth finish.
Sand Lightly Between Coats
After the first primer is dry, lightly sand the surface with fine-grit sandpaper. This step removes any brush strokes, drips, or imperfections, leading to a perfectly smooth layer for the second coat. I remember a time I skipped this step — the second primer layer showed surface flaws that became visible through the topcoat. Think of this as smoothing out wrinkles to ensure a flawless finish.
Apply the Second Primer Layer for Optimal Results
Use the same technique as before, applying the second coat evenly and allowing sufficient drying time. This extra layer enhances adhesion, covers stains thoroughly, and provides a uniform base for your topcoat. Applying two primer coats might seem extra, but it prevents future peeling or bleeding, much like adding a second primer coat on stained furniture enhances durability.
Finalize with a Smooth Finish
Once the second primer is dried, inspect the surface. Lightly sand again if necessary, and then proceed with your chosen paint. This double-priming process guarantees a more vibrant and longer-lasting finish. Remember, just like a coat of primer before wallpapering, two layers ensure your wall’s surface is sealed, smooth, and ready for the final application.
For more expert insight into painting techniques and how to master each step, check out these professional tips.
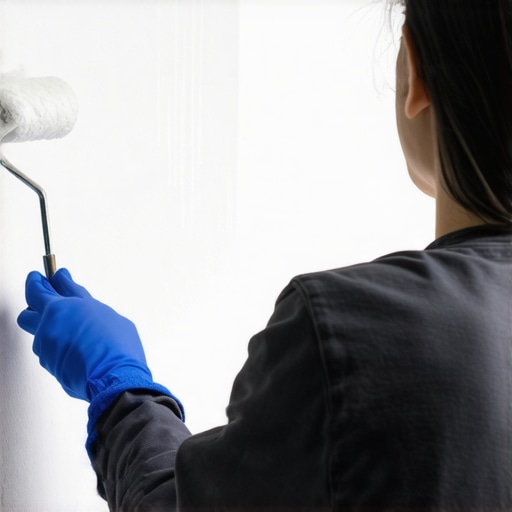 Many homeowners believe they know the basics of house painting, but beneath the surface lie nuanced pitfalls that can sabotage even the most diligent efforts. One common misconception is that selecting high-quality paint alone guarantees durability; however, the preparation process is equally critical. For instance, failing to properly clean or Sand the surface creates a barrier to adhesion, leading to peeling or uneven finish over time. In my experience, following a meticulous prep routine—like lightly scuffing glossy surfaces to improve grip—significantly extends paint lifespan and appearance.
A frequent myth is that darker colors always require more coats. While it’s true that deep hues can demand additional layers, the real strategic advantage comes from understanding primer compatibility. Using a stain-blocking or tinted primer tailored to your chosen color can reduce the number of coats needed, saving time and money. Advanced painters also leverage professional techniques like strategic brushwork and environmental considerations to optimize results.
Beware the trap of rushing to paint in unsuitable weather. Painting during high humidity or extreme temperatures can prevent proper curing, resulting in a dull finish, peel, or other defects. An often-overlooked detail is the paint’s formulation—some finishes are better suited for exterior versus interior projects, or for specific materials like stucco or wood. Knowing which products adhere best in different conditions can make a tangible difference, a fact backed by research from the experts in local painting.
For seasoned painters, the hidden nuance often lies in the sequence of steps—like painting trim before walls or using a high-quality painter’s tape to prevent bleed-through. Skipping such details might seem minor but can lead to a compromised aesthetic. Interestingly, even the choice of brush versus roller can influence the final look; skilled painters select tools based on surface texture and desired finish. To master these subtleties, reviewing advanced tips can elevate your projects from amateur to professional.
Ultimately, the key to overcoming these pitfalls is a deep understanding of paint chemistry, surface properties, and environmental factors. Incorporate expert insights, such as assessing the surface’s moisture content or choosing the proper primer, for a flawless finish that endures. Don’t just settle for surface-level knowledge—delve into the details, and your home will thank you. Have you ever fallen into this trap? Let me know in the comments. For more insights, explore local painting strategies and refine your craft.
Keeping Your Painting Equipment in Top Shape
Investing in high-quality tools is just the beginning; maintaining them properly ensures they serve you well over years. I personally swear by cleaning my brushes and rollers with warm water and a mild detergent immediately after each project. This prevents paint buildup that can ruin brushes or cause uneven application in future jobs. For sprayers, I recommend using specialized cleaning kits like the Graco Spray Cleaner, which thoroughly flushes out residual paint, preventing clogs and extending equipment life. Regularly inspecting hoses and seals for wear prevents leaks and ensures consistent spray patterns. Remember, well-maintained tools not only save money but also contribute to a flawless finish every time.
Upgrade with Smart Software
For those serious about scaling their painting projects, adopting digital solutions is a game-changer. I use painting project management software to schedule tasks, track supplies, and generate estimates. These platforms help streamline workflow, especially if you’re managing local teams or handling multiple properties. Additionally, tools like ColorSnap Visualizer assist clients in visualizing color schemes, reducing revisions and increasing satisfaction. As technology advances, I predict more painters will leverage AI-based color matching and drone photography for site assessments, making the process faster and more accurate.
How do I maintain my tools over time?
Consistent maintenance is key. Clean tools thoroughly after each use, store brushes and rollers horizontally or with protective caps, and periodically replace worn parts. Lubricating sprayer mechanisms helps prevent rust and ensures smooth operation. Keep your equipment in a climate-controlled environment to prevent moisture damage, which is especially crucial for pneumatic tools or spray guns. For an in-depth look at equipment care, check out these maintenance tips. By dedicating a few minutes after each job, you’ll extend the lifespan of your tools and ensure your projects look professional every time.
The Future of Painting Tech
Looking ahead, I believe automation and smart devices will become standard in house painting. From robotic paint applicators to augmented reality apps that help visualize color schemes in real-time, the industry is on the cusp of a technological revolution. Embracing these innovations can drastically reduce waste, improve accuracy, and speed up projects. For those eager to stay ahead, exploring latest painting innovations and integrating them into your workflow could set you apart in a competitive market. Try experimenting with a digital color-matching app today to quickly select perfect hues for your next project—it’s a small step toward mastering future trends and optimizing your results.
The Lessons Designed by Experience
- One of my most eye-opening lessons was realizing that surface preparation is everything—skipping it can undo hours of work and lead to costly fixes later. Now, I always spend extra time cleaning and sanding; it’s like laying a solid foundation before building a house.
- Discovering that applying two coats of primer isn’t about extra effort but about ensuring uniformity and durability has transformed how I approach every project. It’s a simple step that yields professional results and peace of mind.
- I used to believe that top-quality paint alone could hide surface flaws, but I learned the hard way that the right primer and proper surface treatment make all the difference. Understanding your surface’s needs is a game-changer.
- Patience has been my greatest teacher—waiting for each primer coat to dry and light sanding in between ensured a smooth, flawless finish. Rushing only caused imperfections that were difficult to fix later.
- Lastly, investing in good tools and maintaining them—clean brushes, rollers, and sprayers—has saved time and money, making every painting job feel less like a chore and more like an art.
My Go-To Resources for Painting Success
- Professional Painting Tips: This site’s extensive guides and expert advice have upgraded my skills beyond DIY hacks, giving me confidence in tackling more complex projects.
- Innovative Painting Ideas: Staying ahead with new techniques and trends inspires me to push creative boundaries and achieve unique, long-lasting finishes.
- Local Painting Insights: Understanding regional weather and material suitability has helped me select the right primers and paints, reducing failures and increasing durability.
- Budget-Friendly Strategies: This resource keeps me efficient and budget-conscious, especially when working on multiple projects.
Harness Your Inner Painter and Embark Now
Painting isn’t just about adding color—it’s about creating a lasting expression of your home’s personality. The double primer technique is my secret weapon for professional-quality results that stand the test of time. Every brushstroke, every coat, is a step toward transforming your space into something truly special. So why wait? Grab your brushes, plan carefully, and enjoy the rewarding process of bringing your vision to life. Remember, great walls don’t happen by chance—they’re carefully crafted with knowledge and care. What’s the next project you’re excited to tackle with this expert insight? Share your plans below and let’s inspire each other to paint confidently!