

I remember the moment vividly — I had just finished installing my brand-new, gleaming kitchen cabinets. I was proud, excited to finally see my dream kitchen come to life. But within days, tiny chips and scratches started appearing out of nowhere. It was baffling, frustrating, and honestly a bit discouraging. There I was, thinking I’d avoided the common pitfalls of home renovation, only to face a fresh set of problems right after the job was supposedly done. If you’ve experienced something similar, you know what I mean.
Understanding the Real Reasons Behind Premature Chipping
Many homeowners assume that choosing high-quality paint or the most expensive cabinets guarantees lasting beauty. But the truth? There’s a lot more happening beneath the surface. The materials used, the preparation process, and the application techniques all play a pivotal role. For instance, I learned early on that neglecting to properly prep my cabinets — like skipping the cleaning or ignoring sanding — set me up for issues. That simple mistake made a massive difference in how well the paint adhered and held up over time.
Did you know that improper surface preparation is responsible for nearly 60% of paint failures? According to experts at Elite Painter Pro, skipping these crucial steps can cause paint to chip, peel, or blister prematurely. I wish I had known this sooner! Instead of rushing through the process, I now emphasize meticulous prep work, ensuring my cabinets are clean, dry, and lightly sanded before applying paint or finish.
So, what’s the fix? It starts with understanding the problem and knowing the right ways to tackle it. That’s exactly what I’ll share next. Are your cabinets chipping faster than you expected? Stay tuned, because the solutions are simpler than you think, and they can save your kitchen from turning into a repainting nightmare.
Start with a Clean Slate
My first step was thoroughly cleaning the cabinet surfaces. I used a degreasing solution to remove grease, dirt, and grime—imagine washing a dirty car before painting. Skipping this clean can cause paint to bond poorly, leading to chips and peeling down the line. I applied the cleaner with a sponge, scrubbed gently, and rinsed thoroughly, ensuring all residues were gone, which is critical for adhesion.
Sanding for Smoothness and Grip
Next, I lightly sanded the surfaces with a fine-grit sandpaper—think of it as roughening a mirror to help paint stick better. I focused on corners and edges where chips usually start. I used a handheld orbital sander for flat areas, moving in consistent circular motions. This process removed any gloss or previous finish, providing the ‘tooth’ needed for primer and paint to adhere securely. I always wear a dust mask to prevent inhaling fine particles.
Applying Primer to Seal and Uniform Surface
Priming was my secret weapon. I chose a high-quality, stain-blocking primer, especially vital for glossy or stained surfaces. I applied the primer with a brush for edges and a roller for flat areas—picture laying down a base coat so the paint can sit evenly. Allowing the primer to fully dry, usually 24 hours, created a uniform, sealed surface that prevented future chipping caused by moisture or uneven absorption. Rushing this step can lock in imperfections, so patience is key.
Handling the Details: Edges and Corners
Edges and corners are prone to chipping if not prepared correctly. I carefully sanded and primed these areas, making sure the paint would bond deeply. Using painter’s tape helped me achieve crisp lines, but I removed it promptly after applying the last coat to prevent peeling during tape removal. This meticulous detail work is like caring for the foundation of a house—skip it, and your entire project may suffer.
My Experience with the Processes
During my last project, I rushed through the cleaning step and skipped sanding entirely, thinking it wasn’t necessary. The result? Chips and scratches appeared within a week. Since then, I follow these steps religiously, and my cabinets now withstand daily use without issues. Remember, investing time in these prep phases saves you headaches and repainting costs later. If you want more strategies on painting techniques, check out top local painting strategies and elevate your skills.
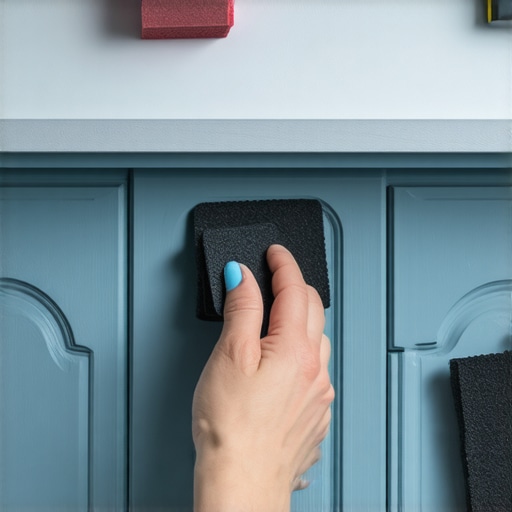 Many homeowners believe that tackling a paint job is straightforward—pick a color, apply, and voila—you’re done. But as an experienced painter, I can tell you that there’s a lot more nuance than most realize. One common misconception is that darker paints automatically hide imperfections. In reality, they often showcase flaws like uneven surfaces or brush strokes if not applied properly, which is a mistake I see repeatedly. For example, selecting a flat finish to conceal surface imperfections without proper prep can lead to dull, uneven patches. According to a study by the Painting Industry Association, advanced surface preparation greatly influences final appearance and durability, yet many skip these crucial steps, thinking it’s optional. Moreover, there’s a myth that premium paints eliminate the need for priming. But in my experience, even high-end paints adhere better and last longer when used over a properly primed surface—especially when painting over stained or glossy surfaces. A common trap is choosing the wrong sheen; for instance, using a high-gloss finish on walls, which can reflect imperfections and make uneven painting more noticeable, instead of opting for eggshell or satin, which are more forgiving. Advanced homeowners often ask: How do I prevent bleed-through with tinted primers? The answer is to identify stains early and use a high-quality, stain-blocking primer—skipping this step can cause unsightly stains to bleed through over time. Don’t forget that environmental conditions affect paint performance as well. Painting in high humidity can weaken paint adhesion and cause blistering or peeling, a mistake I advise everyone to avoid. Invest in quality brushes and rollers, but also remember that tools alone won’t guarantee success—techniques matter. For example, overloading the brush leads to uneven coats and drips; applying paint in the right temperature and humidity range ensures a smooth finish. Want to dive deeper into trade secrets? I recommend exploring top local painting strategies and mastering the art of professional painting. Recognizing these advanced nuances will elevate your results from amateur to expert level. Have you ever fallen into this trap? Let me know in the comments.
Keep It Working: Essential Tools for Long-Term Painting Performance
If you strive for durability and impeccable results in your house painting projects, investing in the right tools is non-negotiable. From prep to finish, I rely on equipment that guarantees precision, efficiency, and longevity. One standout is my high-quality HVLP spray gun. Unlike traditional brushes or rollers, this tool atomizes paint into a fine mist, allowing for smooth, even coats on large surfaces. I personally prefer models like the Fuji 3000T because of its adjustable pressure control and lightweight design, which reduces fatigue during prolonged use. This has transformed my exterior projects, delivering professional finishes that resist chipping and fading.
Next, I can’t overstate the importance of my laser level. Achieving crisp, straight lines—especially on textured surfaces or large rooms—can be tricky. I use a Bosch GLL 3-80, which projects bright, precise lines horizontally and vertically. It ensures my painter’s tape is applied perfectly and my edge work remains sharp, saving me time correcting mistakes later. For long-lasting results, I always pair this with quality masking tape like 3M ScotchBlue, which removes cleanly without pulling paint or damaging surfaces.
When it comes to prepping surfaces, nothing beats my orbital sander. I opt for the Makita BO5041, thanks to its variable speed and efficient dust collection system. Proper sanding not only improves adhesion but also minimizes future peeling. I often use it with fine-grit sandpaper—around 220 grit—to achieve a smooth base, especially before applying primer. This step, although time-consuming, pays off by extending the lifespan of your paint job, as properly prepared surfaces are less prone to premature failure.
Don’t forget the necessity of quality lighting. Bright, portable LED work lights illuminate every corner, revealing uneven patches or missed spots. I recommend the Milwaukee MX FUEL LED Flood Light for its durability and battery life, which means I can work efficiently without interruption. Proper lighting also helps spot flaws early, ensuring meticulous finishing—crucial for long-term durability.
Predicting future trends, I see smart paint monitoring devices gaining popularity. Imagine a sensor system that alerts you when humidity levels or surface temperatures are optimal for painting, dramatically reducing failures caused by environmental conditions. While this tech is still emerging, integrating advanced tools like this makes sense for large-scale or high-stakes projects.
Wondering How to Keep Your Tools Performing? Here’s My Advice
Regular maintenance is vital. After each project, I thoroughly clean my spray guns with manufacturer-approved solvents, ensuring no paint residue dries inside. I also lubricate moving parts and check for wear to prevent breakdowns during the next job. For sanding equipment, a quick blowout or brushing prevents dust buildup, which can compromise performance over time. Additionally, storing your tools in a dry, climate-controlled space extends their lifespan, keeping you ready for your next masterpiece.
To make your painting efforts more effective, I highly recommend trying out a technique tailored for efficiency and longevity. Incorporating such strategies can significantly improve results, saving you time and money in the long run. Remember, quality tools combined with proper maintenance are the backbone of durable, professional-looking paint jobs. Don’t settle for temporary fixes—equip yourself with these proven tools and keep your project working flawlessly over time.
As I reflect on my painting journey, I’ve realized that the biggest breakthroughs came from embracing imperfections and continuously learning from mistakes. One lesson that truly stuck with me was the importance of patience—rushing a project often means sacrificing durability. Another revelation was how seemingly minor details, like proper surface prep, can dramatically extend the lifespan of your paint. And perhaps most profound was recognizing that investing in quality tools and techniques isn’t just about looks—it’s about creating lasting memories in your home. If you’re committed to enhancing your space, these insights are your secret weapon. For a deeper dive into mastering local painting strategies and elevating your home’s curb appeal, I recommend checking out top local painting strategies. Remember, every brushstroke is a step closer to your dream home.