

I remember the moment clearly—standing in my freshly expanded living room, roller in hand, ready to transform the space. But as I started painting, I noticed something odd. The walls looked dull and uneven, no matter how many coats I applied. It was a frustrating realization: I had skipped a crucial step—using the right primer for my new addition. That lightbulb moment taught me a valuable lesson, one I want to share with you today.
The Hidden Power of a Quality Primer in Your Home Expansion
When we add a new room or extension to our homes, it’s tempting to jump straight into paint, eager to see instant results. But skipping or using the wrong primer can cause headaches down the line—peeling paint, uneven color, or worse, everything needing a redo. As someone who’s learned this lesson the hard way, I can tell you that a specialized primer isn’t just a nice-to-have; it’s a necessity.
A properly chosen primer acts as a bridge—enhancing adhesion, blocking stains, and creating a uniform surface that ensures your paint job lasts longer and looks better. Especially in new additions, where drywall and construction materials are fresh, they often have different absorption properties. Not giving them the proper prep can jeopardize your entire project.
Research confirms this: a survey by the Painting and Decorating Contractors of America emphasizes that using the right primer can extend the lifespan of your paint by up to 30%. That’s a noticeable difference—saving time, effort, and money.
Are you facing issues like peeling paint or uneven shades on your recent addition? If so, you’re not alone. Many homeowners overlook the importance of a specialized primer, leading to costly mistakes. Keep reading, because I’ll guide you through selecting and applying the perfect primer—so your efforts truly pay off.
Choose the Right Primer for Your Surface
Start by assessing your wall material—drywall, plaster, or masonry—and select a primer designed specifically for that surface. For drywall, use a latex-Based primer that seals the paper and prevents stains from bleeding through. Masonry surfaces require a bonding primer that enhances adhesion and blocks efflorescence. During my last project, I ended up buying a universal primer, but it lacked the adhesion needed for my textured drywall, which caused peeling later. Choosing the correct primer is like laying a solid foundation—it sets the stage for a flawless finish.
Prep the Area and Gather Your Tools
Before applying primer, clear the room and cover furniture and flooring with drop cloths. Use painter’s tape to mask off trim, outlets, and any areas you want to keep clean. Have your brushes, rollers, and a roller extension pole ready. I once skipped this step, and in my rush, I spilled primer on the carpet, resulting in a stubborn stain. Proper prep work ensures efficiency and cleanliness while applying primer, saving you time during cleanup and avoiding rework.
Apply the Primer with Precision
Pour a manageable amount of primer into a tray and use a high-quality roller to apply it in even, crisscross strokes. Start at the top corner of the wall and work your way down. Use a brush around edges and corners for detailed coverage. I remember applying primer hurriedly with a roller, leaving streaks and uneven patches. To avoid this, work in small sections, maintaining a wet edge to blend seamlessly. This technique ensures uniform coverage, which is crucial for a smooth paint application later.
Pay Attention to Necessary Drying Times
Follow the manufacturer’s instructions for drying; typically, primer takes 1-2 hours to dry thoroughly. Do not rush this step, as applying paint over wet primer can cause adhesion issues. I once painted a wall after only 30 minutes, and it bubbled up within days. Patience here pays off—proper drying creates a stable base that bonds well with your paint, leading to a professional-looking finish.
Inspect and Fix Any Imperfections
After drying, inspect the primed surface for missed spots or uneven coverage. Spot prime any areas that need touch-ups with a brush. Sand lightly if necessary to smooth out any rough patches. I neglected this step on a recent project, and the paint emphasized those rough spots, creating a less-than-perfect result. Taking time to review the primed surface guarantees an even, flawless final coat and makes your overall painting effort more successful.
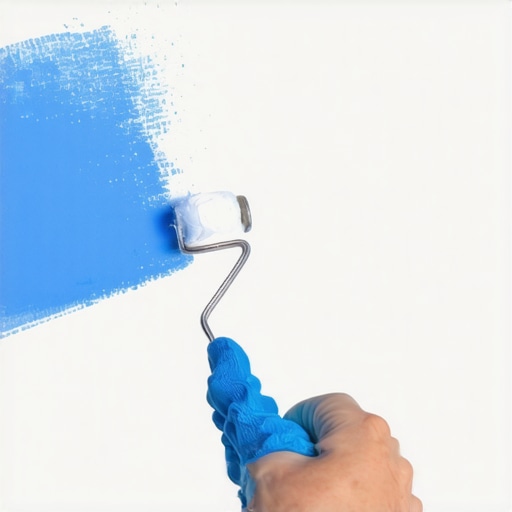 When it comes to painting your home, many homeowners rely on conventional wisdom that, surprisingly, can lead to costly errors. Contrary to popular belief, the quality of the primer you choose is often overlooked, yet it plays a pivotal role in the longevity and appearance of your paint job. Skimping on primer or selecting the wrong type is a mistake that even seasoned DIYers sometimes make, thinking it’s an unnecessary step, but know this: a well-applied primer creates a perfect foundation, preventing issues like peeling and uneven color buildup.
One of the most persistent myths in the painting world is that one coat of high-quality paint will suffice for a flawless finish. In reality, multiple thin coats, combined with proper preparation—like correct priming and sanding—produce a superior, durable surface. Overlooking surface preparation can trap dust, grease, or old paint beneath new layers, resulting in adhesion failure. Remember, rushing through these steps often leads to what I call the “oops” factor: peeling, bubbling, or long-term discoloration.
A common trap is underestimating the importance of environmental conditions. Painting in direct sunlight or humid weather can cause premature drying or wrinkles. According to experts from the Painting and Decorating Contractors of America, ideal conditions include mild temperatures and low humidity, ensuring your paint cures evenly.
Furthermore, many believe that darker colors require fewer coats than light shades. The truth? Darker hues typically need multiple coats to prevent patchiness and to achieve uniform coverage—claiming otherwise leads to uneven walls and frustrating touch-ups. Selecting the right finishing products, such as matte or satin, is also crucial for both aesthetic and functional reasons—higher sheen finishes hide imperfections better but are less forgiving on rough textures.
How about advanced mistakes? One is neglecting to prime stained or porous surfaces adequately, which can result in bleed-through or rapid paint deterioration. Using a stain-blocking primer can save you from these issues. Additionally, not paying attention to edge-work—such as corners and trims—can create an inconsistency that’s evident once the paint dries. Mastering techniques like cutting in carefully can elevate your overall result.
Have you ever fallen into this trap? Let me know in the comments. For further insights on elevating your local painting projects, check out [local painting secrets](https://elitepainterpro.com/local-painting-secrets-elevate-your-space-effortlessly). Remember, the difference between an average paint job and a stunning one often lies in these details that seasoned professionals prioritize.When it comes to maintaining beautiful, long-lasting paint jobs, having the right tools and a solid maintenance routine is essential. Personally, I rely on high-quality brushes with synthetic bristles for precision around edges and detailed areas; they maintain their shape and deliver even coat application over time, which reduces touch-ups. A reliable paint sprayer, like the Wagner Control Spray Max, has been a game-changer for my larger projects—offering consistent coverage and saving me hours of manual work. Keep in mind, equipment choice can dramatically influence the durability and aesthetic of your finish.
Beyond tools, regular upkeep prolongs your paint’s lifespan. For example, cleaning exterior walls annually with a gentle pressure wash can prevent dirt buildup and prevent mold growth that deteriorates the surface. For interior walls, quick touch-ups with a small roller and matching paint every few years can prevent a worn appearance. Remember, addressing minor issues early prevents them from escalating into major repairs, which can be costly and time-consuming.
Looking ahead, I believe automation in painting tools is trending upward. Innovations like cordless electric sprayers with smart-nozzle technology will make maintenance easier, delivering uniform coats with less effort. Additionally, eco-friendly, self-cleaning brushes are on the horizon, making routine maintenance more sustainable and less labor-intensive.
Curious about the best practices for maintaining your newly painted surfaces? One question I get often is, “How do I keep my paint looking fresh for years?” The answer lies in routine cleaning, prompt touch-ups, and using proven tools suited for your surface type—like the [specially designed brushes and sprayers](https://elitepainterpro.com/transforming-spaces-local-painting-solutions-for-every-budget). For even more tips on elevating your local painting efforts, check out [local painting secrets](https://elitepainterpro.com/local-painting-secrets-elevate-your-space-effortlessly). To get started, try applying a quality primer before your next big project—it makes maintenance much simpler down the line.
Lessons Behind the Canvas of My Painting Journey
One of the most profound lessons I learned was the significance of patience—waiting for the primer to dry thoroughly before applying paint. Rushing this step led to cracks and peeling, reminding me that good things come to those who wait. I also discovered that not all primers are created equal; selecting a primer tailored to your surface can make or break your project’s longevity. Perhaps the most eye-opening revelation was understanding the subtle difference a primer can make: it’s the unsung hero that ensures your vibrant colors stay vivid and your walls remain flawless for years. These insights transformed my approach and can do the same for your home transformation endeavors.
Tools and Resources That Changed My Painting Perspective
Over time, I found that investing in high-quality brushes with synthetic bristles preserved my work’s integrity and reduced frustration. The Wagner Control Spray Max became my trusted companion for larger surfaces, providing smooth, even coverage that would have taken hours with a roller. Books like “Paint Like a Pro” offered invaluable tips on surface prep and finishing techniques. Additionally, joining online forums and local workshops broadened my understanding and kept me motivated. These tools and sources are my pillars of confidence, guiding each project from novice to proficient.
Seize the Moment and Paint Your Dream Space
Embarking on a painting project is more than a chore; it’s an opportunity to express your personality and enhance your living environment. Remember, every brushstroke brings you closer to a home that reflects your style and pride. Don’t be daunted by the technicalities—trust the process, use the right primer, and pay attention to detail.Your journey in house painting is unique, and with dedication, even mistakes become valuable lessons. Now’s the time to pick up that brush and turn your vision into reality. Have you ever struggled with the priming process or choosing the right tools? Share your experiences below and let’s learn together.