

Imagine this: You finally finish staining your deck on a sunny Saturday, step back to admire your work, and within a few months, large sheets of stain start peeling off like ice melting in spring. It’s frustrating, messy, and leaves you wondering what went wrong. I remember my own deck fiasco; I thought I’d nailed the prep work, only to find big chunks peeling just after the season turned.
Why Does My New Deck Stain Peel?
The honest truth is, peeling isn’t just about bad luck. It’s often a sign you skipped some crucial steps or chose the wrong products. One common mistake homeowners make initially is assuming that any stain will do — but not all stains bond equally well, especially if the surface isn’t properly prepared. I learned this the hard way when I didn’t thoroughly clean the wood surface, which led to poor adhesion and peeling (more on that later). Understanding why your stain peels can save you a lot of headache and rework, and that’s exactly what we’re going to tackle today. If you’re tired of re-staining your deck every year, keep reading because I’ll guide you through proven strategies to ensure your stain sticks for years to come. You want your work to last, not end up in the compost heap, right? And if you’re considering whether investing in professional help is worth it, check out this helpful article on [professional painting](https://elitepainterpro.com/unlock-the-power-of-professional-painting-for-a-stunning-home) for stunning results.
Will Fixing This Be a Waste of Time?
Early on, I made the mistake of rushing the preparation process, thinking it wasn’t a big deal. Spoiler: It was. I figured a quick scrape and a fresh coat would solve everything, but the stain kept peeling. That’s a lesson I hope you won’t learn the hard way. Proper surface prep is critical for lasting stain adhesion, and skipping steps often leads to peeling in large sheets. Trust me, if you want to avoid a repeat of my mistake, understanding the root causes of peeling will be your best ally. Ready to learn the secrets of a flawless stain job? Let’s dive into what you need to do right from the start.
Start with a Thorough Cleaning
In my first attempt at staining my deck, I skipped this step, assuming a quick sweep was enough. But the result was disastrous—peeling and uneven color. I learned that a deep clean removes dirt, mold, and old residues that can prevent adhesion. Use a deck cleaner or a mixture of water and mild detergent, scrubbing the surface with a stiff broom. Rinse thoroughly and let it dry completely. This creates a clean canvas, much like preparing a painter’s palette, ensuring the stain bonds properly and lasts longer.
Sand Rough Areas and Old Finish
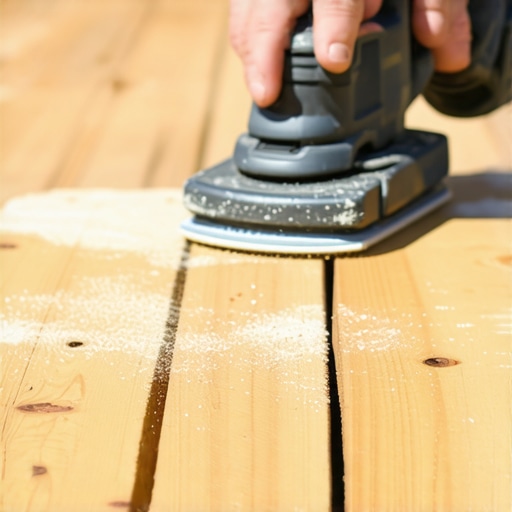
Next, I used a palm sander on rough patches and peeling spots, which improved adhesion significantly. Sanding smooths out splinters and removes failed layers of stain or sealer. Focus on high-traffic areas and edges where peeling begins. Think of this step as sanding a wooden sculpture to reveal fresh, untouched wood—this gives your stain a better grip and helps prevent future peeling.
Repair and Replace Damaged Boards
If any boards are cracked, warped, or rotten, replace them before staining. For minor damage, use wood filler and sand it smooth. Leaving damaged wood can lead to uneven absorption and peeling. Imagine trying to paint over a bumpy wall; the finish won’t look good, and imperfections show up over time. The same applies to your deck.
Apply a Quality Primer or Sealant
In my experience, applying a primer designed for decks enhances stain adhesion. Primers seal the wood’s surface and provide a uniform base, especially on new or bare wood. Choose a primer compatible with your stain product and follow the manufacturer’s instructions. Think of primer as laying a foundation—without it, your stain might settle inconsistently, leading to peeling and fading over time.
Let the Surface Dry Completely
Finally, allow ample drying time after cleaning, sanding, and priming—at least 24 to 48 hours—preferably in dry, warm weather. Moisture trapped under the stain causes peeling. I once hurried this step, and the stain failed within a season. To avoid this, do your prep work on a forecasted sunny day. This ensures the surface is dry and ready for staining, giving you a smooth, durable finish.
 Even seasoned painters often fall prey to misconceptions that can sabotage a project. One common myth is that applying multiple coats always ensures a flawless finish. While more coats can improve coverage, overdoing it without proper surface preparation can lead to peeling or uneven textures. In my experience, understanding the chemistry of paints and the surface they adhere to—something discussed in expert sources like the American Coatings Association—can make all the difference.
Are All Paints Created Equal for Every Surface?
Not exactly. Many assume that choosing a premium, high-cost paint automatically guarantees longevity and durability, but surface compatibility matters just as much. For example, using exterior latex on a damp basement wall without proper primer will often result in peeling, regardless of brand. This is a nuanced point often overlooked, leading homeowners to waste money on
Keep Your Painting Projects in Top Shape with the Right Tools
Achieving a professional-looking, durable finish requires more than just skill; the right tools make all the difference. Over my years of painting homes and local projects, I’ve refined my toolkit to include equipment that ensures efficiency, precision, and longevity. Let’s dive into these essentials and see how they can elevate your painting game.
The Power of High-Quality Sprayers
I personally swear by airless paint sprayers for large surfaces. They deliver a smooth, even coat and significantly reduce manpower and time. My go-to model is the Graco Magnum, known for its reliability and adjustable pressure control. It’s especially useful for exterior walls and fences where brush marks are unacceptable. Using a sprayer also minimizes uneven layering, which can lead to peeling or chipping over time. For smaller, detailed work, I switch to handheld HVLP sprayers, which provide better control and less over-application.
Invest in Precision Tape and Protective Gear
Few tools are as underappreciated as painter’s tape. I prefer painter’s tape with gentle adhesion properties that don’t peel paint off during removal—this is crucial for sharp, clean edges. Blue Duck Painter’s Tape has consistently delivered in my projects. Complement it with high-quality masks and safety glasses; safety should never be compromised, especially when working on ladders or in tight spaces. Better protective gear translates into fewer accidents and cleaner results.
Use Durable Drop Cloths and Surface Prep Tools
Trust me, the time saved by using heavy-duty drop cloths—preferably canvas—is worth every penny. They stay in place and contain dust and splatters effectively, making cleanup easier and preventing unintentional damage. For surface prep, a reputable orbital sander (like the Bosch Random Orbit Sander) is invaluable. It ensures smooth surfaces, which are essential for adhesion and a uniform appearance. Proper preparation with the right tools reduces the chances of peeling or bubbling after painting.
The Role of Software and Planning Aids
Beyond physical tools, digital apps like Houzz or Project Color help plan color schemes, visualize how colors will look, and organize schedules. Clear planning minimizes mistakes and ensures consistent quality across multiple projects. For professional contractors, software such as Jobber streamlines scheduling and client communication, which directly impacts long-term satisfaction.
The Future of Painting Equipment and Techniques
As technology advances, expect to see smarter sprayers with Wi-Fi connectivity and AI-guided precision. These innovations promise even better control over coverage and material usage, reducing waste and application errors. Staying updated with these trends can give you a competitive edge for local projects and help maintain high standards over time. To see this in action, review the latest industry breakthroughs on dedicated technical sites or trusted suppliers.
How do I keep my tools working well over many projects?
Proper maintenance is key. Regularly clean sprayers with the recommended solvents, lubricate moving parts, and store equipment in dry, climate-controlled spaces. Check hoses and filters for wear and replace them before failures occur. I also recommend calibrating spray settings periodically to maintain consistent application thickness. Implementing a routine maintenance schedule will pay dividends by extending your tools’ lifespan and ensuring predictable results.
If you’re serious about elevating your painting outcomes, I highly recommend trying the advanced cleaning and calibration techniques I mentioned. They’re simple but can dramatically improve your project quality and longevity of your equipment. Want to explore more tips? Visit this resource.
Hidden Lessons From My Deck Disasters
One of the most valuable insights I gained was the importance of patience—waiting for the perfect weather, letting each coat dry thoroughly, and resisting the urge to rush. Skipping these steps might seem minor, but over time, I realized they are what separate a durable finish from peeling chaos. Another lesson was the significance of choosing the right products; not every stain is compatible with every wood, and using low-quality materials can doom your project from the start. Lastly, I learned that even seasoned painters face surprises—what works on one deck might not on another—so tailoring your approach to each project is key, a tip I wish I had embraced earlier. These personal revelations transformed my approach and can do the same for you, ensuring your staining efforts last for years without peeling or flaking.