

Ever spent a sunny Saturday applying fresh stain to your deck, only to step back and see uneven patches that make the whole project look amateurish? I remember my first attempt. I was excited, thinking I’d give my backyard a professional-looking finish, but it turned out splotchy and only highlighted my mistakes. That frustrating moment was a lightbulb for me—turns out, there’s more to staining than just slapping on the paint and hoping for the best.
Unveiling the Common Cause of Splotchy Deck Stains
The truth is, a splotchy stain job isn’t just bad luck; it’s usually due to improper surface preparation or uneven application. I’ve learned the hard way that neglecting to clean, sand, or properly prep your wood can leave you with patches that refuse to soak up stain uniformly. Early on, I made the mistake of skipping a thorough cleaning, thinking a quick wash was enough. Spoiler alert: It’s not. Sometimes, dirt, mildew, or previous finishes can interfere with stain absorption, resulting in that uneven look that laughs at our DIY efforts.
Is Your Deck Flawless or Fighting a Battle?
If you’ve faced the unfortunate sight of blotchy spots after staining, you’re not alone. From my experience, tackling this problem involves understanding your deck’s surface and choosing the right products and techniques. But before jumping into solutions, I want to address a common doubt: “Is staining really worth the effort if it’s going to look uneven?” Trust me, with the right approach, you can achieve a professional finish that boosts curb appeal and protects your investment. According to experts at Elite Painter Pro, proper prep and application are key to stunning results.
Have you ever experienced a staining project that turned out worse than expected? If so, keep reading—I’ll walk you through proven steps to prevent splotchiness and restore that beautiful, even finish.
Let’s dive into what you need to do to say goodbye to uneven stains and hello to a deck that truly shines.
Prepare the Surface Thoroughly
Begin by removing all dirt, mildew, and peeling paint. Use a pressure washer or stiff brush with a cleanser designed for wood. For example, I once skipped this step and ended up with blotchy patches; after a proper clean, the stain absorbed evenly. Ensure the wood is completely dry before moving on. Proper preparation is the foundation of a smooth finish.
Sand the Wood Surface
Lightly sand rough areas to create a uniform surface, much like smoothing out a canvas before painting. Use medium-grit sandpaper and focus on splinters or raised grain. I once used a power sander on my deck; the key is to avoid over-sanding, which can damage the wood. After sanding, remove all dust with a vacuum or damp cloth. This step helps the stain penetrate evenly, preventing patches.
Choose the Right Stain and Application Tools
Select a high-quality, penetrating stain suited for your wood type. For even application, prefer a brush for detailed areas and a roller or sprayer for larger surfaces. I experimented with a sprayer once; it’s quick but requires steady arm work and even movements to avoid streaks. Always stir the stain thoroughly before use to maintain consistency. Remember, using compatible tools can make a difference in avoiding lap marks or uneven coats.
Apply the Stain Strategically
Work in manageable sections, applying the stain in the direction of the grain, much like drawing with a pencil. Use a brush for edges and detailed spots, then fill in larger areas with a roller or sprayer. I once overwhelmed a section with too much stain; it resulted in runs and uneven coloration. Keep a wet edge by blending freshly applied stain into the previous area to prevent lap marks. Keep your strokes smooth and consistent.
Maintain Consistent Technique and Conditions
Apply at the right temperature and humidity levels, ideally between 50-85°F with low humidity. This prevents blotchiness or uneven drying. My first experience staining in the heat caused the stain to dry too quickly, leading to streaks. To avoid this, stain early in the morning or late afternoon. Use the same application pattern throughout and recoat any missed spots before the stain dries completely. Regularly check your work to keep the finish uniform and professional-looking.
Allow Proper Drying and Assess the Result
Let the stain cure according to manufacturer instructions, typically 24-48 hours. Once dry, inspect your work and touch up any uneven patches. If you notice blotches, lightly sand those areas and re-apply stain. Remember, patience during drying pays off with a rich, uniform color. This last step ensures your deck looks polished, almost factory-finished, and provides lasting protection.
By following these concrete steps—thorough preparation, proper tool selection, strategic application, and patience—you significantly increase your chances of achieving an even, professional-looking stain. Keep practicing these techniques, and transforming your deck into a stunning outdoor space becomes a rewarding DIY project, not a frustrating mess. For more expert tips on local painting strategies or to explore creative finishing ideas, visit this guide.
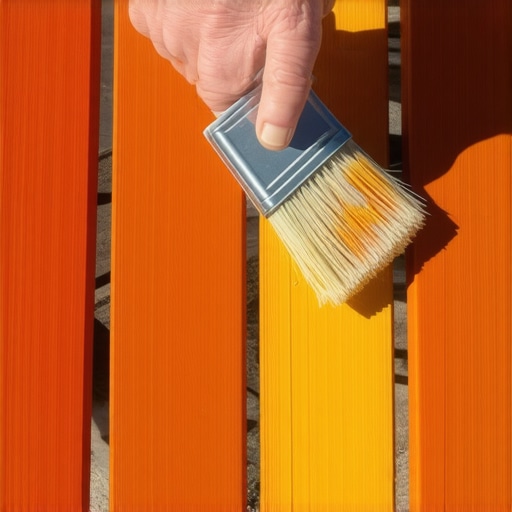
While many DIY enthusiasts focus on surface prep and color choices, a lesser-known nuance can dramatically affect the final outcome: the importance of understanding paint adhesion behavior in different environments. Everyone assumes that applying the same primer and paint across different sections of a house guarantees uniform results, but experts reveal that factors like surface porosity, moisture levels, and even microclimates play a crucial role. Ignoring these subtleties often leads to peeling, bubbling, or uneven finishes over time, wasting both time and money.
What advanced homeowners overlook about paint chemistry and environmental interactions
The secret to a durable, flawless finish isn’t just in the application technique. Adequate surface preparation addresses more than just dirt and old paint; it involves understanding paint’s chemical properties and how these react with your environment. For example, latex paints contain binders that can become less effective in high humidity, leading to adhesion failures. Similarly, high temperatures can accelerate drying too quickly, causing brush marks or lap marks that are difficult to correct later. Using high-quality preparation materials and selecting paints suited for specific conditions mitigate these risks.
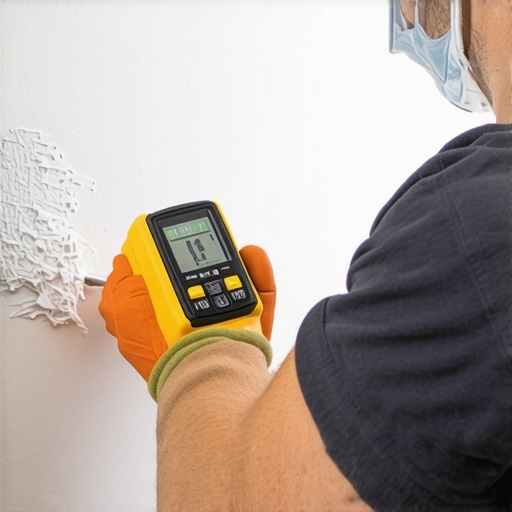
Many believe that a fresh coat can hide underlying issues, but this can mask problems like moisture intrusion or surface contamination, which will only worsen over time. An advanced approach involves testing your surfaces with moisture meters or adhesion primers designed for problematic substrates. This proactive step prevents surprises post-completion and extends the lifespan of your paint job.
How can understanding paint environmental interactions save you from costly mistakes
Research from industry leaders like Sherwin-Williams emphasizes that environmental factors directly influence paint performance. For instance, selecting the right paint finish and type based on location reduces issues like mold growth or fading. Furthermore, consulting local climate data when planning your project ensures you account for seasonal variations that might compromise curing or adhesion.
Many homeowners fall into the trap of rushing a project during ideal weather and then encountering failures during seasonal changes. Recognizing this advanced nuance—how environmental conditions and paint chemistry interact—can vastly improve your results. This is why expert advice recommends investing in high-quality primers, moisture barriers, and environmental testing before starting.
By understanding these hidden nuances—beyond just the superficial steps—you elevate your home’s protection and beauty. Stay tuned to more expert insights and practical tips to master the art of local house painting. Have you ever fallen into this trap? Let me know in the comments and share your experiences!
Invest in Quality Equipment for Long-Term Results
Maintaining a professional finish over time starts with choosing the right tools. I personally swear by high-quality brushes with angled bristles, which offer superior control and help you achieve crisp edges on trim or intricate details. For larger surface areas, a premium extension pole attached to a roller minimizes fatigue and ensures even coverage without streaks. Using a synthetic roller cover with a nap suited for your paint’s finish—typically 3/8 inch for smooth walls—allows for smooth, uniform application that resists splatter and uneven patches. Remember, investing in durable tools upfront saves you money and frustration down the line by preventing the need for touch-ups caused by inferior equipment.
Leverage Advanced Technology and Software
In the digital age, staying organized is half the battle. I recommend using project management apps like Asana or Trello to track your painting schedule, equipment maintenance, and future touch-up plans. Moreover, color-matching software such as Sherwin-Williams’ ColorSnap enables you to analyze existing paint colors precisely, ensuring consistency in touch-ups and future projects. These tools help maintain the accuracy and professionalism of your work, especially if you’re managing multiple areas or switching between shades. In the next decade, I foresee more homeowners adopting these digital solutions to keep and improve their home’s aesthetic seamlessly.
How Do I Maintain My Painting Tools Over Time?
The key to long-lasting tools is proper maintenance. After every project, rinse brushes and rollers thoroughly with warm water and a mild detergent to remove residual paint. For brushes, reshape the bristles and let them air dry flat or hanging. Store brushes with the bristles facing upward or in a protected holder to prevent bending. Regularly inspect roller covers for wear; replace them when they become flaky or distorted. Additionally, lubricate any moving parts in spray tips or extension poles periodically with silicone spray to ensure smooth operation. Proper cleaning and storage extend the lifespan of your tools, saving you money and maintaining high-quality results for years to come. For more insights on the latest equipment that professionals prefer, visit this resource.
The Future of Painting Maintenance and Tools
As technology advances, I believe we will see smarter, tool-integrated solutions that diagnose wear or suggest optimal cleaning routines. Imagine brushes embedded with sensors that alert you when they need replacing or coatings with self-healing properties that repair minor scratches over time. Staying informed about these innovations will allow you to keep your home’s finish looking pristine without the constant guesswork. For now, focusing on the right equipment and diligent maintenance practices remains the best strategy for long-term success.
Try This Expert Tip to Elevate Your Maintenance Routine
Next time you finish a painting project, soak your brushes and rollers in a cleaning solution infused with a small amount of vinegar—this helps break down residual paint and prevents buildup of dried pigment. Then, store them wrapped in plastic wrap to keep the moist environment, which makes future touch-ups easier and more uniform. Giving your tools this extra care can significantly improve their lifespan and the quality of your work, ensuring your home looks impeccable for years. Want to learn more advanced tips like this? Visit this comprehensive guide.
Hidden Lessons That Could Save Your Next Project
One of the biggest revelations I had was realizing how much surface consistency impacts stain absorption; neglecting tiny details like controlling the temperature and humidity can be the difference between a smooth finish and visible blotches. I once rushed applying stain during a humid day, only to spend hours correcting uneven patches later. This taught me that patience and understanding environmental factors are crucial — a lesson I now hold dearly.
Another insight was the importance of testing your stain in a small, inconspicuous area first. It might sound obvious, but skipping this step saved me from discovering too late that my chosen stain reacted poorly with my deck’s condition or existing treatments. A quick test can prevent costly mistakes and give you confidence in your process.
Finally, I learned that quality tools and proper technique aren’t just about aesthetics—they influence the longevity of your finish. Using a high-quality brush and maintaining consistent application patterns has extended the life of my stained decks, reducing the frequency of future treatments and repairs.
Tools and Resources I Trust to Elevate My Craft
For mastering deck staining, I recommend the comprehensive guide available at Elite Painter Pro. Their in-depth tutorials cover everything from preparation to finishing touches, ensuring you don’t miss critical steps. I also rely on my moisture meter—an affordable, invaluable device from this trusted source. It helps me determine the perfect timing for staining, especially in tricky weather conditions. Additionally, high-quality brushes and sprayers, which I sourced after reading this professional advice, have made a real difference in my results.
Your Journey Starts Here—Transform Your Deck Today
Embarking on a deck staining project might seem overwhelming at first, but with the right knowledge and tools, you’re fully capable of achieving professional-quality results. Don’t wait for the perfect moment—start small, practice your techniques, and learn from each project. Every coat you apply brings your outdoor space closer to that beautiful, even finish you envision. Remember, the key is continuous improvement and patience. Now, I invite you to share—have you ever struggled with uneven staining or misunderstood the environmental factors? Let’s talk below and support each other in creating stunning, long-lasting decks.