

I’ll never forget the morning I realized I had wasted three weekends and two gallons of expensive “lifetime warranty” paint. I was standing in the garden, hose in hand, when a stream of water hit the front window sill. Instead of beads of water rolling off, a quarter-sized chip of paint simply drifted to the ground. My heart sank. I had followed the directions on the can, yet here I was, looking at bare wood less than a year after a full house painting project. It didn’t make sense. The siding looked like a million bucks, but every single window sill looked like it was peeling away in defeat. It felt like a personal failure as a homeowner.
Why the Rest of Your House Looks Great While the Sills Fail
It’s a specific kind of heartbreak to see your hard work literally flake off in the wind. When I first started DIYing my home maintenance, I assumed that if the paint stuck to the walls, it would stick to the sills. I was wrong. Window sills are the “shelf” of your home’s exterior. They catch the rain, they bake in the direct afternoon sun, and they are often the first place where exterior window trim begins to rot under the paint. One of the biggest blunders I made early on was ignoring the “standing water” factor. Gravity is usually your friend when you’re painting walls, but on a horizontal sill, gravity just holds the moisture against the coating. According to research from the USDA Forest Products Laboratory, wood that stays saturated for long periods will naturally expand and contract at a rate that standard latex paint simply can’t keep up with. If you’ve seen this happen on your own home, you aren’t crazy—you’re just fighting a battle against physics.
Does special “window paint” even exist or is it a scam?
You might be wondering if you need to buy some niche product or if you just got a bad batch of paint. Usually, the problem isn’t the paint itself, but what’s happening underneath it. I used to think I could save time by skipping the primer on the “low-visibility” parts of the sill. That was a total disaster. Using the wrong primer—or skipping it entirely—is the fastest way to ensure your sills will be peeling again by next season. The real culprit is often moisture trapped deep within the wood fibers. When the sun hits that sill, the moisture tries to escape, and it pushes the paint right off the surface. It creates those little bubbles that eventually pop and peel. The reason your exterior paint is bubbling so soon is almost always related to what was happening on the day you picked up the brush. Have you ever felt like you were chasing your tail, repainting the same three windows every single spring? It’s a common frustration, but it’s one we can actually fix with the right prep sequence.
Stop the Cycle of Constant Scraping and Repainting
To get a handle on this, we have to stop treating the window sill like just another piece of trim. It’s a high-stress zone. If you’ve ever noticed that painting over peeling paint only makes the problem worse, you’ve already learned the hardest lesson in the book. You can’t bury a failure under a new layer and expect a different result. In the next few sections, I’m going to show you exactly how to prep these surfaces so the paint actually bites into the wood. We’ll talk about how to manage moisture and why getting a sharp line is actually the least of your worries when the wood is struggling to breathe.
Strip the Sill Down to Bare Wood
If you see a crack in the surface, the paint around it is already compromised. I once thought I could just feather the edges of a small chip on a south-facing sill, but it was a massive mistake. Within two months, the new paint pulled the old paint right off the wood like a cheap bandage. You have to be ruthless with your scraper. Using a sharp carbide tool is the only way to ensure you aren’t leaving behind “ghost” layers that will fail later. Remember, the reason you should never paint over peeling exterior paint is that the bond is only as strong as the weakest underlying layer. If that old layer is ready to quit, your new coat is going down with it.
Wait for the Wood to Actually Dry
This is the step everyone skips because it feels like wasted time. After scraping or cleaning, the wood must be bone dry. I remember one humid July when I was so eager to finish a set of Victorian sills that I painted right after a morning drizzle. I thought the primer would “lock in” the moisture. By Monday, the paint looked like a topographical map of the Swiss Alps—full of ridges and bubbles. I had to scrape the entire thing off while it was still gummy. I learned the hard way about the danger of pressure washing wood siding before house painting; if you force water into the grain, it has to come out eventually. If the wood feels cool or damp, put the brush down. Use a moisture meter if you want to be certain—anything over 15% moisture content is a recipe for a bubbling mess.
Choose a Primer That Bites
Think of primer as the “glue” that bridges the gap between raw organic wood and synthetic paint. On a flat, high-stress surface like a sill, you need something with high solids. This is not the place for a “2-in-1” paint and primer combo found at big-box stores. Why using the wrong primer causes your trim paint to chip often comes down to the product’s ability to penetrate the wood fibers. I prefer a slow-drying oil-based primer for sills because it has the time to soak deep into the grain before it skins over, creating a structural bond that latex primers simply can’t match on old, weathered wood.
Fix the Gaps Before the Final Finish
Once the primer is dry, look at the joints where the sill meets the casing. If there is even a hairline gap, water will find it and sit there. If you’ve ever wondered why your exterior caulk is falling out of the gaps already, it’s usually because it was applied to dusty, unprimed wood. Apply a high-quality elastomeric caulk only after the primer is down. This creates a waterproof gasket that moves as the wood expands and contracts. 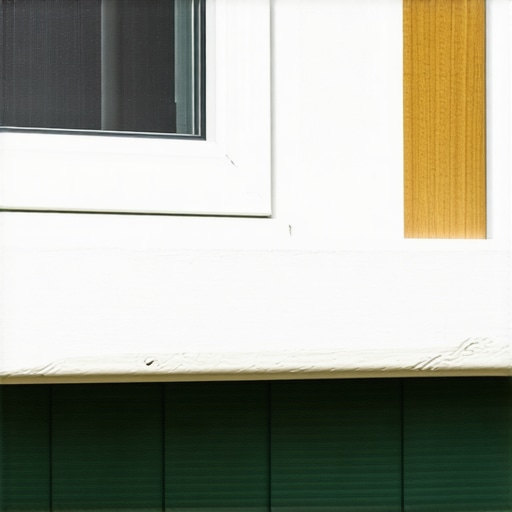
Apply Two Thin Coats for Maximum Shielding
Don’t glob the paint on in an attempt to finish faster. One thick coat creates a brittle shell that cracks under the sun’s heat. Two thin coats create a flexible skin. This is how you stop your exterior paint from fading in direct sunlight and prevent the rapid expansion that leads to peeling. When you follow this exact sequence—scrape, dry, prime, caulk, and double-coat—you are no longer just decorating; you are building a weather-tight barrier. If you do this right, you can finally learn how to maintain your newly painted exterior for ten years or more without ever touching a scraper again.
The “Premium” Paint Myth You Need to Forget
Most homeowners are led to believe that if they spend eighty dollars on a gallon of “top-shelf” acrylic, they are buying a ten-year insurance policy. In my experience, that is exactly where the trouble starts. While the difference between contractor grade and premium paint is real in terms of pigment density and resin quality, no paint is a substitute for structural integrity. I’ve seen budget-friendly projects outlast luxury ones simply because the homeowner understood the hidden nuance of vapor pressure. If you seal a window sill completely with a thick, high-build coating without addressing the moisture content of the wood, you aren’t protecting the house—you are creating a plastic bag that traps rot. Experts at the International Association of Certified Home Inspectors (InterNACHI) note that most paint failures on wood trim are actually moisture-management failures, not product failures.
Why Does Your High-End Acrylic Still Crack on the Joints?
The most sophisticated readers often ask why their paint splits specifically at the corners of the window casing. It’s a phenomenon called “differential movement.” The sill and the vertical trim expand at different rates because of the direction of the wood grain. If you apply a paint that is too brittle, it cannot bridge that movement. You need to look for local painting secrets like using hybrid alkyd-acrylics that offer the flexibility of water-based products with the deep penetration of oil. One massive “oops” factor I see is painters applying the second coat too quickly. Even if the surface feels dry, the solvents are still “off-gassing.” If you trap them with a second layer, you get micro-bubbles that eventually lead to the very peeling you’re trying to avoid.
Stop Sanding Your Sills to a Mirror Finish
It sounds counterintuitive, but you can actually make wood *too* smooth. If you use a high-grit sandpaper (anything over 120) on exterior cedar or pine, you end up burnishing the wood fibers. This closes the pores of the wood, meaning the primer has no mechanical “tooth” to grab onto. I always recommend staying with 80 or 100 grit for sills. You want a surface that feels slightly fuzzy to the touch; that texture is what allows the coating to anchor itself. 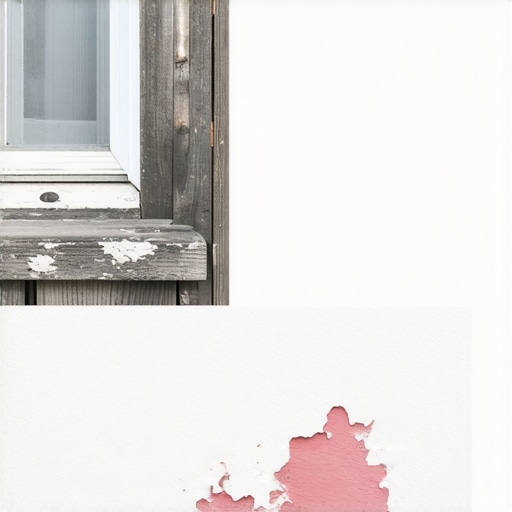 When people ask for master the art of house painting with these pro tips, the number one thing I tell them is to respect the surface profile. If the primer can’t bite, the paint will eventually slide off like water on a waxed car. This is why the reason you should never paint over peeling paint is about more than just aesthetics—it’s about ensuring the new layer has a foundation it can actually hold. Have you ever fallen into this trap and wondered why your perfectly sanded wood was peeling again by autumn? Let me know in the comments below.
Invest in Tools That Actually Save Your Sanity
I used to buy the five-dollar ‘value packs’ of brushes, thinking I was being frugal. It was a nightmare of shed bristles and sloppy edges. If you want to unlock the power of professional painting for a stunning home, you need a 2.5-inch angled sash brush with synthetic Tynex/Chinex filaments. Personally, I stick with the Purdy ClearCut Series because the stiffness allows you to ‘push’ the paint into the wood grain of the sill rather than just sliding over the top. For the prep phase, toss the cheap steel scrapers. I switched to a Bahco 650 carbide scraper years ago and never looked back. It stays sharp enough to shave with, which means you spend less time sweating and more time getting that perfectly flat surface. Using the right gear is one of those local painting secrets that separates a weekend warrior from a pro whose work lasts a decade. 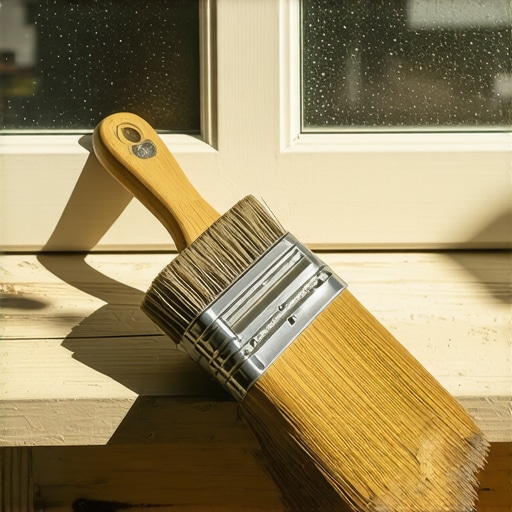
How do I maintain my exterior sills over time?
Maintaining your work is significantly easier than doing a full strip-and-repaint. Every spring, I take a soft-bristled brush and a bucket of mild detergent to my sills. You’d be surprised how much damage simple bird droppings and tree sap can do to a paint film over six months. According to the Master Painters Institute (MPI), the buildup of atmospheric contaminants can actually etch into the topcoat, creating microscopic pits where water can hide. After cleaning, I do a quick ‘touch-test.’ If the paint feels chalky, it’s time for a single fresh topcoat. This proactive approach is exactly how to maintain your newly painted exterior for ten years or more without ever having to reach for a scraper again. If you spot a hairline crack in the caulk, don’t wait. Dig it out and replace it immediately, as that’s the primary way exterior window trim begins to rot under the paint.
The Next Wave of Weather-Shielding Technology
As we look toward expert house painting advice for 2025, the industry is shifting toward ‘smart’ coatings. I’m already seeing incredible results with IR-reflective pigments that keep the wood temperature lower, reducing the expansion and contraction that causes peeling on south-facing sills. In the future, we’ll likely see bio-based resins that mimic the natural resins found in old-growth cedar, providing a level of rot resistance we haven’t seen in fifty years. For now, the best thing you can do is avoid the temptation to rush the process. If you’ve ever wondered why your paint stays tacky or why it fails early, it’s usually because of high humidity during application. My advanced tip for you this week: grab a cheap infrared thermometer and check the surface temperature of your wood. If it’s over 90 degrees Fahrenheit, the paint will skin over too fast and fail. Wait for the shade, take your time, and do it once—so you don’t have to do it again next year.
The Hard Truth About My Failed Weekend Projects
Looking back at years of failed exterior work, I realized the biggest mistake wasn’t my technique, but my impatience. I used to think I could outsmart the weather by “priming over” a slightly damp morning. Now I know that moisture is like a ticking time bomb under your coating. If you’ve ever felt overwhelmed by the scope of your project, take a look at the ultimate guide to house painting boost curb appeal for a broader perspective on how these small details fit into the big picture.
One lightbulb moment for me was understanding that window sills are sacrificial. They are designed to take the brunt of the weather so your wall frame doesn’t rot. Treating them with a generic exterior paint is like bringing a knife to a gunfight; you need the flexibility of modern resins and the deep bond of a high-solids primer. If you make a mistake along the way, don’t panic; you can always learn how to fix a run in your paint without starting over instead of letting a drip ruin your hard work.
The Only Gear I Pack for High-Stress Trim Work
To get professional results, you have to stop using the tools designed for “one-time” use. My kit always includes a carbide scraper, which stays sharp fifty times longer than steel, and a digital moisture meter. These aren’t just gadgets; they are the gatekeepers of your success. If the meter says 18% moisture content, I go back inside and wait for a drier day, no matter how much I want to finish the job.
I also rely heavily on synthetic blend brushes that can handle both the thick oils of a primer and the smooth flow of a modern topcoat. For those looking to stay ahead of the curve and use the most efficient equipment, I recommend checking out transform your home with expert house painting tips for 2025 to see how tool technology is evolving to make our lives easier.
Finally Ending the Spring Scraping Ritual
There is a unique kind of peace that comes from watching a heavy rainstorm hit your home and knowing—with absolute certainty—that your window sills are protected. You don’t have to be a professional to achieve this level of durability; you just have to be more disciplined than the average DIYer. By respecting the wood’s need to breathe and dry, you’re not just performing house painting; you’re preserving your home’s history. Take that first step this weekend, even if it’s just scraping one window to see what’s underneath. You’ll thank yourself three years from now when the paint is still holding strong and the wood is as solid as the day it was installed. Have you ever noticed one specific side of your house where the paint always fails first regardless of what product you use? Let me know in the comments below!