

Ever spent hours choosing the perfect deep, rich hue for your walls, only to realize the moment you hang pictures or move furniture, scuff marks start sprouting like weeds? I remember the first time I painted my living room a daring espresso. It looked stunning—until I noticed every fingerprint, scratch, and dust speck glaring back at me. Talk about a wake-up call! That was my lightbulb moment: dark paint isn’t forgiving, and without the right approach, it highlights every little blemish like a neon sign.
The Challenge of Dark Paint and Scuff Marks
Here’s the truth I had to learn the hard way: dark paints have a high hiding power but can be unforgiving when it comes to imperfections. They magnify every mistake in your prep or mishandling. Early on, I made a common mistake: skipping proper surface cleaning and not applying a suitable primer—trust me, it shows. If you’ve ever wondered why your freshly painted dark walls look dingy or why those pesky marks seem to pop out even days later, stick around. In this post, I’ll share the battle-tested techniques I’ve picked up to keep your dark paint looking pristine despite everyday wear and tear. Ready to stop feeling like your walls are a battlefield? Let’s dive into the secrets of maintaining a flawless dark finish.
Will Dark Paint Always Look Dirty and Worn?
I used to think dark walls were impossible to keep looking sharp—but that’s not true. The key is understanding the specific nuances of dark paint and how to care for it properly. Early in my painting career, I made the mistake of assuming that just applying a coat of good-quality paint would do the trick. Turns out, surface preparation, choosing the right finish, and proper cleaning are what truly make or break your results. For an even better understanding of how local painting practices can elevate your space, check out these local secrets. Once you grasp these basics, you’ll be well on your way to enjoying dark walls that impress rather than depress.
Prep the Surface Ruthlessly
Begin by meticulously cleaning your walls with a damp cloth and mild soap to remove dust, grease, and grime—think of it as giving your walls a detox before the makeover. After drying thoroughly, inspect for cracks or holes; use spackle and sand smooth—don’t skip this, or imperfections will scream through the dark paint. I once rushed this step and ended up with visible blemishes that looked like acne scars in my deep navy wall. Proper prep is your foundation for a sleek finish.
Prime for Perfection
Apply a high-quality primer suited for darks, such as a tinted stain-blocking primer. This step ensures uniform color and prevents blotchiness, especially vital for dark shades. I remember vividly the first time I used a tinted primer—it drastically reduced the number of coats needed and prevented that dull, uneven look. Use a roller for large areas and a brush to cut in edges. Let it dry fully; rushing this step invites problems later.
Choose the Right Finish and Tools
Opt for eggshell or satin finish for easier cleaning without too much gloss. Matte tends to show imperfections more, while semi-gloss can be tricky on walls with bumps. Use high-quality brushes and rollers—synthetic blends are best for dark paints, as they hold more paint and create fewer streaks. I once tried a cheap brush, and it left bristle marks that looked like scars—an avoidable mistake. Also, invest in a painter’s tray with a grid to remove excess paint, ensuring even application.
Limit Your Coats, Not Your Quality
Apply the paint in thin, even coats, using a ‘W’ pattern to distribute evenly. Wait at least 4 hours between coats—rushing causes uneven color and streaks, especially noticeable with dark paint. I learned this the hard way when I attempted to finish in a single day and ended up with patchy walls that needed more coats than planned. Patience is key; multiple light layers trump one heavy one for a flawless look.
Apply with Precision and Care
Use a high-quality angled brush for cutting in edges and a roller for the main surface. Maintain a wet edge by overlapping each pass. To prevent lap marks, work in small sections and keep a damp roller for touch-ups. I recall painting my living room alone and having to work quickly to blend edges—keeping a damp roller helped me avoid streaks and ensure a seamless surface.
Finish and Maintain the Shine
Once the final coat dries, inspect for missed spots. Lightly sand any drips or thick areas with fine-grit paper to ensure a smooth finish—this step is crucial, especially with dark colors that magnify imperfections. Seal the walls with a washable wax or a clear protective coat if necessary; this will help maintain that sleek look longer. Regular cleaning with a soft, damp cloth will keep your dark walls looking sharp and prevent dust from settling into their richness.
Many homeowners believe that choosing the right paint color is the most crucial aspect of a successful painting project, but in reality, the nuances of prep, technique, and material choices often determine the final look and durability. A common myth is that a single coat of high-quality paint suffices for a flawless finish; however, seasoned professionals stress the importance of proper surface preparation and multiple thin coats for optimal results. Skipping the priming stage, for instance, especially when working with dark or vibrant hues, can lead to uneven coverage and ongoing touch-ups, as detailed in expert sources. One often overlooked aspect is the quality of tools used; inexpensive brushes and rollers may seem tempting, but they often cause visible streaks and splatters, making the project look amateurish. For advanced painters, understanding the interaction between paint sheens and wall textures can also be a game-changer, influencing both the aesthetic appeal and ease of cleaning. Additionally, many assume that standard latex paints are universally suitable, but specific formulations like eggshell or satin finishes offer better durability and resistance to scuff marks in high-traffic areas. Be aware of common pitfalls such as applying paint in conditions of high humidity, which can cause bubbling and uneven drying. For an in-depth discussion on surface preparation techniques that prevent common issues, you can explore resources on professional painting practices. To elevate your painting results, always consider the nuances of material quality, application methods, and environmental conditions. Have you ever fallen into this trap? Let me know in the comments!
Keep Your Paint Job Alive: Essential Maintenance Tools and Tips
Maintaining the quality and appearance of your home’s paintwork requires more than just initial application; it’s an ongoing process that depends on the right tools and techniques. From cleaning to touch-ups, the proper equipment can dramatically extend the lifespan of your paint, saving you time and money in the long run.
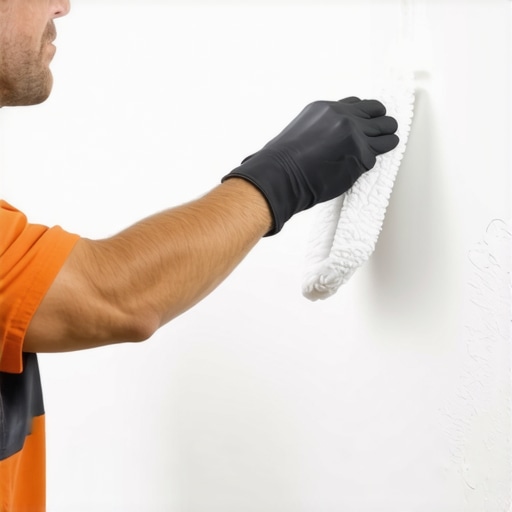
One indispensable tool I rely on is a high-quality microfiber dust mop. Regularly sweeping your walls and trim with a microfiber cloth or mop removes dust and cobwebs, preventing grime buildup that can dull the finish and attract pests. Unlike traditional dusters that spread dust around, microfiber captures and holds particles, making maintenance more effective. For stubborn spots or scuff marks, a soft sponge with a bit of mild detergent and warm water often does the trick without damaging the paint surface.
Investing in a good paint sprayer has profoundly changed how I perform touch-ups and refresh entire rooms quickly. Electric HVLP (High Volume Low Pressure) sprayers, such as the Wagner Control Pro 170, allow for smooth, even coats and reach into corners and textured surfaces with ease. This tool not only speeds up the process but also results in a more uniform appearance, especially critical for darker hues that reveal inconsistencies more readily. To ensure longevity, always clean your sprayer thoroughly after each use, following manufacturer instructions or consulting expert sources like this guide.
Painting over time involves more than just brushing on new coats. To prevent issues like peeling or fading, applying a clear protective topcoat once your painting is complete can act as a shield against UV rays, moisture, and scuffs. A popular choice is a polyurethane or polycrylic sealer suitable for interior walls, which I select based on the wall finish and foot traffic expectations. This extra layer of defense keeps your color vibrant longer and makes cleaning easier.
How do I maintain my paintwork over time?
Aside from tools, adopting a regular maintenance routine can preserve your home’s aesthetic appeal. Schedule quarterly inspections to identify early signs of wear—such as cracking, peeling, or discoloration—and address these issues promptly. Keep an eye on problem areas like window sills, door frames, and corners where moisture or friction often causes damage. Using a soft brush or vacuum attachment on these zones prevents dust accumulation, which can accelerate deterioration. For more advanced maintenance techniques, consider consulting professionals or resources like this local painting overview. Remember, the key to long-lasting paint is consistency in upkeep—think of it as the regular oil change for your home’s appearance.
Long-term results depend heavily on the initial quality of the tools used and the vigilance exercised during maintenance. Choosing the right equipment, like a durable microfiber cloth and a reliable sprayer, can make all the difference. For instance, a professional-grade sprayer combined with high-quality paints and sealers results in a more resilient finish that stands up to daily wear. Moreover, incorporating a scheduled inspection and cleaning routine keeps issues manageable before they escalate, ensuring your walls stay vibrant and pristine for years to come.
Visualize your maintenance kit: a microfiber dust mop, sprayer, soft sponge, and sealer, all ready for your next touch-up.
Lessons from My Deep Dive into Dark Paint Mastery
- It took me countless sanding sessions to realize that the key to flawless dark walls is obsessively smooth surfaces—anything less shows up in every shade and scratch.
- I learned that the true magic happens during surface prep; skipping primer or rushing the drying process almost always results in uneven, dull finishes.
- My biggest breakthrough was discovering that specialized tools and patience in layering coats transform a tricky color into a showstopper, not a maintenance nightmare.
Tools and Resources That Elevated My Painting Game
- Wagner Control Pro 170 HVLP Sprayer: This sprayer revolutionized my approach, making even dark colors easy to apply without streaks or drips. Reliable and easy to clean, I can’t recommend it enough.
- Benjamin Moore Fresh Start Primer: Tinted primer was a game-changer, providing uniform coverage and reducing coats. It’s an investment that saves time and frustration.
- 3M Fine Grit Sandpaper: Perfect for smoothing out imperfections before the final coat. Achieving a silky finish is all about prep, and this tool is my secret weapon.
- Local Painting Resources: Visiting local painting guides has helped me adapt pro techniques to my unique space, ensuring durability and aesthetic excellence.
Your Next Step to Flawless Dark Walls
Getting dark paint right is a craft that rewards patience, tools, and careful planning. Whether you’re aiming for a cozy navy or a bold charcoal, remember that meticulous prep and using the right materials make all the difference. Now it’s your turn—have you ever struggled with maintaining dark walls? Share your experiences below and let’s learn together!