

I still remember the moment I painted my first concrete garage floor without testing for moisture—bright Saturday morning, full of enthusiasm, ready to transform my space. A few hours in, I noticed it looked… weird. The paint started bubbling and peeling within days. That was a harsh, eye-opening lesson. Turns out, concrete can hide moisture issues that sabotage your entire coating project—and I learned the hard way.
Why Moisture Matters More Than You Think
If you’re like me, you might assume that just cleaning and priming is enough before coating a garage floor. But concrete is like a sponge—it pulls in moisture from beneath, especially if your garage has poor ventilation or humidity is high. When you apply paint over damp concrete, the moisture gets trapped, causing peeling, bubbling, and even mold growth underneath the coating. It’s a costly mistake that can ruin your finish and waste your effort—and money.
So, today, I want to share the critical step you shouldn’t skip: moisture testing your concrete before applying any coating. Doing this simple check can save you from failure and ensure your new garage floor lasts for years. Trust me, no amount of fancy paint or professional techniques can fix a moisture problem now lurking beneath your coating.
Is Moisture Testing Really Necessary or Just Hype?
I used to think that moisture testing was optional. I believed if the surface looked dry, I was good to go. That was a mistake I’ll never repeat. I once skipped the test and ended up peeling paint within months. In fact, according to a study by the *Portland Cement Association*, moisture vapor emissions from beneath the slab can be high enough to cause coating failures even when the surface appears dry to the eye. That’s why performing a simple moisture test is a game-changer, especially for garages where moisture issues are common. Curious how to do it right? Let me guide you through the steps and share some insider tips so your next coating project is successful from the start.
Preparing for Moisture Testing
Before diving into testing, clear your garage floor of any debris, oil, or loose materials. Remove furniture, tools, and anything that might interfere with the test process. This is like setting the stage for an important exam; cleanliness ensures accurate results. As I experienced when I first skipped this step, even minor residues can skew results, leading to false confidence or unnecessary rework.
Choosing the Right Testing Method
Funnels, calcium chloride kits, or in-situ sensors are common options. I prefer using a calcium chloride moisture test because it provides a quick and cost-effective indication of vapor emissions. Think of it as taking a blood pressure reading—fast and informative. Make sure to select a method suitable for your project scale and budget. Larger, commercial-grade projects might benefit from electronic sensors for precise measurements.
Getting Set Up Correctly
Place the testing device according to the manufacturer’s instructions, typically at a central location on the slab, away from edges or walls. For calcium chloride tests, tape the evidence cup securely to prevent tampering, and avoid areas with cracks or patches. I remember accidentally placing the cup near a seam once, which resulted in higher readings; always follow the guidelines strictly. This setup ensures a representative sample of the entire slab’s moisture levels.
Executing the Test Properly
Start the test at least 24 hours after any recent rain or high humidity, so you’re measuring steady-state conditions. For calcium chloride kits, expose the cup to the environment undisturbed; don’t move or jostle it. During the test, I kept a log of temperature and humidity, as these factors influence results. After the prescribed period, seal the cup as instructed and wait for the reading. This patience prevents inaccurate readings caused by premature removal.
Interpreting the Results
Compare the results against industry standards; for example, a moisture vapor emission rate (MVER) below 3 pounds per 1000 sq ft per 24 hours generally indicates acceptable conditions for coating. In my case, a reading of 4.5 prompted me to reconsider my plan or wait for drying. Remember, these numbers serve as guidelines—if your levels are borderline, consider additional measures like sub-slab ventilation or a moisture barrier before proceeding with painting. Proper interpretation of test data is the cornerstone of a durable finish.
Addressing High Moisture Levels
If the test indicates excessive moisture, options include installing vapor barriers, improving ventilation, or waiting for the slab to dry naturally. I learned this from experience; after failing the test, I installed a temporary dehumidifier and increased airflow, which gradually lowered moisture levels. For a long-lasting coating, it’s better to postpone painting and fix moisture issues upfront—skipping this step can lead to peeling and costly repairs later. The key is to treat moisture as an obstacle, not an afterthought.
Incorporating Moisture Testing into Your Routine
Make testing a standard part of your prep work, especially if your garage has experienced recent weather changes or high humidity. It’s like checking the weather before a hike; a small step saves time and resources in the long run. By adopting this practice, you ensure your coatings adhere perfectly and last longer, saving you from future headaches—as I painfully learned when my first project failed due to moisture issues.
Most homeowners and even seasoned painters often fall prey to misconceptions about house painting, believing that a fresh coat of paint can mask underlying problems or that all paints and techniques deliver similar results. However, as an expert in the field, I can tell you that the devil is in the details. One common myth is that sanding is always optional—while it might seem insignificant, skipping proper surface preparation can lead to premature peeling and an uneven finish. A study published by the Paint & Coatings Industry highlights how neglecting proper surface prep reduces adhesion by up to 50%, dramatically reducing the lifespan of your paint job.
Why Surface Preparation Can Make or Break Your Paint
Many assume that a good cleaning suffices before painting. But in reality, inadequately prepared surfaces—like glossy finishes or peeling old paint—can create adhesion issues. The nuanced step of etching or priming is often overlooked, especially in DIY projects, leading to bubbles, peeling, and uneven color over time. This is where advanced knowledge comes into play: using a coffee filter trick to strain out old paint lumps can ensure a smooth, professional finish, saving you time and frustration.
Is It Better to Use High-Quality Primer or Skip It to Save Money?
Many believe high-quality primers are merely optional, especially for small patches. But in my experience, skipping primer often results in uneven color, increased coats needed, and reduced durability—particularly when painting over stains, knotty wood, or prior colors. For example, using a primer with stain-blocking properties can prevent bleed-through after years, which is documented in a comprehensive industry guide. Remember, investing in the right primer pays dividends in the longevity and appearance of your paintwork.
Common Pitfalls of Choosing the Wrong Paint Type
Another hidden nuance involves selecting the appropriate paint finish and type for each surface. For example, bathroom walls benefit from moisture-resistant paints, not standard matte formulations. Conversely, exterior trims require durable, weatherproof coatings that can withstand UV rays and temperature fluctuations. Failing to match paint types can lead to peeling, chalking, or color fading—costly fixes that could have been avoided with informed choices. I recommend reading expert tips for 2025 to stay ahead in material selection.
Why Do Some Colors Fade Faster and How Can You Prevent It?
Color fading is a subtle yet pervasive issue. Many assume the chosen color pigment is solely responsible, but in reality, the binder quality and UV resistance are equally critical. Low-quality pigments tend to degrade faster under sunlight, causing dullness over time. According to industry research, investing in paints with integrated UV blockers can extend color vibrancy by up to 50%, preserving your home’s curb appeal for years.
Understanding these nuances and avoiding common mistakes transforms a mediocre project into a stunning, durable finish. Always consider surface prep, primer quality, paint selection, and environmental factors—these hidden details make all the difference. Have you ever fallen into this trap? Let me know in the comments.
Maintaining Your Painting Equipment for Long-Term Success
Proper maintenance of your painting tools ensures their longevity and optimal performance, saving you time and money on future projects. Regularly cleaning brushes, rollers, and sprayers immediately after use prevents paint buildup that can cause uneven application and clogs. I recommend using a biodegradable solvent like mineral spirits for oil-based paints and warm, soapy water for latex paints—this keeps your tools in top shape. Store brushes hanging upright in a dry, ventilated area, and check for wear and tear periodically to replace worn-out equipment before they compromise your finish.
Investing in good-quality tools might seem costlier upfront, but they reduce frustration and produce smoother results over time. My personal favorite is the Wagner Spraytech Control Spray Max for its adjustable pressure and fine finish control, especially on large exterior surfaces. Professional-grade sprayers can dramatically speed up your workflow and enhance uniformity, making them worth considering if you’re scaling projects or tackling multiple spaces.
Tools That Make House Painting More Efficient
Beyond brushes and sprayers, I highly recommend a high-quality extension pole—preferably telescopic—for reaching ceilings and high walls without scaffolding. It provides stability and control, reducing fatigue. Additionally, a laser level is invaluable for achieving perfect lines on exterior trim or interior accent walls, saving time on masking tape and touch-ups.
Another game-changing tool is a paint-mixing drill attachment, which guarantees consistent color and texture, especially when mixing custom shades. This is particularly useful as I’ve found manually stirring can introduce inconsistencies that affect the final look. Using advanced tools like these empowers you to work faster, produce professional results, and minimize mistakes, especially when tackling larger projects.
What’s Next in Painting Technology?
The future points toward smarter, eco-friendly equipment. Solar-powered sprayers, automated mixing systems, and AI-driven color matching are on the horizon, making home improvement more accessible and sustainable. Staying informed about these innovations ensures you’re ahead of the curve and ready to leverage new advantages.
How do I keep my tools in peak condition over time?
Consistent care means cleaning immediately after each use, storing tools properly, and performing periodic inspections for damage. Applying a light coat of oil on metal parts prevents rusting, and calibrating spray equipment annually maintains spray pattern consistency. For detailed guidance, regarding tool maintenance offers advanced tips that can prolong tool life. Remember, investing a little time now ensures your tools remain reliable when you need them most—especially for scalable or ongoing projects.
To truly elevate your painting game, experiment with a professional-grade sprayer like the Wagner Control Spray Max. Its adjustable settings and fine mist control not only boost efficiency but also produce smoother finishes. Give it a try—your future selves will thank you for the quality results and reduced effort. Remember, maintenance is the secret to keeping your tools and results sharp for years to come.
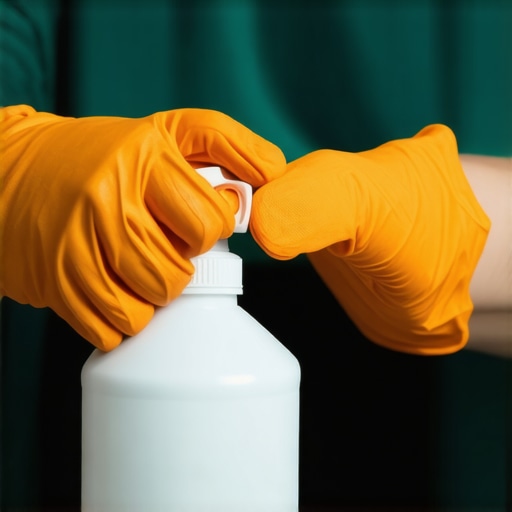
How I Learned the Hard Way About Hidden Moisture
Few lessons in painting are as costly as overlooking moisture issues beneath your concrete slab. My first garage floor project was filled with enthusiasm, but I paid the price when the paint bubbled and peeled shortly after. That painful experience taught me the importance of proper moisture testing before applying any coating—to avoid future headaches and ensure a lasting finish.
Sealing My Success by Asking the Right Questions
One of my biggest revelations was realizing that surface dryness doesn’t tell the whole story. Moisture lurking inside the concrete can sabotage your project, regardless of how dry it looks on the surface. Performing a simple moisture vapor emission test can reveal hidden moisture, turning an uncertain project into a guaranteed success step.
Why You Can’t Skip This Step for Long-Lasting Results
Skipping moisture testing might seem tempting to save time, but it’s a gamble. I’ve seen many DIYers and even professionals face peeling paint and mildew growth from neglecting this crucial step. Just like testing soil nutrients before planting, testing concrete moisture levels ensures your coating bond is strong and durable over the years.
My Personal Tips for Accurate Moisture Testing
Get clear about your garage’s condition: clear debris, remove oils, and set up your test in representative areas. I prefer using calcium chloride kits—they’re affordable and give quick insights. Remember to follow the manufacturer’s instructions meticulously, and interpret your results against accepted industry standards, like a vapor emission rate below 3 pounds per 1000 sq ft per 24 hours, to confidently proceed with your coating.
Turning a Problem into a Solution
If high moisture levels are detected, don’t despair. Options include installing vapor barriers, increasing ventilation, or delaying your project until the slab dries naturally. I chose to install a dehumidifier and boost airflow, which ultimately saved my paint job from failure. Prevention is always better than repairing peeling, bubbling, or mold damage later.
Integrate Moisture Testing Into Your Routine
Think of moisture testing as a health check for your garage floor—it’s a small effort with huge payoff. By making it routine—particularly in humid months or after weather shifts—you’ll enhance adhesion, longevity, and aesthetic appeal. As I’ve learned firsthand, taking that extra step now spares you costly rework and frustration down the road.
Lessons That Shaped My Approach to House Painting
- Not all moisture tests are created equal; research and select the method suitable for your project size and budget.
- A clean, debris-free surface is crucial for accurate readings—don’t cut corners during prep.
- High moisture levels mean more than delays—they threaten the durability of your entire project.
- Understanding industry standards makes interpreting results straightforward and reliable.
Tools That Took My Garage Coatings to the Next Level
- Calcium chloride moisture test kits—quick, affordable, and effective for DIY projects.
- High-quality dehumidifiers and ventilators—helping slabs dry naturally or artificially if needed.
- Infrared thermometers—monitoring temperature and humidity to maintain consistent testing conditions.
What the Future Holds in Moisture Testing and House Painting
Emerging technology, like in-situ moisture sensors and smart meters, promises even more precise, real-time moisture monitoring. Staying ahead in techniques and tools ensures your projects are successful, durable, and less stressful. Investing in proper testing now is a small price for peace of mind—and a professional-looking, long-lasting garage floor.
Take Action Today to Protect Your Next Painting Project
If you decide to coat your garage floor, remember: moisture testing isn’t optional; it’s essential. It’s the difference between a paint job that lasts years and one that fails in months. Have you ever skipped this step and regretted it? Share your story below, and let’s learn from each other’s experiences.