

It was a sunny Saturday morning when I rolled my ladder out, ready to give my house a fresh coat of white paint. I had carefully scraped and prepped the surface, imagining that pristine, crisp new look. But as I stepped back to admire my work, my heart sank. Dark, muddy streaks were seeping through the white paint—like my siding was bleeding through a fresh wound. That was my lightbulb moment: I realized my beautiful cedar siding was stubborn, and my paint wasn’t enough to hide the story beneath.
Understanding the Culprit Behind Bleeding Cedar Siding
Cedar siding is known for its natural beauty and durability, but it also harbors a secret—its tannins and oils can freely migrate to the surface when painted over, especially if not properly prepared. These natural substances are responsible for the unsightly discoloration that appears after painting—often called bleeding. It’s a problem many homeowners face, and addressing it requires more than just a fresh coat of paint.
When I first encountered this issue, I made a common mistake: thinking that a quick primer and some paint would do the trick. I naively believed that choosing white would sufficiently mask any underlying stains. But I learned the hard way that if the cedar isn’t properly sealed, those tannins will sneak through, spoiling even the most carefully selected color.
Did you know that cedar tannins can cause staining that is resistant to regular cleaning and painting? According to a study published in the Journal of Coatings Technology, tannin bleed is a common cause of premature paint failure on cedar and redwood surfaces, leading to costly touch-ups and frustration. Recognizing this early mistake saved my project—and my budget.
Now, I want to share what I’ve discovered since then, so you don’t have to go through the same trial and error. In the next sections, we’ll cover the exact steps to prevent bleeding and ensure your white paint stays true and bright. Whether you’re tackling a small re-paint or a major siding overhaul, understanding these key points will help you achieve professional results and a lasting finish.
Have you experienced persistent staining or bleeding after painting your cedar siding? If so, don’t worry—you’re not alone, and there’s a proven way to fix it. Ready to learn how to keep those pesky tannins at bay and enjoy that clean, white look? Let’s dive into the solutions that truly work.
Prepare Your Surface with a High-Quality Exterior Primer
Before you even think about choosing your white paint, ensure you apply a proven, stain-blocking primer designed specifically for cedar siding. I once skipped this step and saw tannin stains peek through within weeks. Instead, I used a bonding primer with shellac resins, which form an impenetrable barrier. Apply it evenly with a roller, ensuring full coverage of all siding surfaces. This step is like putting a seal on an envelope—nothing gets through once sealed. For durable results, follow manufacturer instructions on drying times.
Use a Tannin-Blocking Primer for Complete Sealing
Not all primers are created equal. Opt for a specialized tannin-blocking primer, which chemically bonds with the natural oils and tannins in cedar. During my project, I chose a product like Zinsser BIN shellac-based primer. I brushed it onto tricky spots really well and even used a sprayer for hard-to-reach areas. This creates a barrier that tannins can’t seep through. Remember, applying multiple thin coats is better than one thick coat, as it ensures proper penetration and drying.
Allow Adequate Drying Time and Check the Seal
Patience is key. After priming, wait at least 24 hours before applying your topcoat. I learned this the hard way when I rushed and saw stains bleed through the next day. To check your seal, lightly dab a damp cloth on some spots and see if any color transfer occurs. If so, add another coat of primer and let it dry thoroughly. This layer acts like a shield, preventing tannins from migrating to the surface.
Select the Right Paint Finish and Type
Use a high-quality, exterior-grade acrylic latex paint with a satin or semi-gloss finish. These finishes are more resistant to tannin bleed and are easier to clean. I recommend choosing a paint with added stain blockers for extra protection. When I painted my siding, I avoided matte finishes because they can absorb tannins more easily. For those extra stubborn stains, some professionals suggest applying a clear, water-repellent sealer on top after painting as added insurance.
Apply Paint in Proper Conditions and Techniques
Painting during dry, mild weather is crucial. I scheduled my project on a clear day with temperatures between 50-85°F, avoiding direct sunlight which can prevent proper curing. Use a high-quality brush or roller, and work in smooth, even strokes. Avoid over-brushing, which can disturb the primer layer. To prevent drips and ensure consistency, work in sections and keep a wet edge. Remember, thorough surface preparation combined with correct application techniques is your best defense against tannin bleed.
Regular Maintenance and Inspection
Even after successful painting, inspect your siding annually. Tiny tannin leaks can sometimes appear months later. Touch up spots promptly with primer and paint. During my own maintenance routine, I noticed some areas requiring reapplication of primer after a particularly damp winter. Staying vigilant helps maintain your home’s fresh appearance.
By following these actionable steps—proper priming, selecting the right materials, and applying under optimal conditions—you’ll prevent cedar tannins from bleeding through your white paint. Remember, patience and quality materials are your best allies in achieving a pristine, lasting finish. For more expert tips on house painting, visit this comprehensive guide.
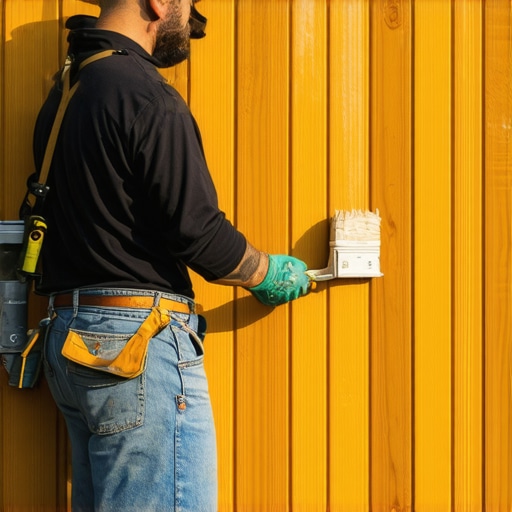 Many homeowners believe that selecting a good-quality paint and applying it evenly guarantees a flawless finish, but in my experience, there’s more beneath the surface. A prevalent misconception is that all paints are equally suitable for exterior use; however, the truth is, differences in formulations dramatically affect durability and appearance over time. Using a low-quality exterior paint can lead to peeling, cracking, and fading much sooner than expected, despite proper application. Experts recommend choosing paints specifically designed for your climate and substrate to ensure longevity. Additionally, a common mistake is neglecting the importance of surface preparation—failing to clean, sand, or prime properly can trap moisture and contaminants, leading to adhesion problems and early deterioration. Research from the Painting and Decorating Contractors of America emphasizes that meticulous preparation is responsible for 80% of a successful paint job. Keep in mind that the typical spray or roller application might seem efficient, but advanced techniques, such as brushing in the direction of the grain and applying multiple thin coats, result in a smoother and more durable finish. Many overlook the significance of environmental conditions; painting in high humidity or extreme temperatures hampers drying and curing, which can cause blistering or uneven coverage later. For a detailed guide on selecting the right tools and conditions, visit this expert house painting advice. Another aspect often misunderstood is color choice; while grey or neutral tones are popular, they can reveal imperfections more readily, and certain colors may require primer adjustments for uniformity. Do not assume that one-coat coverage always works—many one-coat paints have marketing hype behind them, but actual results depend on surface condition and color contrast. Myths aside, understanding these nuances helps you avoid costly mistakes and achieve results that stand the test of time. Have you ever fallen into this trap? Let me know in the comments. For more insider tips on perfecting your painting projects, check out mastering house painting techniques.Achieving durable, professional-looking house paint jobs requires more than just quality paint and a steady hand; it involves the right tools, meticulous maintenance, and strategic planning. I personally rely on a few key pieces of equipment that streamline the process and ensure long-term results. First, investing in a high-grade, fast-setting airless paint sprayer, such as the Wagner Control Pro 250, has been a game-changer. It offers consistent coverage, reduces overspray, and significantly speeds up projects, especially for large surfaces like siding or fences. Using a sprayer allows me to apply thin, even coats, which are less prone to peeling and blistering over time. For detailed work and corners, I switch to a high-quality angled brush like the Purdy Cardinal, renowned for its durability and precision. The brush’s fine bristles help achieve crisp edges and prevent streaks, which is crucial for a professional finish.
To monitor environmental conditions during painting, I use a digital humidity and temperature meter, ensuring I paint when conditions are optimal—ideally between 50-85°F with low humidity, as advised in the industry standard for exterior painting. Painting in adverse weather can compromise adhesion and longevity, leading to costly touch-ups down the line. For cleanup and ongoing maintenance, I keep a set of specialized brushes, like Purdy’s nylon-and-polyester blend, which withstand repeated washings without losing shape—saving me money and ensuring consistent results over multiple projects. A high-quality water-repellent sealer, such as Behr Transparent Waterproofing Stain & Sealant, serves as a final layer to protect against moisture intrusion, especially on cedar or other porous materials. Applying this after the paint has cured extends the life of your work and keeps your home looking fresh longer.
Looking ahead, the trend in house painting tools is moving toward smarter, eco-friendly technology. Electric sprayers with built-in sensors to optimize pressure and flow are beginning to hit the market, reducing waste and uneven application. Additionally, UV-cured coatings might become mainstream, offering unparalleled durability by curing instantly under UV light—though current models are niche and more expensive. Before you dive into your next project, I highly recommend testing a small section with a sprayer or brush and carefully observing how it adheres over time. Mastering these tools and techniques will not only improve your craftsmanship but also save you money by reducing the frequency of repainting. Want to boost your skills? Try using an airless sprayer like the Wagner Control Pro 250 for your next siding repaint; it’s the exact model I use for large-scale projects. And for in-depth guidance on maintaining your tools and ensuring long-lasting results, visit this comprehensive guide.
Lessons I Wish I Learned Sooner About Cedar Siding
One of the biggest lightbulb moments in my painting journey was realizing that cedar tannins can sneak through even the thickest coats of paint, making my siding look stained over time. I used to think priming was optional, but now I know that a high-quality, tannin-blocking primer is essential for a lasting finish. I also learned that rushing the process—especially skipping drying times—inevitably leads to bleeding and peelings. Taking the time to properly prepare, seal, and choose the right materials has transformed my results and saved me money in repairs. Finally, understanding that environmental conditions impact drying and curing has been the game-changer, preventing me from painting in unfavorable weather and facing avoidable issues.
Tools and Resources That Elevate My Painting Game
Over the years, I’ve discovered a few invaluable tools that make a difference. A spray gun like the Wagner Control Pro 250 ensures even coverage on large siding surfaces, reducing streaks and improving durability. I rely on Purdy Cardinal brushes for detailed edges, providing precision that roller brushes can’t match. For primers, I trust Zinsser BIN shellac-based solutions—they bond well and block stubborn tannins effectively. When in doubt about environmental conditions, I use a digital humidity and temperature meter to choose the perfect painting window. For further reading and expert insights, I recommend visiting this detailed guide that has helped me perfect my craft.
Getting Inspired to Tackle Your Next House Makeover
Remember, every successful project starts with confidence and the right knowledge. If you’re facing stubborn cedar stains or repainting an aging exterior, let my experience be your guide. Breaking free from misconceptions and embracing proven techniques will ensure your paint job not only looks beautiful but also lasts for years. So, roll up your sleeves, arm yourself with the best tools, and don’t shy away from taking on that home improvement project. Your dream exterior is within reach—start now! Have you ever struggled with tannin bleed or other painting setbacks? Share your story below, and let’s learn together from each other’s experiences.
.