

I remember the first time I dove into painting a friend’s vintage wooden cabinet, only to end up with streaks, blotches, and an embarrassing mess. The stain underneath made the white paint look uneven, and I felt like I had failed before I even started. That lightbulb moment taught me a valuable lesson: never underestimate the power of proper preparation, especially when working over stained wood.
The Secret Sauce to Flawless White Paint Finishes
Today, I want to share how a simple step—priming stained wood—can transform your painting projects from frustrating to fantastic. If you’ve ever struggled with the dreaded bleed-through or uneven coverage, sticking to this advice will save you time, money, and a whole lot of headache. Trust me, I’ve been there, and I’ve learned the hard way that skipping this step is a recipe for disaster. Want to learn how to achieve those smooth, crisp white finishes you’ve been dreaming of? Stay tuned, because I’m about to walk you through the essential tips and tricks to get it right every time.
Is Priming Really Necessary or Just a Fancy Step?
Early on, I thought I could skip priming—after all, isn’t paint supposed to stick to wood? But my experience proved otherwise. I once haphazardly painted over stained wood without a primer, only to find the white paint bleeding the dark stain through in just a few months. That was a costly lesson. In fact, studies show that properly primed surfaces can extend the life of your paint job significantly (source: Expert House Painting Tips). It’s no exaggeration to say that primer acts as a barrier, sealing in the stain and creating a uniform surface that lets your white paint shine—literally and figuratively.
Have you ever faced similar issues? If so, you’re not alone. Many homeowners overlook this crucial step, leading to frustration and repeated work. But don’t worry; with the right prep, your next project can be a breeze and look professionally done. Ready to dive into the how-to? I’ll guide you through the precise techniques that will make all the difference for your paint job—and your peace of mind.
Preparing the Surface Like a Pro
Think of priming as laying a solid foundation before building a house. I recall a project where I skipped this step, and the white paint seeped through dark stain patches, creating a blotchy mess. To avoid repeating that mistake, I now always start by cleaning the surface thoroughly with a degreaser or mild soap to remove dust, grease, and any existing grime, which can hinder primer adhesion. Use a damp cloth to wipe down the entire area, ensuring it’s completely dry before proceeding.
Choosing the Right Primer for Your Project
High-Quality
Picking a high-quality primer is crucial. I prefer oil-based primers over latex for stained wood because they provide a more robust seal, especially over dark stains or knots. For less problematic surfaces, a premium latex primer works fine, and it’s easier to clean up. When selecting, look for primers labeled as stain-blocking and adhesion-promoting.
Color Matters
If you’re painting white over a stained surface, opt for a tinted primer close to the final paint color to reduce the number of coats. I once used a tinted primer that matched my white paint, and the coverage was flawless, saving me time and paint.
Applying Primer with Precision
Applying primer evenly is like spreading butter on bread—thick enough to cover but not so thick that it blobs. I use a high-quality synthetic brush for edges and a roller for flat surfaces. Begin by framing out corners, edges, and tricky spots with a brush, then roll the larger areas. Don’t overload your roller; a provably effective method is to dip lightly and roll in a W-pattern to ensure even coverage. Always work in manageable sections to prevent the primer from drying before you finish, which can cause uneven texture.
Dealing with Stubborn Stains
If your surface has stubborn stains like water marks or smoke, apply a stain-blocking primer and let it dry thoroughly—at least 2 hours or as per manufacturer instructions—before painting. I remember one cabinet where I used a shellac-based primer over a water stain, and it prevented any bleed-through after painting white.
Allow Proper Drying Time
After priming, patience is key. Rushing to paint over wet primer invites imperfections and adhesion issues. Typically, wait at least 2-4 hours or until the primer feels dry to the touch. For best results, check the primer’s label for recommended drying time and avoid placing anything on the surface prematurely.
Follow Up with Your White Paint
Once primed and completely dry, apply your white paint. Starting with a high-quality interior latex paint will give you the smoothest finish. Use a clean roller or brush, and avoid overworking the surface to prevent streaks and roller marks. Remember, a second coat often yields a more uniform, professional look—especially over tinted primer.
Switching to the right primers and applying them methodically can dramatically improve your results, making white paint look crisp and professional. Ready to explore creative paint ideas? Check out these inspiring painting ideas or discover expert color advice here.
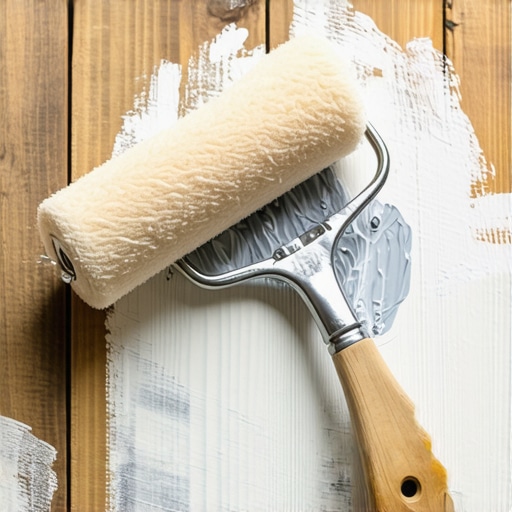 When it comes to **local house painting**, many homeowners and even some professional painters fall prey to misconceptions that can significantly hamper results. While the basics are well-understood—like preparing surfaces and choosing the right paint—what often escapes notice are the nuanced details that distinguish an amateur job from a truly professional finish. Let’s dig deeper into some *hidden nuances* and common myths that can sabotage your project if overlooked.
One widespread myth is that all paints are created equal, but in reality, **the quality and formulation of paint matter immensely**, especially when working with special surfaces or in challenging environments. For instance, many believe that low-VOC paints are just as durable as traditional options, but recent studies demonstrate that higher-quality formulations can provide superior adhesion and longevity, even in sensitive spaces like children’s rooms or kitchens. To achieve lasting results, it’s crucial to understand the different formulations and their applications—something you can explore further in these expert tips.
Another common misconception is about surface preparation. Many think that a quick clean is enough, but *ignoring subtle surface issues*—like tiny cracks, unprimed patches, or residual oils—can lead to bleeding and peeling down the line. Did you know that **not all primers are suitable for every situation**? For example, using a standard latex primer over stained wood can cause bleed-through, which only worsens over time. An advanced mistake is to assume that primer is a waste of time on new drywall—when in fact, proper priming ensures the paint’s adhesion and color consistency, especially with whites or light colors. For detailed procedures, check this in-depth guide.
Now, for a critical question many homeowners overlook:
Why does my paint appear uneven or streaky even after multiple coats?
This often stems from **incorrect application techniques or the wrong tools**. Applying paint with a low-quality brush or roller, or overloading your roller, can cause streaks and uneven textures that are hard to fix later. The aging myth that thick coats cover imperfections more effectively is false; in fact, multiple thin coats yield a smoother, more professional finish. Additionally, ambient conditions such as temperature and humidity can affect drying times and finish quality. Desktop studies show that waiting for proper drying and applying coats in optimal conditions reduce rework and enhance durability—something I emphasize in these expert insights.
What about the mistake of underestimating **the importance of light**? Many fail to examine painted surfaces under different lighting conditions, leading to surprises when seeing uneven patches in sunlight versus artificial light. I always recommend inspecting your work in natural daylight before deeming it complete.
Finally, a trap that catches many is skipping **edge-work and finishing details**—like clean lines on trim and corners. These small details contribute significantly to an overall polished look, and neglecting them signals amateur work. For tips on perfecting those finishing touches, see these professional strategies.
Understanding these hidden nuances can elevate your DIY painting projects from decent to stunning. Have you ever fallen into this trap? Let me know in the comments.
Investing in the Right Tools for Professional Results
To ensure your house painting projects stand the test of time, using specialized tools is crucial. I personally swear by high-grade extension poles with adjustable lengths, which eliminate the need for ladders in many cases and provide a consistent application angle—crucial for avoiding streaks. A high-quality microfiber roller cover, specifically one rated for smooth surfaces, helps achieve a sleek finish while minimizing lint residue. For edges and detailed work, I rely on angled brushes with synthetic bristles, which give better control and keep paint even during tricky cuts, especially over textured walls.
Power Washing: A Step That Saves Future Headaches
Maintaining your painted surfaces begins with proper preparation. I always recommend a thorough power wash before repainting exteriors; this removes grime and loose paint that could hinder adhesion or cause early peeling. I prefer using a pressure washer with adjustable nozzles—aiming around 1500 psi—to clean siding effectively without damage. Regularly inspecting and replacing washer nozzles ensures consistent pressure and results. For delicate surfaces like stucco or old brick, I use lower pressure settings, paying attention to uniform coverage and avoiding water intrusion into gaps, which can lead to long-term damage. Incorporating this step can extend your paint job’s lifespan considerably, as detailed in this expert advice.
Storage and Preservation of Painting Supplies
Storing your paint and tools properly between projects prolongs their usability and maintains quality. I use airtight paint cans with a rubber gasket seal, ensuring no air enters and dries out the paint. When storing brushes or rollers, I rinse them thoroughly with water or solvent depending on the paint type, then wrap brushes in plastic wrap or store them in airtight containers to keep the nap conditioned. For quick cleans during multi-day projects, I keep rollers in sealed plastic bags with a little soapy water to prevent drying, saving time and money. Additionally, investing in a quality paint bucket with a locking lid allows for easy transport and minimizes spills—particularly important if you’re tackling multiple rooms or floors.
Now, What About Long-Term Maintenance?
Keeping your painted surfaces looking fresh over time involves regular inspections and touch-ups. I schedule maintenance checks every 2-3 years, focusing on areas exposed to the elements or high traffic. When you notice small chips or fading, address them promptly by sanding lightly and applying a touch-up coat. Using the same high-quality tools throughout is vital; a quality brush or roller will ensure uniform color matching and adhesion. Also, consider applying a clear sealant or protective coating on high-use or weather-exposed surfaces for enhanced durability—something I discuss in these tips.
How do I keep my painted surfaces in top shape over time?
Routine cleaning with gentle soap and water, avoiding harsh abrasives, preserves the finish. Check for signs of damage or wear, and address small issues immediately with spot repairs. Implementing these simple maintenance habits can vastly improve the longevity, saving you money and effort in the long run. Want to dive deeper? Try adopting the practice of inspecting your painted surfaces seasonally and applying a fresh coat of exterior or interior paint as needed. For advanced strategies, explore professional insights here.
What I Wish I Learned Sooner About House Painting
One of the most impactful lessons I discovered is the importance of trusting high-quality primers over rushing straight into topcoats. Skipping this step seemed convenient at first, but it often led to bleed-through, especially over stained wood. It was only after experimenting with stain-blocking primers, like shellac-based ones, that I realized how much smoother and longer-lasting my finished projects could be. This lightbulb moment reshaped my entire approach to house painting and saved me countless rework hours.
Another lesson I won’t forget is the significance of meticulous surface prep. Clear away dirt, grease, and loose paint—no shortcuts! Proper cleaning and light sanding create a perfect canvas that ensures even paint adhesion. I once tried to save time by skipping this, only to deal with peeling paint and uneven finishes later. Now, I see surface prep as the foundation that makes or breaks your project’s success.
The third insight? Thin coats are the magic brew. Applying multiple light coats with proper drying time yields a stunning, professional-looking finish. I’ve learned that patience here pays off—skimping on coats or rushing the process results in streaks or uneven coverage. It’s a small investment of time that pays huge dividends in the final look and durability.
Tools and Resources I Trust for Better Results
If you’re aiming for a flawless house paint job, equip yourself with the right tools. A high-quality microfiber roller cover helps achieve a smooth surface, while an angled synthetic brush ensures crisp edges and clean cuts. I swear by these professional-grade brushes because they last longer and provide better control. For color ideas and inspiration, I love exploring latest creative paint ideas to keep my projects fresh and exciting. Finally, investing in a good ladder and extension poles makes reaching tricky spots safer and more efficient—key to a high-quality finish over the long haul.
Your Next Painting Step Starts Today
Embracing these deeper truths about local house painting can elevate your skills and results beyond ordinary expectations. Remember, patience, quality tools, and thorough preparation are your best friends on this journey. Don’t hesitate to experiment, learn from each project, and enjoy the transformation process—your home deserves it. Thinking about refreshing your space? Dive into these expert tips or reach out through our contact page for personalized advice. Your dream finish is within reach—start today and see the difference that genuine care and knowledge can make.