

It was one of those mornings when I finally decided to paint my living room walls after years of neglect. Everything was going smoothly—brushes loaded, colors mixed, and the soft glow of the afternoon sun streaming through the window. But then, as I stepped back to admire my work, I noticed it: the familiar dullness turned oddly surreal. The gray shade I had chosen looked almost purple under the living room light. It was baffling. I wondered how I hadn’t noticed this strange color shift before.
What’s Behind the Purple Hues in Your Living Space?
The culprit is often the quality of your lighting combined with the undertones of your paint. Our eyes are remarkably sensitive to light, and different bulbs—whether warm, cool, or daylight—can dramatically alter how colors appear. If you’ve ever experienced a paint color looking gorgeous in the store but then turning weird at home, you’re not alone. I’ve made the mistake early on of picking a color in incandescent lighting and assuming it would look the same everywhere. Trust me, that was a rookie error. Painting is as much about understanding how your space’s lighting interacts with your chosen hue as it is about the color itself.
So, what can you do if you find yourself facing the same perplexing problem? Well, that’s what I’ll be sharing in this post. I’ll walk you through my personal experience and the practical solutions I discovered that can save you hours of frustration and money.
Is It Really Lighting, or Is Your Paint Trickier Than You Thought?
Early in my painting journey, I believed that selecting the perfect color was all about picking the right shade. I didn’t realize that the lighting environment could turn an innocent gray into a mysterious purple. I also made the mistake of rushing into choosing paint without testing under different lights—something I now know could have been avoided by doing a simple [soap and water test for wall cleanliness](https://elitepainterpro.com/the-soap-and-water-test-for-checking-wall-cleanliness-before-priming). The key takeaway: always test your paint sample under various lighting conditions before committing.
If you’ve ever experienced this color confusion, don’t worry. I’ll help you decode what’s happening in your space and how to get consistent, beautiful color regardless of the light. Ready? Let’s dive into how lighting influences your paint choices and how to master it.
Prep Your Space with Lighting Control
Before you start testing paint samples, create a controlled lighting environment. Use the same type of bulbs you have in your living room—be it warm, cool, or daylight—to assess how the color appears. During my own project, I switched between incandescent and LED bulbs to see the drastic changes in my chosen gray, which looked purple under certain lights. This initial step prevents surprises after painting and saves you from rework.
Apply Sample Patches Strategically
Use sample-sized brushes or testers to apply small patches of your paint on different walls or areas. Place these patches near light sources, windows, and shadowed spots. When I tested my color on different walls, I noticed how the corner shadowed by furniture distorted the hue, reminding me to view samples under varied lighting. This granular approach ensures your selected shade remains consistent across your entire room.
Observe Under Different Times of Day
Colors can look entirely different in morning, afternoon, and evening light. Spend a day monitoring your wall patches at these times. I made a mistake by only checking my sample in the afternoon, which led me to an unpleasant surprise in the evening—my room looked gloomy and purple. Recording your observations helps in making an informed decision, avoiding costly repaint jobs later.
Document Your Findings
Take photos at each lighting condition for comparison. When I documented my samples, I captured the subtle shift in hue, making it easier to compare over time. Additionally, note down your impressions—was it warm, dull, or vibrant? This organized record guides you in selecting a color that will look great regardless of lighting changes.
Make Smarter Choices with Professional Advice
If uncertainty persists, consult a professional. An experienced painter can perform a comprehensive lighting analysis and recommend suitable shades. For example, I once asked a local expert to evaluate my samples; their insights helped me pick a color that retained its charm throughout the day and night, avoiding the common pitfall of choosing based solely on store lighting or a single snapshot.
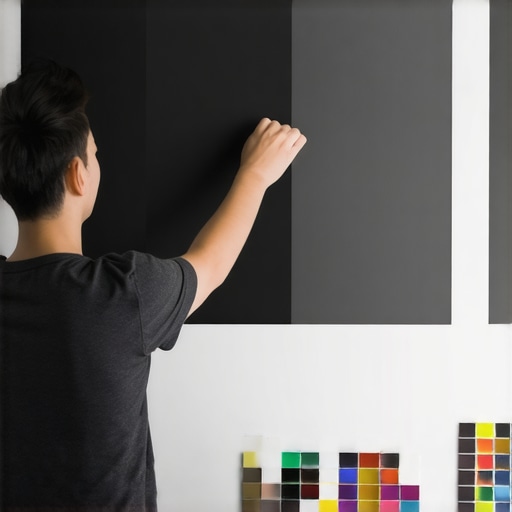 Even seasoned DIY enthusiasts often fall prey to misconceptions about house painting, leading to costly mistakes and frustrating results. One pervasive myth is that choosing the right paint color is all about personal preference, but in reality, understanding the nuances of finish and surface type is crucial for durability and aesthetic appeal. For example, many believe that matte finishes hide imperfections better, yet they often lack the washability required in high-traffic areas. Dive into the details of paint sheens and their appropriate applications to avoid future disappointment.
Another widespread misconception concerns the belief that primer isn’t always necessary, especially on new drywall. However, skipping primer can cause uneven absorption and color inconsistency, making your walls look uneven or streaky. The difference between applying a quality primer versus going straight to paint is significant, particularly when dealing with stained or uneven surfaces. Learn why investing in primer can save you time and ensure a smooth, long-lasting finish.
Beware the trap of choosing cheap, low-quality tools, like roller covers and brushes, under the assumption that all tools are interchangeable. In fact, inferior tools can leave lint and fuzz in your paint, creating an uneven texture and increasing the need for touch-ups. For an impeccable finish, opt for professional-grade tools—like high-quality roller covers—and learn how to maintain them properly. For example, using [proper roller covers](https://elitepainterpro.com/why-cheap-roller-covers-leave-your-living-room-looking-like-an-orange-peel) can make a tangible difference.
For the advanced DIYer, understanding the importance of surface preparation extends beyond mere cleaning. Improper sanding or neglecting to remove old paint properly can lead to bubbling, peeling, or a mismatched appearance over time. A crucial step is performing tests, such as the [skin-paint adhesion test](https://elitepainterpro.com/the-hidden-danger-of-sanding-old-paint-without-a-hepa-vacuum), to determine if additional treatments are necessary before painting. Skipping these steps is a common mistake that often results in premature paint failure.
Have you ever fallen into this trap? Let me know in the comments. Understanding these nuanced aspects of house painting can elevate your project from amateurish to professional-grade. Remember, patience and attention to detail are your best tools, and a little knowledge goes a long way in avoiding costly pitfalls.Achieving a professional-looking paint job isn’t just about choosing the right color or technique; it also hinges on maintaining your tools and understanding the equipment that ensures durability over time. Investing in quality tools is a step towards ensuring your paint lasts longer and maintains its vibrant appearance. I personally swear by high-quality synthetic brushes for transitions and edging because they provide superior control and reduce brush marks, especially on smooth surfaces. When it comes to rollers, I opt for premium roller covers—like those from elite brands—that feature dense nap fibers designed to minimize lint and fuzz, which can ruin a freshly painted wall. Proper tool maintenance, such as thorough cleaning immediately after each use, extends the lifespan of these tools and preserves their performance for multiple projects.
It’s equally important to keep your equipment in top shape to prevent the buildup of dried paint or debris, which can compromise your finish. For brushes, soaking them in warm, soapy water (or solvent if you’re using oil-based paints) and reshaping the bristles helps maintain their form. Roller covers should be washed with gentle detergent and spun dry, avoiding high heat that can damage the fibers. I also suggest storing brushes hanging or flat to prevent bent bristles, which can cause uneven application. Long-term results depend heavily on these little details; neglecting them may lead to peeling or uneven wear down the line.
Looking ahead, I predict that advancements in smart paint technology—like self-healing or UV-resistant coatings—will become more prevalent, reducing the frequency of repainting cycles. However, the foundation of long-lasting results will always be dependable tools and consistent maintenance.
How do I keep my tools performing well over time?
Adopt a routine of cleaning brushes and rollers immediately after painting sessions. Use the appropriate solvent — water for latex, mineral spirits for oil-based paints — and ensure brushes are thoroughly rinsed to remove all paint residues. Store brushes with bristles flat or hanging to preserve shape, and keep roller covers in sealed plastic bags if you plan to reuse them soon. Regularly inspect your tools for signs of wear, such as frayed fibers or bent bristles, and replace them as needed. This simple maintenance prolongs their lifespan and ensures your future projects will benefit from smooth, even coats. Also, consider investing in a quality [paint sprayer](https://elitepainterpro.com/how-to-get-that-smooth-factory-finish-on-your-interior-doors) for large surfaces, which can significantly reduce application time and improve finish consistency. Remember, well-maintained tools lead to fewer touch-ups, saving you money and effort in the long run. For an extra step, consult expert tips like the one detailed in this [professional painter’s guide](https://elitepainterpro.com/the-difference-between-paint-primer-and-sealer-for-new-drywall) to optimize your maintenance routine and results. Challenge yourself to implement one advanced tip today—try cleaning and inspecting your brushes after your next project to see how it improves your work efficiency and results.
The Lessons That Changed My Entire Approach to House Painting
One of the most eye-opening lessons I learned was the significance of testing paint under different lighting conditions before committing to a color. I used to pick shades based solely on store samples, only to be disappointed when I returned home and the hues didn’t look the same. Now, I always perform the soap and water test for wall cleanliness and test my samples at various times of day, in different light settings, to ensure consistency. Another insight was realizing how crucial proper surface preparation is — neglecting it can lead to peeling or uneven color even with the best paint. And finally, I discovered that investing in quality tools and maintaining them carefully profoundly impacts the final result, making the extra effort well worth it.