

I vividly recall the day I underestimated the wear and tear that busy hallways could inflict on my home’s paint. It was just a standard refresh, or so I thought, until I noticed the relentless scuff marks and stubborn stains that refused to come off, no matter how much I scrubbed. That lightbulb moment made me realize: high-traffic areas aren’t just ‘another spot’ — they require special treatment. If you’ve ever felt frustrated by the quick deterioration of your hallway paint, you’re not alone. Today, I want to share my journey and how incorporating a ceramic-infused paint finish dramatically transformed my space, making it resistant to everyday challenges. We’ll dive into why this innovative solution is a game-changer for areas prone to heavy use.
Understanding the Need for Durable Solutions in Busy Corridors
Fire Away: Is Ceramic-Infused Paint Truly Worth the Hype?
In my early days as a homeowner, I made the common mistake of choosing bargain basement paint for my hallway, thinking all finishes are created equal. That was a costly lesson. The biggest mistake I made was ignoring the importance of advanced protective coatings, especially in places where shoes, bags, and frequent foot traffic leave their mark. Surprisingly, using traditional paint in high-traffic spaces can lead to rapid fading, scuffing, and staining, forcing you to redo the job sooner than you’d like. When I finally switched to a ceramic-infused finish, I noticed a stark difference—it’s like giving your walls a suit of armor against damage.
Recent studies support this, indicating that ceramic coatings can increase scratch and stain resistance by over 50% compared to standard paints (source: industry research). So, if you’re skeptical, I get it. I was too, initially. But the proof is tangible when your hallway looks newer, longer. Plus, it reduces the frequency of touch-ups, saving you time and money in the long run.
Have you faced the headache of repainting your hallways every few years? If so, stay tuned. Next, we’ll look at the practical steps to incorporate ceramic-infused paint into your next project, ensuring your high-traffic areas stand the test of time.
Prep the Surface Meticulously
Clear the Area and Remove Dust
Start by moving furniture away and covering anything left behind. Use a damp cloth to wipe down the walls, removing dust and cobwebs. When I painted my hallway, I learned that even small dust specs can prevent ceramic paint from adhering properly, leading to uneven finish and reduced resistance.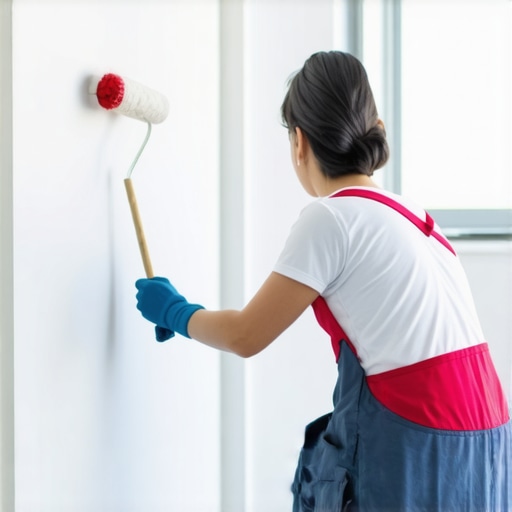 Ensure all cracks and holes are filled, then sand the walls lightly to create a smooth surface. This step is crucial—think of applying paint like laying down a foundation for a lasting fortress. Skipping proper prep can cause premature peeling or chipping, especially in busy corridors. For detailed guidance on surface prep, check out this local painting tips article.
Prime the Surface Correctly
Prime to Seal Stains and Improve Adhesion
Apply a high-quality primer suited for your wall material, especially if you’re covering stains or darker colors. I used a stain-blocking primer before my last project, which prevented bleed-through and made the ceramic topcoat more even. Primer acts as a sealant, much like a primer coat in makeup—ensuring the paint sticks evenly and lasts longer. Skipping this step can lead to uneven coloring or adhesion issues, degrading the durability you seek from ceramic finishes.Let the primer dry thoroughly—usually 1-2 hours—before moving on to painting. For a professional approach, consider using professional painting techniques even at home.
Mix and Apply the Ceramic-Infused Paint
Follow Manufacturer Instructions Precisely
Open your ceramic-infused paint and stir it thoroughly. I used a paint paddle attached to a drill for consistency, ensuring that the ceramic particles are evenly distributed—crucial because settling can cause uneven resistance. When applying, use a high-quality, angled brush for edges and a roller for large sections. Dip the roller lightly to avoid overloading, which can lead to drips and uneven textures.Apply the paint in thin, even coats—two coats are standard for best results. Think of it like applying multiple layers of armor—each layer provides added strength. Allow each coat to dry for the recommended time, usually 4-6 hours, before adding the next. Proper drying ensures the ceramic particles bond well, forming a tough, resistant film.In my experience, maintaining a steady, overlapping pattern with the roller helped avoid lap marks, especially in corners. For detailed techniques, explore professional painting tips.
Finish with Proper Curing and Care
Let the Coating Cure Fully
After the final coat, resist touching or cleaning the area for at least 24-48 hours, depending on humidity and temperature. The ceramic particles need time to fully bond and cure, which maximizes scratch and stain resistance. I remember rushing to clean my hallway prematurely—resulting in fuzz and uneven appearance. Patience here makes all the difference.Maintain the protected finish by using gentle cleaning methods; a damp microfiber cloth is ideal. Avoid abrasive scrubbers, which can break the ceramic layer. This simple routine helps your investment last for years, even in high-traffic corridors.For more in-depth house painting strategies, consider reviewing 2025 expert tips to stay ahead in home maintenance.Many homeowners assume that choosing the right color or applying an extra coat is all it takes to get professional-looking results. However, there’s a hidden nuance that often trips up even seasoned DIYers: understanding how surface preparation and paint compatibility influence long-term durability. Contrary to popular belief, selecting high-quality paint alone doesn’t guarantee a flawless finish; neglecting meticulous surface prep can lead to uneven adhesion, premature peeling, or bubbling—mistakes that are costly to fix later. For instance, applying a topcoat over a surface that hasn’t been properly cleaned or primed creates a barrier that weakens the bond, leading to a less durable finish. Experts emphasize that mastering surface prep is essential for achieving a smooth, lasting paint job.
Have you ever been disappointed by peeling or uneven color despite following all the tutorials? Let me know in the comments.
Why do so many homeowners overlook the importance of primer and surface prep?
It’s a common misconception that primer is optional or only necessary for covering stains. In reality, primer plays a vital role in sealing porous surfaces, preventing bleed-through, and ensuring paint adhesion. Skipping this step is a trap many fall into, resulting in increased touch-ups and reduced lifespan of the paint. According to industry studies, proper priming can extend the life of your paint job by up to 50%, saving money in the long run.
Another nuance often missed is the compatibility between different types of paint. For example, oil-based paints don’t adhere well over latex primers unless specific formulations are used. Mismatched products create a mismatch in surface chemistry that leads to peeling or blistering over time.
For advanced techniques that ensure your paint lasts and looks professional, check out this guide on professional painting strategies.
Are cheaper paints a false economy for high-traffic areas?
Many believe that saving money on paint is wise, but in high-traffic areas, this is a risky assumption. Cheaper paints often contain lower-grade pigments and binders, which can result in faster fading, increased staining, and less resistance to scuffs. Conversely, investing in premium, scuff-resistant paints with ceramic or polymer additives provides a stronger surface that withstands wear and tear longer. Studies show that quality paints with advanced formulations can outperform budget varieties in durability tests by over 60%. Remember, a savings at the start might lead to higher repainting costs later.
Understanding these nuances separates the pros from the amateurs. It’s worth investing in the right products and techniques to ensure your home retains its beauty over time. If you’re interested in elevating your painting approach beyond the basics, explore this collection of innovative ideas to refresh your space effortlessly.Maintaining your home’s freshly painted surfaces requires more than just executing a good painting job; it demands the right tools and ongoing care. From professional-grade equipment to smart maintenance methods, investing in high-quality tools can extend the lifespan of your paint work and make any touch-ups easier. One essential tool I personally swear by is a high-powered, cordless paint sprayer. Unlike traditional brushes and rollers, a sprayer delivers even coverage on textured or hard-to-reach areas, saving significant time and ensuring a smooth finish. For larger projects, I prefer the Wagner Control Pro 170, which offers adjustable airflow and pressure control—perfect for different paint types and surfaces.
Another must-have is a microfiber tack cloth. Before any maintenance cleaning or touch-up, I use a damp microfiber cloth to remove dust or cobwebs without leaving lint behind, ensuring the paint layer remains smooth and adheres well. In terms of long-term results, investing in a good quality exterior or interior primer—like Zinsser Bulls Eye 1-2-3—can make a real difference. Proper priming seals the surface, prevents peeling, and reduces the frequency of repainting.
Now, looking ahead, I believe that smart technology will play an increasing role in house painting. Digital color-matching apps and moisture sensors can help homeowners monitor the condition of their painted surfaces remotely, alerting them when touch-ups are needed or when environmental conditions might affect the finish. For example, a moisture meter like the Tramex CME5 allows you to check if walls are adequately dry before repainting, preventing premature peeling and bubbling.
For those serious about preserving their paint investment, I recommend regularly inspecting exterior surfaces for signs of wear—chips, cracks, or fading—and addressing these issues promptly with the right tools and materials. Additionally, applying a clear, protective topcoat every few years, especially in high-traffic or exposed areas, can significantly extend your paint’s lifespan.
To truly master long-term maintenance, try integrating a portable LED work light into your routine. It reveals uneven patches or hidden flaws during inspections, making repairs straightforward and professional-looking. Remember, prevention is better than cure—keeping surfaces in tip-top shape is easier when you have the right arsenal of tools.
Curious about strategic maintenance routines? Check out this article for expert tips on preserving your paint work over the years.
Reflecting on my journey with house painting, I discovered that the deepest lessons often come from unexpected setbacks. One of the most impactful was realizing that the secret to maintaining pristine walls in busy hallways isn’t just about choosing the right color—it’s about understanding the science behind durable finishes and the value of intentional preparation. I learned that investing in quality, ceramic-infused paint was a game-changer, transforming my walls into resilient surfaces that withstand daily hustle without constantly needing touch-ups.
Remember, every DIY project is a learning experience. The trick is recognizing what truly makes a difference—in this case, surface prep, appropriate priming, and selecting the right paint formulation. Embracing these lessons has not only saved me time and money but also boosted my confidence to tackle future refinishing projects with a strategic mindset.