

Have you ever dived into a painting project only to discover your trusty brushes have turned into stiff, unmanageable sticks? I’ve been there, frustration mounting as I watched my freshly painted walls suffer from uneven strokes and bristle pullouts, all because my brushes were crusty and neglected. It was a lightbulb moment for me when I stumbled upon a simple trick involving vinegar — yes, that humble kitchen staple — that completely transformed how I care for my brushes. From that day on, I saved so much time and money, and my paint jobs improved remarkably.
The Vinegar Trick That Saved My Painting Day
If you’ve ever faced the nightmare of stiff, paint-caked brushes that seem impossible to clean or restore, you’re not alone. It’s a common pain point, especially for homeowners and DIY enthusiasts who don’t want to toss their favorite brushes after one messy project. Well, I’m here to tell you that your painting tools aren’t destined for the trash bin just yet. With a simple vinegar soak, those crusty brushes can be rescued, revitalized, and ready for their next adventure. This method isn’t just a myth; it’s backed by personal success and a bit of science — vinegar’s acidity helps break down dried paint and soften stubborn bristles, making them as good as new.
But before we jump into the step-by-step, let me share a mistake I made early on that almost cost me my favorite brushes. I tried to clean dried paint with hot water and soap alone, thinking I could save a few minutes. Instead, I ended up damaging the bristles and shrinking the wooden handles. That was a rookie mistake, but it taught me the value of patience and the right cleaning solutions. Now, I always remember that the key to saving brushes is understanding what they need, and sometimes, it’s as simple as using the right vinegar solution.
Is Vinegar Actually Worth the Hype for Paintbrushes?
At first, I was skeptical. I wondered if vinegar could really do the trick or if I’d be better off just buying new brushes. Research and experience proved otherwise. Vinegar’s acetic acid helps dissolve dried paint without damaging the bristles or handles, unlike harsh chemicals or aggressive scrubbing. Plus, it’s inexpensive and eco-friendly — a win-win for homeowners who care about their tools and the environment. If you’re curious about other handy tips, check out the essential brushes every homeowner should own.
Now that I’ve shared my personal breakthrough, let’s dive into the practical steps so you can give your brushes a second life and keep your painting projects smooth and enjoyable.
Prepare Your Workspace and Tools
Start by gathering your old brushes, white vinegar, a container large enough to submerge them, and some warm water. I remember the first time I did this—my kitchen smelled sharp, but the results were worth it. Lay out newspapers to protect surfaces, and wear gloves to avoid vinegar’s sting. Remember, the goal is to soften the dried paint, so setup matters to keep the process smooth and mess-free.
Soaking the Brushes Properly
Pour enough vinegar into the container to fully submerge the brush bristles. Place the brushes handles-up, ensuring the bristles are immersed. I suggest letting them soak for at least 30 minutes; I once left a brush overnight, and it was like magic. The acidity of vinegar breaks down the paint’s adhesion without damaging the wood or synthetic fibers. Think of it as letting the vinegar do the hard work while you prepare the rest of your project.
Scrubbing and Cleaning Effectively
After soaking, gently scrub the bristles with an old toothbrush or a nail brush. This step is vital—don’t just rinse and go; the vinegar loosens the dried paint, but scraping helps remove residual gunk. I once neglected this and found my brushes still stiff; after a good scrub, they regained their flexibility. Rinse thoroughly under warm water until no vinegar smell remains. This step prevents any lingering acidity that might affect your next paint job.
Drying and Reshaping Your Brushes
Once cleaned, gently squeeze out excess water, reshape the bristles with your fingers, and lay the brushes flat or hang them with the bristles pointing downward. I learned early to avoid drying brushes upright—water can seep into the handle, damaging glue and shortening their lifespan. Proper drying preserves the brush’s shape and prolongs its usability, so take a minute to do it right.
Testing and Final Touches
Before using the brushes on your wall, test them with a bit of your current paint on a scrap surface. If the brush feels stiff again, repeat the vinegar soak. I remember testing a restored brush on peeling trim, and it performed like new. Using this method regularly keeps your painting tools in top shape, saving you the cost and hassle of replacing brushes prematurely. For tips on choosing the best brushes for different surfaces, check out the essential brushes every homeowner should own.
Even seasoned homeowners can fall prey to misconceptions about painting their homes. One common myth is that choosing the cheapest paint will save money in the long run. In reality, budget paints often require more coats and don’t last as long, leading to higher costs over time. Another misconception is that all brushes are created equal; however, using the right brush for specific surfaces—like synthetic brushes for latex paints—ensures smooth application and better finish, as discussed in this guide to eco-friendly paints. A hidden nuance many overlook is the importance of surface preparation; neglecting proper cleaning and priming can cause paint to peel or discolor prematurely, a trap that even experienced DIYers can stumble into.
The
Maintain Your Painting Tools for Lasting Quality
Keeping your brushes, rollers, and other equipment in top shape is crucial for achieving professional-looking results every time. I personally rely on a few key maintenance routines that ensure my tools last longer and perform better. Regularly cleaning brushes immediately after painting prevents dried paint from hardening, which can render them useless over time. Using warm water and mild soap for latex paints or the appropriate solvent for oil-based finishes keeps the bristles flexible and effective. A quick rinse and gentle reshaping after each project preserve their shape and integrity, saving you money and hassle in the long run.
Invest in Quality Tools: Why It Matters
Choosing the right equipment is half the battle in house painting. I recommend investing in high-quality brushes designed for the specific type of paint you’ll be using. For instance, the three brushes every homeowner should own include a good synthetic brush for latex, a natural bristle for oil-based paints, and a high-quality angled brush for corners and edges. Opting for premium tools may cost more upfront but pays off through better application, less paint waste, and easier cleanup. Remember, the right tools make your work smoother and can dramatically improve your finishes.
Use Proper Storage to Preserve Equipment
Proper storage extends the life of your tools. After cleaning, shape your brushes and hang them with bristles pointing downward to prevent water from seeping into the handle, which can cause cracking or peeling. For rollers, store them in airtight containers or cover with plastic to prevent dust accumulation. I have found that diligent storage practices prevent equipment degradation and keep tools ready for your next project, reducing the need for frequent replacements.
Predicting the Future of Painting Tools
The trend points towards smart, eco-friendly tools that offer greater durability and user convenience. Innovations like self-cleaning brushes and ergonomic roller handles are already emerging, making maintenance easier and more effective. As technology advances, expect more embedded sensors and real-time feedback systems to guide painters in achieving perfect coats. Staying ahead involves embracing these innovations early, which can greatly enhance your efficiency and results.
How do I keep my tools in shape over time?
Regular cleaning is essential, but also consider using dedicated storage solutions like tool racks and airtight containers for paint-soaked accessories. Applying a light coat of oil or specialized brush conditioner can prevent bristle damage. Moreover, inspecting tools before and after each use helps catch early signs of wear, so you can replace or repair parts before they compromise your work. By adopting these simple habits, you ensure your equipment remains reliable, saving you money and frustration down the line.
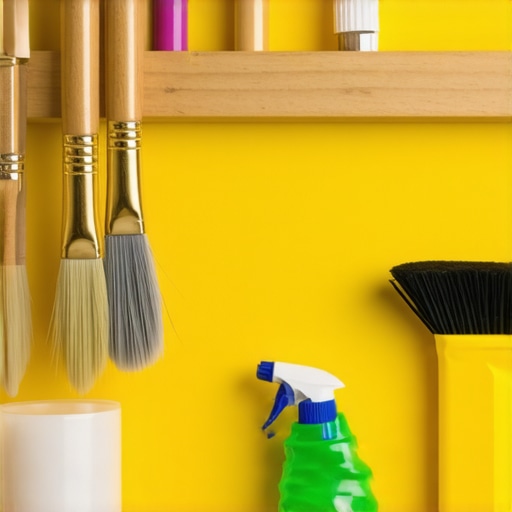
For example, a high-quality, ergonomically designed roller with a sleek handle helps distribute paint evenly, reducing fatigue during longer projects. Proper maintenance and choosing the right tools contribute significantly to professional results and long-term satisfaction.
Try incorporating a dedicated cleaning routine for your brushes using a vinegar solution as discussed earlier, and see how much longer your tools last while improving their performance. Staying consistent with tool care ensures your investment in quality pays off over time, making every painting project smoother and more successful.
The Hardest Lesson I Learned About House Painting
One of the most valuable lessons I uncovered was about surface preparation. Rushing into painting without properly cleaning or priming can doom even the best paints to failure, leading to peeling and discoloration within a few years. It’s a surprising investment of time that pays off by extending your paint’s lifespan and ensuring a flawless finish.
Rolling With the Right Equipment Changes Everything
I used to underestimate the importance of choosing quality rollers and brushes. Switching to the recommended tools for specific surfaces not only made my work look more professional but also reduced the number of coats needed. Trust me, a good tool is an investment that saves money and frustration over countless projects.
Let’s Talk About Embracing a Routine That Preserves Your Tools
Implementing a simple care routine—like immediate cleaning with warm water or appropriate solvents and proper drying—transformed the longevity of my brushes and rollers. Now, I can reuse tools multiple times, maintaining their performance and reducing waste. Remember, caring for your tools is just as crucial as caring for your walls.
Where to From Here: Take Action Now
Every brushstroke you make after adopting these insights will be smoother, more efficient, and longer-lasting. Incorporate these lessons into your next project and notice the difference. The key is patience, the right tools, and proper maintenance—embrace it, and your future painting endeavors will be nothing short of satisfying.