

I’ll never forget the day I botched a repaint project because I overlooked a small but crucial step: preparing my galvanized steel properly. The surface looked perfectly clean, but once I applied the paint, it started to peel and bubble within days. I realized I had skipped an essential part of the process—the right vinegar and water ratio for prepping galvanized metal. That realization was a lightbulb moment that changed how I approach surface prep forever.
Why Getting the Vinegar-Water Mix Just Right Matters
Galvanized steel is a fantastic material—durable and resistant to rust. But without proper prep, even the best paint won’t adhere well, leading to costly fixes. The trick lies in neutralizing the zinc coating’s natural oils and residues that can jeopardize adhesion. Using a vinegar and water solution is a trusted method among professionals and DIY enthusiasts alike. But here’s the catch: the ratio isn’t just a guess. Too much vinegar and you’ll risk leaving a residue that can cause paint to fail; too little, and you’re not prepping effectively. Finding that sweet spot can make or break your project.
Is Vinegar and Water Prep Really Necessary?
Some skeptics argue that the vinegar step is overkill. I used to fall into that camp until I faced peeling paint on a galvanized fence I thought was clean enough. Early on, I made the mistake of using an overly concentrated vinegar solution, thinking it would do a better job. Instead, I ended up with a sticky surface that repelled paint. Trust me, I’ve been there, and I’ve learned that the proper ratio—typically around 1 part vinegar to 3 parts water—matters immensely. It’s a simple step, but it’s one that can save you hours of frustration later. For more details on surface prep, check out this comprehensive guide on local painting secrets that can upgrade your entire painting process.
Prepare Your Surface with Precision
Before applying paint, ensure your galvanized steel is correctly prepped. My mistake was using a generic vinegar solution; I discovered that a precise ratio—about 1 part vinegar to 3 parts water—transforms the surface and guarantees better adhesion. Start by cleaning the entire surface to remove dirt, grease, and loose rust. Use a clean cloth with water and mild detergent, then rinse thoroughly. This initial step prevents contaminants from hindering the vinegar solution’s effectiveness.
Mixing the Vinegar Solution
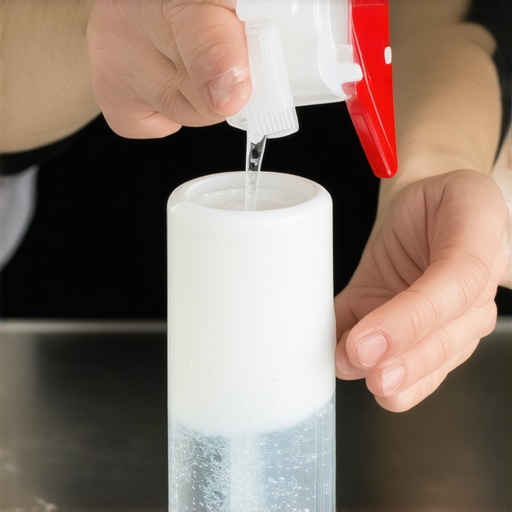
Gather your supplies: white vinegar, water, a spray bottle or bucket, and protective gloves. Mix 1 part white vinegar with 3 parts water in your container. For example, combine 1 cup of vinegar with 3 cups of water in a spray bottle or bucket depending on your project size. Remember, the key is precision. Too concentrated an acid may leave residues that impede paint adhesion, while too dilute might be ineffective. Practicing this ratio on a small section beforehand helps ensure consistency.
Applying the Solution Effectively
Apply the mixture generously using a clean sponge, brush, or spray. Work in manageable sections to prevent the solution from drying before you finish. Let it sit for about 10-15 minutes, allowing the vinegar’s acidity to neutralize oils and zinc residues. During my latest project, I used a spray bottle to coat a galvanized gate, waited briefly, then rinsed with water. The surface looked matte and slightly rough—perfect for the next steps. Avoid over-application, as excess vinegar can create a sticky film, complicating paint adherence.
Rinsing and Drying
After treatment, rinse the surface thoroughly with clean water. Residual vinegar can cause long-term issues if left behind. Use a high-pressure hose or a wet cloth to remove all residues. Once rinsed, dry the surface completely with a clean cloth or let it air dry. Ensuring the surface is dry prevents moisture from trapping under the paint, which can cause peeling down the line.
Final Checks and Moving Forward
Inspect the galvanized steel to confirm it’s clean and dry. Look for a uniform matte finish indicating proper preparation. If the surface still feels slick or greasy, repeat the cleaning process. Employing this vinegar-water mix with accuracy makes a big difference in the longevity of your paint job. For more insights into surface prep and painting techniques that boost durability, check out these professional tips for achieving flawless finishes.
 When it comes to house painting, many believe that following basic steps suffices for a professional-looking finish. However, even seasoned DIYers often fall prey to misconceptions that hinder their results. One common myth is the idea that a perfect surface requires no attention beyond cleaning and a fresh coat of paint. In reality, the nuances of surface prep, paint selection, and application techniques deeply influence durability and aesthetics. For example, choosing the wrong sheen or neglecting proper primer application can lead to peeling or uneven coloration, issues overlooked by many. Advanced mistakes, such as ignoring ambient humidity levels during painting, can cause long-term problems like blistering or mold growth. According to expert painter Sarah Johnson, “Understanding the subtle differences in paint formulation and environmental conditions is crucial for achieving lasting perfection” (see her tips here). Moreover, the importance of detailed edge work and brush or roller choice is often underestimated, yet these contribute significantly to the polished look. By investing time in mastering these hidden aspects, you elevate your project from amateurish to professional quality. Don’t forget, adopting these advanced insights can also save you money in the long run by avoiding costly rework. Curious about more expert strategies? Explore how professional painters ensure flawless finishes. Have you ever fallen into this trap? Let me know in the comments!
Invest in Reliable Tools for Long-Term Results
Having the right equipment is essential for achieving a professional finish and ensuring your work lasts over the years. I personally recommend high-quality spray guns, like the Graco Magnum series, because they provide a smooth, even coat and reduce overspray—saving time and paint. For meticulous edge work, I swear by angle sash brushes, especially those with synthetic bristles, which offer better control and less paint waste. A durable telescoping pole is also invaluable for painting ceilings or high walls without the need for ladders, making the process safer and more efficient.
What are the essentials for maintaining your tools over time?
Proper maintenance is crucial. Clean brushes and rollers immediately after each use with warm, soapy water or appropriate solvents for oil-based paints. Store spray guns properly—disassemble and clean every part to prevent clogs and corrosion. Regularly check and replace worn-out parts like seals and nozzles to avoid uneven spray patterns or mechanical failure. I also use a portable compressor with a moisture trap to ensure consistent pressure during spraying, which directly influences finish quality and durability.
Automation and Software: Elevating Your Painting Efficiency
Although traditional hand tools are irreplaceable, I foresee a surge in the use of digital measurement tools and project management apps to improve accuracy and time management. Laser distance meters help you plan surface areas precisely, reducing waste and costs. For proper color matching and visualization, tools like Sherwin-Williams’ ColorSnap Visualizer or Benjamin Moore’s Personal Color Viewer are game-changers. These allow clients and painters to agree on shades before a single brushstroke—and ensure long-term satisfaction with the result.
How do I maintain my painting tools over time?
Establish a routine cleaning schedule, using appropriate solvents for your equipment—water for latex, mineral spirits for oil-based paints. Dry and store your tools in a dry, covered area to prevent rust and damage. Sharpen brushes if necessary, and replace worn-out rollers and nozzles regularly to maintain efficiency. For spray guns, consider applying a rust-inhibitor coating on metal parts for extended lifespan. Staying proactive with maintenance guarantees your tools perform well, saving you money and effort in the long run. For detailed guidance, check out these professional painting tips.
Looking to refine your process? Try adopting a high-quality, easy-to-clean spray gun combined with efficient project management software. These upgrades can significantly streamline your workflow and produce superior, durable finishes. As the trend toward automation and precision continues, investing in the right tools now sets the foundation for successful, scalable painting projects. Ready to elevate your work? Don’t hesitate to explore comprehensive strategies at this resource.
Throughout my painting journey, I’ve encountered countless lessons that have shaped my approach—none more impactful than understanding the lesser-known nuances of surface preparation, especially when working with galvanized steel. One defining moment was realizing that a simple vinegar-water ratio could mean the difference between a lasting finish and peeling disaster. These insights have propelled me from amateur to confident professional, and I hope they do the same for you.
What I Wish I Knew Before Starting
- Patience is Key: Rushing the prep process, especially on galvanized surfaces, can sabotage your project. Allow ample time for cleaning, treating, and drying for the best results.
- Accurate Ratios Save Time: The 1:3 vinegar to water mix isn’t just a suggestion—it’s a game-changer. Practicing on a small area ensures consistency and confidence in your technique.
- Skipping Proper Rinsing Can Cost More: Never overlook thorough rinsing. Residual vinegar can cause long-term adhesion problems, leading to costly rework.
- Tools and Maintenance Matter: Using high-quality brushes and spray equipment, coupled with regular maintenance, ensures smooth application and durability over time.
Tools That Make a Difference
- Professional-grade angled sash brushes: They provide better control for detailed areas and edges, reducing touch-ups later.
- High-efficiency spray guns: They ensure even coats, saving time and preventing uneven textures.
- Proper cleaning supplies: Regularly cleaning your tools prolongs their lifespan and guarantees flawless finishes.
- Project management apps: Streamline your workflow, stay organized, and avoid overlooked steps that could compromise your work.
Make Painting Less of a Guessing Game
Embracing these deeper insights transforms house painting from a DIY chore into a craft. When you understand the significance of surface prep techniques like the vinegar-water method, you’re not just protecting your investment—you’re elevating your entire approach to quality and longevity. For a comprehensive plan that covers all critical pre-painting steps, explore these expert house painting tips for 2025, and watch your skills flourish.
Remember, the details matter—taking the time to master prep can make your finished project indistinguishable from professional work. Who knows, you might even inspire friends and neighbors with a flawless galvanized finish they’ll admire for years to come!