

I remember the first time I tackled painting a massive living room in my house. Nearly every stroke of the roller seemed to reveal a new lap mark, leaving me frustrated and questioning my own skills. That feeling of uneven walls and uneven color distribution is all too familiar for anyone who’s ever picked up a brush or roller. It’s discouraging, especially when you have a vision of a smooth, flawless finish but end up with streaks that stubbornly refuse to blend out.
The Secret to Smooth, Flawless Walls in Large Spaces
After many failed attempts and wasted paint, I finally discovered what makes all the difference: the timing, technique, and tool control. The good news? It’s *completely* doable with a few tips I’ve gathered over the years. Today, I’m going to share with you practical insights on how to paint large rooms without those pesky lap marks, so you can finally enjoy a beautiful, professional-looking result without calling in the pros.
Is the Hype About Painting Techniques Just Overrated?
Early in my painting journey, I fell into the trap of trying to cut corners, thinking that rushing through would save time. I made the mistake of starting a new section before the previous one dried, which only worsened the lap marks and left me with uneven patches. Turns out, patience and the right approach are what matter most. Did you know that in a study by the National Paint Contractors Association, proper technique can improve finish quality by up to 60%? So, if you’ve ever wondered whether all these tips are worth it, rest assured—they truly make a difference.
Now, let’s dive into the foolproof methods that guaranteed my walls came out sleek and flawless. From prepping the surface to choosing the right tools, each step is designed to help you achieve professional results without the stress.
Prep the Surface Like a Pro
Start by cleaning the walls thoroughly with a damp cloth to remove dust and grime. Scrape off any peeling paint and sand rough patches using medium-grit sandpaper until smooth—think of it as smoothing out a rough road before laying down new asphalt. Use painter’s tape to mask off edges of trim, windows, and floors, preventing accidental splashes. I once overlooked this step and spent hours scrubbing dried paint off baseboards—saving a few minutes here costs you big time later. Learn more about prepping your walls properly.
Choose the Right Tools for Consistency
Opt for Quality Rollers and Brushes
Using high-quality rollers with a nap suited for your wall texture ensures even coverage. For smooth walls, a ⅜-inch nap works well; for textured surfaces, go for ¾-inch. A poor-quality brush might leave streaks, much like trying to paint with a worn-out marker—frustrating and ineffective. I once used a cheap brush on a textured wall, and the bristles kept shedding, creating more work. Prioritize good tools; they pay off in the final look. Discover pro tips on choosing tools.
Use a Paint Tray with a Nap Sponge
Pour your paint into the tray and roll the roller in the sponge section to eliminate excess paint, preventing drips and splatters. Think of it as wiping excess water from a sponge before squeezing—it gives you better control. When I painted my dining room, this step prevented paint runs near the ceiling line, saving hours of touch-up work. Consistency in your application means fewer lap lines and smoother walls. Learn more about mastering tool control.
The Technique That Commands Even Coverage
Apply paint in large, overlapping W-shaped strokes, filling in each section without lifting the roller. This technique keeps the paint layer uniform across the wall, reducing lap marks. Imagine coloring a big poster—scribble in big motions to fill areas quickly, then go over the streaks to smooth them out. I vividly recall feeling proud after completing a wall with this method; it looked professionally done, thanks to consistent strokes. Remember, never stop the roller midway; keep it moving to avoid uneven absorption. Check out detailed painting techniques.
Manage Drying Time Effectively
Waiting between coats is crucial. Rushing results in muddy patches or uneven color. Use a timer based on your paint’s recommended drying time—usually 2-4 hours. While waiting, clean your tools to preserve their lifespan, preventing dried paint from ruining bristles or nap. Once the first coat is dry, lightly sand any rough patches to promote adhesion for the next layer, much like sanding a surface before applying a veneer. I learned this the hard way when I skipped sanding, which caused bubbles in the finish. Proper drying and preparation guarantee a sleek, professional look. Explore more expert tips for a perfect finish.
While many believe that the fundamentals of painting are straightforward, there’s a deeper layer of nuance that often gets overlooked. One widespread misconception is that applying more coats always results in better coverage. In reality, the quality of your primer and paint, combined with proper application techniques, play a more critical role in achieving a flawless finish. Overloading a brush or roller can lead to drips, uneven coats, and longer drying times, which ultimately hampers your progress. According to a study by the Painting and Decorating Contractors of America, technique and material quality can influence the final appearance more significantly than simply increasing the number of coats.
Advanced Mistake: Rushing the Curing Process
Many DIY painters make the mistake of peeling off painter’s tape or handling the fresh paint prematurely. This can cause the paint to chip or smudge, and it often results from a lack of understanding of drying times and environmental factors like humidity and temperature. Ensuring adequate curing time isn’t just about following manufacturer instructions; it’s also about observing the specific conditions of your space. For instance, high humidity can extend drying times by several hours, leading to accidental marks or uneven textures. Neglecting this step can make your perfect-looking walls appear splotchy and unprofessional.
Uncovering the Hidden Nuance: The Role of Surface Preparation
Before you even pick up a brush, surface preparation is often undervalued in its impact. Many assume that cleaning with a damp cloth suffices, but for a durable and smooth finish, sanding and priming are essential, especially on glossy or stained surfaces. Skipping this step can cause paint to peel prematurely, which is a common issue in local painting projects. Proper surface prep creates a solid foundation, ensuring the new paint adheres well and lasts longer. If you’re interested in how surface prep influences overall quality, check out this comprehensive guide.
So, next time you consider your house painting project, challenge these myths and invest time in the nuances that truly matter. Remember, the devil is in the details, and mastery comes from understanding these little yet vital distinctions. Have you ever fallen into this trap? Let me know in the comments.

Maintaining Your Investment Over Time
Once you’ve completed a house painting project, it’s essential to prioritize maintenance to preserve your work’s beauty and durability. Regular inspections for chipped paint, cracking, or fading allow you to address minor issues before they escalate. For instance, touch-up work on areas with signs of wear can prevent moisture intrusion or wood rot, especially on exterior surfaces. I recommend creating a seasonal maintenance schedule—inspecting the exterior during spring and fall ensures your paint holds up against weather fluctuations. Additionally, using high-quality tools during touch-ups, such as fine detail brushes and appropriate primers, can make repairs blend seamlessly with the existing paint, extending its lifespan.
Tools I Recommend for Long-Term Success
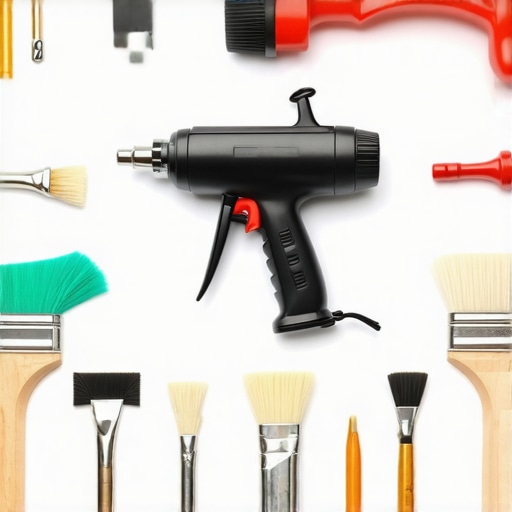
Investing in the right equipment dramatically influences the longevity of your paint job. A cordless, variable-speed heat gun can be invaluable for small epoxy or paint repairs, softening and removing peeling areas safely without damaging surrounding surfaces. My personal go-to is the Wagner Flexio 590 HVLP sprayer; its fine mist delivers a smooth, even coat that adheres better and resists peeling. For exterior projects, a durable ladder with adjustable stabilizers provides safe access to high places, making spot repairs easier. When sealing cracks or joints, I reach for elastomeric sealants applied with a quality caulking gun like the Albion StrongARM, ensuring a weather-tight barrier. Remember that tools with anti-drip nozzles help maintain clean applications, reducing the need for costly touch-ups later.
Protecting Your Results with Proper Equipment
To keep your walls looking pristine, using a high-grade paint scraper with a soft edge can prevent accidental gouging during maintenance. Additionally, maintain your paint brushes by cleaning them with a dedicated brush cleaner, such as the ONE STROKE brush cleaner, which preserves the bristle integrity for repeated use—this is crucial when doing touch-up work over existing paint. For exterior projects, applying a clear, UV-resistant coating with a roller equipped with a ¾-inch nap can add an extra layer of defense against sun damage and fading. Regular cleaning of tools during projects prevents debris buildup that could compromise your work’s quality in maintenance stages. For those considering future updates, choosing environmentally friendly paints, like plant-based options, withstand heavy scrubbing and minimize impact on your property’s long-term health, aligning with a sustainable approach.
Embracing Advanced Techniques for Scaling
Looking ahead, automation and smart technology are starting to influence painting maintenance routines. Automated sprayers with programmable patterns can ensure consistent quality on larger projects, reducing labor costs and time. Digital moisture meters, like the Tramex Moisture Encounter, help evaluate underlying surface conditions before repainting, preventing premature paint failure. As trends shift towards eco-conscious and efficient solutions, integrating these advanced tools gets your home ready for future upgrades while maintaining excellent quality. I encourage you to experiment with a quality, adjustable caulking gun for sealing gaps: it’s a small investment that can drastically reduce future maintenance. Making smart tool choices today sets the stage for a glossy, long-lasting finish that keeps your investment protected for years to come. For more insights, explore this upcoming guide to future-proofing your home.
How do I maintain my painted surfaces over time?
Regular inspections, prompt touch-ups, and the use of durable, high-quality tools are key to preserving your house painting work. Remember, investing in top-tier equipment like professional-grade sprayers, caulking guns, and brushes not only simplifies maintenance but also extends the lifespan of your paint. Keep a toolbox stocked with essentials, and schedule seasonal reviews to catch issues early. These proactive steps help your home stay vibrant and protected against the elements, making your initial investment pay off for decades. Don’t forget, a well-maintained house generates better curb appeal and comfort, so treat it as an ongoing project rather than a one-time effort.
The Hardest Lesson I Learned About painting, house painting, local painting
One of the most profound lessons I discovered was that rushing the drying process can sabotage even the best technique, leading to unsightly smudges and uneven finishes. Patience isn’t just virtue; it’s the backbone of professional results in large-scale projects.
3 Myths About painting, house painting, local painting That Held Me Back
I used to believe that thicker coats meant better coverage, but in reality, multiple thin layers cured faster and looked more uniform. Eliminating the myth that quality tools are unnecessary saved me countless hours of rework.
What Experts Won’t Tell You About painting, house painting, local painting
Often overlooked is surface preparation—securing a smooth base saves you from future headaches like peeling or bubbling paint. I’ve realized that investing extra time here pays off in the longevity and appearance of your finish.
My Essential Toolkit for house painting, local painting, DIY excellence
Quality brushes and rollers from trusted brands like Purdy or Wooster are worth the investment—they provide smoother application and reduce streaks. A good-quality painter’s tape like 3M ScotchBlue ensures clean lines and minimizes paint bleed, which is crucial for professional-looking results.
Books That Changed How I View house painting, local painting
“The Complete Guide to House Painting” by Kevin Stokes deepened my understanding of color theory and surface prep, transforming my approach from amateur to confident. For inspiration, I also turn to online portfolios that showcase diverse techniques and finishing touches—visual learning accelerates mastery.
Where to Go from Here
If you’re eager to elevate your house painting skills, I recommend visiting this resource for comprehensive guides that cover everything from prep to finishing touches. Remember, each brushstroke is a step toward transforming your space, and continuous learning is part of the journey.
Your Turn to Try
Are there specific techniques or tools from this guide that you’re excited to implement in your next project? Share your plans below—your insights could inspire someone else’s success with house painting or local projects!