

Ever spent hours painting a brick wall only to find that tricky, uneven paint stuck deep in those rough crevices? I remember the day I tackled my first brick fireplace, thinking it would be straightforward. The vibrant red bricks, a bit cracked and textured, became a nightmare when it came to clean-up. Paint seeped into every tiny nook and cranny, and no matter how much I scrubbed, those stubborn spots just wouldn’t budge. It was a classic lightbulb moment for me—realizing that my usual paint-removal tricks just didn’t cut it against such a rugged surface.
The Key to Convincingly Clean Bricks
Since that frustrating experience, I’ve learned a lot about getting paint out of rough brick crevices. Today, I want to share a method that truly works—one that can save you hours of scraping, frustration, and possibly damaging your beloved brickwork. This isn’t a quick fix propped up by gimmicks; it’s an effective, tried-and-true approach rooted in real-world experience. Whether you’re renovating, repainting, or just fixing a mistake, knowing how to tackle those difficult spots makes all the difference.
Is Scraping Alone Enough to Save Your Brick?
Before diving into the solution, I want to address a common misconception. I once thought that heavy-duty scraping with metal tools was the best way, but that led to chipped bricks and uneven surfaces. The harsh abrasion not only risked damage but also left behind residue that was tough to dissolve later. It’s a classic mistake I see many make—underestimating the power of gentle, chemical-based solutions versus brute-force methods. Trust me, patience and the right supplies will give you a cleaner result without harming your investment.
Next, I’ll walk you through my favorite method, which combines strategic cleaning agents and a bit of elbow grease, ensuring your brick remains intact while the paint disappears from even the most stubborn crevices. For more expert tips on house painting, check out our professional painting secrets that can elevate your entire project.
Prepare Your Workspace and Tools
Begin by gathering essential supplies: a stiff-bristled wire brush, a plastic scraper, gloves, goggles, a spray bottle filled with warm water, and a cleaning solution like vinegar or a commercial paint remover suitable for masonry. I once tackled a stubborn paint spot on my textured brick fireplace, and having everything within reach saved me time and prevented mishaps. Protect nearby areas with plastic sheeting or drop cloths to contain debris and drips.
Apply a Suitable Chemical Solution
Choose the Right Remover
Select a paint remover formulated for masonry or brickwork to avoid damaging the surface. I recommend using a eco-friendly vinegar solution mixed with water (1:1 ratio) for lighter spots, or a commercial product for heavier layers. Pour or spray the solution generously over the painted bricks, focusing on the areas with stubborn paint. Allow it to sit for 15-30 minutes to loosen the paint, much like letting a marinade penetrate meat.
Scrubbing the Surface
Once the solution has set, use the stiff brush to scrub in circular motions, working into the crevices and textured areas. Think of it like using a toothbrush to clean stubborn plaque—it requires firm but gentle pressure. For deep grooves, employ the plastic scraper to gently lift off loosened paint without scratching or gouging the brick. I recall my first try where I used a metal putty knife — it left marks. Switching to a plastic scraper preserved the brick’s integrity while effectively removing residue.
Work Methodically to Avoid Damage
Take your time and work in small sections. Don’t rush; rushing can cause accidental chipping or gouging. Rinse the area with warm water using the spray bottle or a damp cloth to neutralize the chemical and remove paint particles. I found that this step also helps reveal any remaining spots that need extra attention. For persistent patches, reapply the remover and repeat the scrubbing process. Remember, patience beats brute force in this delicate cleaning.
Tackle Residues in Crevices
Deep crevices demand focused attention. Use an old toothbrush or a smaller brush to get into tight spots. For really stubborn paint, consider using a soft-wire brush attachment on an electric drill, but proceed cautiously to prevent damage. A tip I learned is adding a bit of dish soap to warm water to improve the cleaning action. This method ensures you don’t leave behind residual paint or chemical traces, vital for preventing future issues like peeling or discoloration. Want more insights on precision painting techniques? Check out our pro tips for flawless house painting.
Final Clean-Up
Once all paint is removed, rinse the brick thoroughly with clean water to eliminate any remnants of the cleaning solution. Use a sponge or cloth to wipe away excess moisture, and let the surface dry completely before any repainting or sealing. I recommend allowing at least 24 hours for thorough drying, especially in humid environments, to prevent trapping moisture that could cause future damage. If you plan on repainting, ensure the surface is perfectly dry, clean, and free of residue to achieve a smooth, long-lasting finish.
Removing paint from rough brick can seem daunting at first, but with the right tools and techniques, it becomes manageable. Remember, gentle cleaning combined with chemical agents designed for masonry is far more effective than aggressive scraping alone. For comprehensive strategies on house painting projects, explore our local painting strategies.
When it comes to house painting, many homeowners rely on popular advice that might not hold up under scrutiny. One widespread misconception is that hiring the cheapest local painter guarantees the best results. In reality, quality often correlates with experience, proper tools, and attention to detail—factors that aren’t always reflected in a lower price tag. Cutting corners on cost can lead to uneven finishes, poor adhesion, or premature peeling, which ultimately costs more to fix.
Is It Better to Paint Over Old Paint to Save Time?
Many believe that simply painting over existing layers is a quick fix. However, this approach can hide underlying problems like water stains, mold, or peeling that should be addressed first. Skipping proper preparation not only diminishes the aesthetic appeal but also shortens the lifespan of the new paint job. Experts recommend removing loose or peeling paint and thoroughly priming the surface to ensure durability. Rushing this step can result in chipping or bubbling down the line. For strategies on proper prep and achieving a flawless finish, check out our local painting strategies.
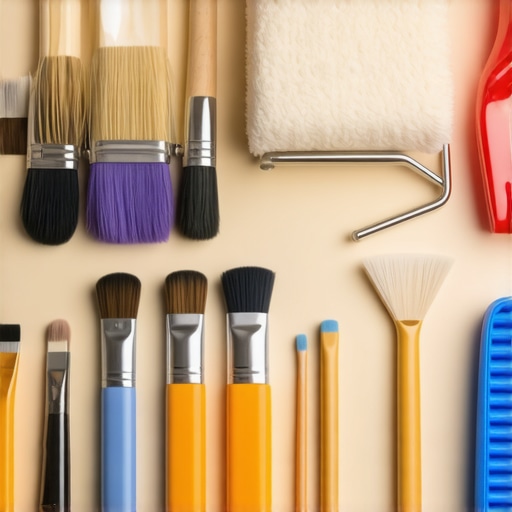
Maintaining your paintwork and choosing the right tools are crucial for ensuring your house painting projects stand the test of time. Investing in quality equipment not only speeds up the process but also results in a more professional finish that endures. When it comes to tools, I highly recommend using a high-quality, extendable paint roller like the Wooster Silver Tip. Its densely knit cover provides exceptional absorption and smooth application, reducing streaks and lap marks. For brushes, the Purdy XL series has been my go-to for years; its stiffness helps with detailed cuts and edges, especially on trim work.
An often-overlooked aspect is proper maintenance of your tools between projects. Rinsing brushes and rollers immediately after use with warm, soapy water prevents paint from hardening, extending their lifespan. For oil-based paints, a solvent such as mineral spirits is necessary; I keep a dedicated container for cleaning, ensuring I don’t contaminate my water-based tools. Periodically inspecting your brushes for loose bristles and replacing worn-out rollers saves you from uneven application down the line.
Keep Equipment in Top Shape for Future Projects
Store brushes vertically in a jar or wrapped tightly in plastic wrap to retain their shape and moisture. Foam rollers should be rinsed thoroughly and dried flat to prevent warping. Using a quality paint mixing drill attachment can help maintain a consistent color, especially if you prefer custom shades or repurposing leftover paint. Regularly replacing worn-out tools is an investment; for instance, a worn brush can cause uneven strokes and leave bristle marks that are difficult to correct.
Looking ahead, advancements like smart paint sensors are on the horizon, promising real-time monitoring of paint conditions and surface health. This technology could revolutionize how we approach maintenance, allowing for proactive touch-ups before problems escalate. To stay ahead, I recommend implementing routine inspections and keeping your tools in excellent condition. For example, try cleaning your brushes with a specialized brush cleaner and storing them properly – it’s a simple step that pays off in the longevity of your tools and the quality of your work.
How do I maintain my painting equipment over time?
The key to long-lasting tools is regular cleaning, proper storage, and timely replacement of worn parts. Always rinse brushes immediately after use with appropriate cleaning agents, and dry them flat or hang them to prevent deformation. Store rollers in airtight containers or wrapped in plastic to retain moisture. Over time, replacing brushes with frayed bristles or rollers that no longer spin smoothly can make a significant difference. Incorporate routine inspections into your painting schedule to catch small issues before they develop into bigger problems, ensuring your investment in tools continues to serve you well for future projects. With these practices, your tools will stay effective, and your paint jobs will look consistently professional. For more expert advice, visit our ultimate guide to house painting.
What I Wish I Knew Before My First Brush Stroke
One of the most valuable lessons I learned was the importance of proper surface preparation. Skipping this step might seem like saving time, but it often leads to uneven finishes and peeling later on. Investing time to clean, sand, and prime surfaces pays off huge dividends in the final appearance and durability of your paint job.
Another insight came from understanding the significance of high-quality tools. Cheap brushes and rollers may save money upfront, but they often result in streaks and inconsistent coverage, which you end up fixing anyway. Personally, I swear by trusted brands like Purdy brushes and Wooster rollers — they make the process smoother and the results more professional.
Additionally, patience is key. Rushing through coats or neglecting drying times can compromise your work. Allow each layer to cure fully, and don’t be tempted to apply thick coats. Thin, even layers with adequate drying time create a sleek finish that lasts.
Tools and Resources That Changed My Approach
Over the years, I’ve leaned on several resources that elevated my craftsmanship. The book “The Ultimate House Painting Guide” demystified color selection, surface prep, and application techniques, making a noticeable difference in my work quality.
For tools, I rely heavily on the professional-grade equipment I discovered through local supplier recommendations. A durable ladder, extendable brushes, and quality drop cloths help prevent accidents and messes, reducing stress and cleanup time.
Finally, online communities and tutorials, like those found at local painting secrets, offer continual learning opportunities. Sharing experiences and tips keeps my skills sharp and inspired.
Your Home’s Future Could Shine Brighter
Embarking on your painting journey might seem daunting at first, but with the right knowledge and tools, you can transform your space into something truly special. Remember, every brushstroke is an opportunity to improve your craft and boost your home’s value. The more you learn and invest in quality, the more satisfying your results will be. Want to dive deeper into expert techniques? Explore our latest house painting tips for 2025 and start turning your vision into reality.
What has been your biggest challenge when tackling a painting project? Share your story below—I’d love to hear your experiences!