

Ever found yourself eyeballing a freshly painted wall, only to spot a tiny, glaring screw hole staring back at you? It’s one of those little frustrations that can spoil an otherwise perfect paint job. I used to get so annoyed trying to patch those tiny imperfections—until I discovered a simple trick involving a humble toothpick. What seemed like a small detail actually made a huge difference in my home projects, saving me time and frustration. If you’ve ever struggled with filling cabinet screw holes before painting, you know exactly what I’m talking about. That moment when a nail or screw is in the way, and you need a quick, effective solution to hide it seamlessly. Today, I’m going to share with you how the toothpick trick transformed my approach and can do the same for you.
The Toothpick Trick: Why It Works Wonders
When I first started painting over cabinet holes, I would fill them with spackle or putty, expecting a smooth finish. But after applying paint, those patches would often stand out—either because I didn’t get a perfect feather or because the filler shrank as it dried. That’s when I stumbled upon a trick that seemed almost too simple: using a toothpick to fill screw holes. It’s a game-changer. Toothpicks are sturdy enough to fill small gaps, and they blend perfectly once painted over. Plus, they’re affordable and easy to manipulate, making them ideal for this purpose. I’ve patched countless holes using this method, and every time I’m amazed at how naturally it blends into the wall.
Is This Little Trick Actually Worth the Hype?
Good question! I’ll admit, I was skeptical at first, thinking that a tiny wooden stick couldn’t possibly provide a lasting, smooth repair. My early mistake was applying too much filler over the hole and then trying to sand it down perfectly—only to end up with uneven patches or one that peeled away. I learned that the key is to use a single toothpick protruding just slightly from the wall, then fill the gap around it with spackle. Once dry, I lightly sand and then paint over it. The result? A virtually invisible fix that looks professional and holds up well over time. This approach is much more forgiving than traditional filling, and I promise, it saves you the headache of constant touch-ups.
If you’re tired of having visible screw holes marring your freshly painted cabinets or walls, give this trick a try. It’s an easy, cost-effective solution that elevates your finishing game instantly. Curious about other quick fixes that make home improvement a breeze? Check out this article for more pro tips on painting with confidence. And remember, the devil is in the details — little improvements can make all the difference in your home’s appearance and value. Now, let’s walk through how you can master this technique step-by-step and ensure your next project turns out flawless.
Preparing Your Materials and Workspace
Start by gathering your supplies: a box of toothpicks, fine-grit sandpaper, painter’s putty or spackle, a putty knife, and matching paint. Clear the area around the hole and lay down a drop cloth or old newspaper to catch drips. I remember once working on a Sunday afternoon, balancing on a stepladder in my tight hallway, trying to patch a screw hole while avoiding a ceiling fan. Proper preparation saved me from making a bigger mess and helped me achieve professional results.
Inserting the Toothpick Correctly
Break the toothpick into smaller segments if necessary, and insert one or two into the screw hole so that they protrude slightly from the wall surface. Think of it like filling a crack in ceramic: the toothpick acts as a form around which the filler can set, preventing shrinkage and cracking. I once used a small pry tool to gently press a toothpick into a stubborn, tightly compressed screw hole—it took a bit of effort, but the precision meant my patch was seamless once finished.
Tip: Choosing the Right Toothpick Size
Use standard-sized toothpicks for small holes. For larger gaps, consider splitting or trimming the toothpick—this makes for a snug fit that supports the filler and avoids excess paint buildup. I learned this the hard way when a too-thick toothpick caused unevenness, requiring extra sanding later.
Filling Around the Toothpick
Apply a small amount of spackle or paintable putty around the protruding toothpick. Use your putty knife to press the filler into the space, ensuring the toothpick remains slightly proud of the wall surface. The goal is to create a solid fill that conforms to the wall’s contours. I vividly remember smoothing the filler with the edge of a credit card, which helped achieve a flush finish quickly, reducing the need for extensive sanding.
Avoid Overfilling
Don’t pile on too much filler—this can lead to uneven patches and increased sanding time. Like pouring a tiny layer of paint over a brush stroke, a thin, controlled application produces a smoother, more natural inlet for paint. I once made the mistake of overfilling, which resulted in a noticeable bump that I had to sand down, wasting time and patience.
Allowing Drying and Sanding
Let the filler dry fully, usually for at least an hour, following product instructions. Once hardened, gently sand the area with fine-grit sandpaper until smooth and flush with the wall. Imagine shaving down a rough plaster cast—light pressure yields the best results. During one project, I had to wait overnight, but that extra time ensured the patch was indiscernible once painted.
Finishing Touch with Paint
Match the wall color and carefully feather the edges with a brush or roller to blend the patch seamlessly. For the perfect finish, feathering is like blending colors on a painter’s palette—gradually softening the transition makes the repair invisible. I recall a time when I walked into a room after painting, and nobody could tell where the patch was—bringing a satisfying sense of accomplishment.
Using the toothpick trick is surprisingly straightforward, yet it offers a significant upgrade in the quality of your wall repairs. When achieved correctly, this method ensures your patches stand up to close inspection and last over time, elevating your overall home finishing skills. For more tips on perfecting your painting projects, visit this guide.
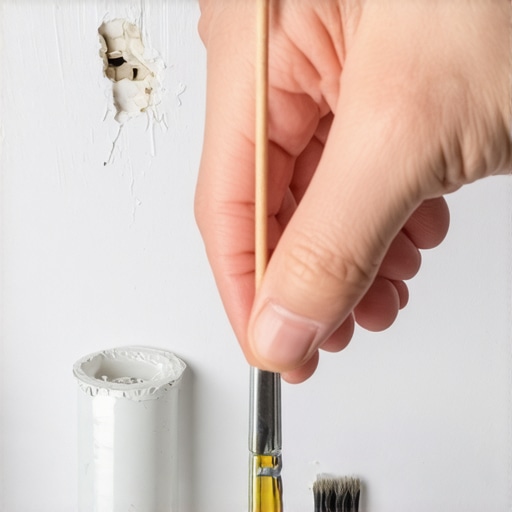 When it comes to house painting, many enthusiasts and even seasoned painters fall prey to misconceptions that can compromise the final result. Contrary to popular beliefs, the biggest pitfalls often stem from overlooked nuances rather than obvious mistakes. For instance, a common myth is that using cheap brushes saves money and still results in a smooth finish. In reality, this false economy can lead to streaks, uneven coats, and longer work times. High-quality brushes penetrate the paint better and produce a more professional look, proving that investing in tools pays off in the long run.
Ever Heard That Painting is All About Color?
Many assume choosing the perfect hue is the key to a stunning home makeover. While color selection is vital, the nuances of paint finish, primer quality, and surface preparation often have a far more profound impact on durability and appearance. A little-known detail is that not all paints adhere well to every surface; specific primers are necessary, especially on problematic areas like glossy or porous materials. Neglecting these subtleties can lead to peeling or uneven coloration over time. According to expert painter Dave Smith, “Surface prep and the right product selection determine how long your paint job lasts and how good it looks.” For advanced insights on achieving flawless walls, explore top local painting strategies.
Maintain Your Equipment for Long-Term Success
Investing in quality tools is just the first step; consistent maintenance ensures they perform optimally over time. For example, I personally swear by using Wagner PaintEater electric paint removers for prepping surfaces—its durability and efficiency save me hours and keep my work sharp. Regularly cleaning brushes and rollers with warm, soapy water or specialized cleaning solutions prevents buildup and extends their lifespan. Remember, well-maintained tools produce smoother finishes and reduce rework, ultimately saving you money.
Tools I Trust and Why
One indispensable tool I recommend is the 3M Ceramide Safety Knife. Its retractable blade makes cutting painter’s tape and masking paper safer and cleaner, minimizing accidental damage. For precision cutting, I use the Olfa Utility Knife with a fresh blade—its sharpness provides clean edges that save time during masking and detail work. Additionally, I rely on a high-quality cornering spatula to get into tight spaces and ensure even paint application.
Streamlining with Software and Tech Tools
Modern painters can leverage digital tools to enhance efficiency. I use the Paintroid app to calculate paint quantities accurately, preventing waste and saving costs. For project management, software like Houzz helps me coordinate schedules and track progress seamlessly. These tools not only improve accuracy but also reduce errors, which is vital for large-scale or long-term projects.
Planning for Longevity and Scaling Up
When working on multiple homes or larger projects, establishing a routine maintenance schedule for tools and surfaces is essential. Regularly inspecting paint sprayers, for example, prevents clogs and ensures an even spray pattern. As I scale my local painting business, I’ve found that investing in a Graco Magnum paint sprayer offers both power and ease of cleaning—perfect for consistent results across multiple jobs. In the future, I predict the integration of IoT (Internet of Things) devices into tools for real-time diagnostics, which will make maintenance even smarter and more proactive.
How do I keep my painting tools in top shape over time?
Maintaining your equipment involves cleaning immediately after use, storing tools properly in dry, protected areas, and performing routine inspections for wear and tear. Using high-quality cleaning solutions specific to your tools, like mineral spirits for oil-based paints, helps prevent corrosion and buildup. Following manufacturer recommendations for storage and maintenance prolongs your tools’ lifespan and ensures consistent, professional results. For more about expanding your local painting capabilities, check out this article. Don’t hesitate—try cleaning your brushes with a special soap and see immediately how much smoother your next project turns out, proving that proper upkeep pays off in lasting quality.
The Hardest Lesson I Learned About house painting,painting,local painting
One invaluable insight I gained early in my painting journey is that patience and attention to detail often outweigh expensive tools. The simple act of carefully preparing a surface, rather than rushing through it, consistently yields better results. I used to believe that the latest high-end brushes or sprayers would save me time, but I found that mastering fundamental techniques—like properly sanding or cleaning surfaces—made a more significant difference, teaching me that sometimes, the simplest approach is the most effective.
3 Myths About house painting,painting,local painting That Held Me Back
I used to think that expensive paints automatically guaranteed a perfect finish, but I realized that application technique and surface prep are far more important. Similarly, I believed I needed to completely strip old paint before repainting, which isn’t always necessary and can be a waste of time. Finally, I thought that touch-ups were always noticeable, but with proper blending and patience, small imperfections can be virtually invisible, saving you from overworking your walls.
What Experts Won’t Tell You About house painting,painting,local painting
Many seasoned painters know that the success of a project hinges on understanding the nuances of materials and surfaces. For example, using a primer specifically suited for your wall type can prevent peeling and ensure longevity. Experts also emphasize the importance of working in the right environmental conditions—avoiding painting in extreme humidity or temperature—to achieve optimal results. These behind-the-scenes tips, often overlooked, can dramatically elevate your painting quality and durability.
My Essential Toolkit for house painting,painting,local painting
My go-to tools include high-quality brushes like the Olfa Utility Knife for precise cuts, a reliable cornering spatula for tight spaces, and a good-quality paint sprayer, like the Graco Magnum, which balances power and ease of cleaning. These tools, combined with proper surface prep, make all the difference in producing professional-looking results that last.
Innovative Techniques That Changed My Approach to house painting,painting,local painting
I started incorporating simple but effective methods, like using a flashlight test to identify uneven drywall sanding and the hot water trick to soften stiff brushes, saving time and improving finish quality. These small adjustments, often overlooked, can significantly improve the outcome of your house painting projects, making your work more efficient and durable over time. Embracing continuous learning and trying new tips, even the small ones, keeps the process engaging and results impeccable.
Imagine Perfect Results Every Time You Paint
Achieving flawless house painting doesn’t require magic, just a combination of solid techniques, quality tools, and an understanding of surface nuances. By learning from each project and refining your approach—like mastering the toothpick trick for minor wall repairs—you can turn any space into a showcase. Remember, the smallest improvements, applied consistently, lead to the biggest transformations in home aesthetics and value. Keep experimenting, stay patient, and trust in the process. Want to elevate your next project? Dive deeper into professional tips at this resource. And, have you encountered a small fix that unexpectedly made a big difference? Share your story below!