

I’ll never forget the time I took on a small accent wall in my living room, excited to add a splash of color. As I reached for my brush, I realized I was shaky—my hand refused to stay steady, and those edges looked more like a kid’s scribble than crisp, professional lines. Frustrated, I almost gave up, thinking I wasn’t cut out for such detailed work. But then a lightbulb went off: there had to be a trick to making straight lines freehand, without fancy tape or hours of taping.
The Secret to Painting Sharp Lines Without Tape
What if I told you that you could master the art of painting straight lines freehand and make your walls look like you hired a pro? No more tedious taping, no more fuzzed edges. I’ll share the simple trick I discovered that changed my entire approach, and I believe it will do the same for you. Whether you’re creating a sleek stripe or defining a color boundary, this method is reliable, quick, and surprisingly easy once you get the hang of it. Ready to transform your walls from messy to magnificent? Let’s dive into this game-changing technique.
Is It Really Worth the Hype Or Just Another Trick?
Early in my painting journey, I made a costly mistake—trusting that my shaky hands would magically improve on their own. Spoiler alert: they didn’t. Instead, I wasted hours redoing sections, getting more frustrated, and second-guessing my skills. It wasn’t until I learned the right technique that everything changed. This method isn’t some fleeting fad; it’s rooted in practical physics and simple practice, backed by experienced painters who swear by it. Want to see how I finally got those perfect lines? Check out this expert guide to elevate your painting skills.
Stabilize Your Hand for Precise Lines
My first attempt at a clean stripe on the wall was a disaster—wobbly, uneven, and unprofessional-looking. To fix this, I placed one hand firmly against the wall for support, mimicking the steadying effect of holding a camera stabilizer. This technique reduces tremors and keeps your brush path straight. It’s like riding a bike: the more stable your balance, the more controlled your movements will be. Practice this by gently resting your hand and wrist on the wall while guiding your brush along the desired line.
Prepare Your Tools and Surface
Next, ensure your brush and surface are primed for precision. Use a high-quality angled brush, which offers better control over corners and edges. Dip only the tip to avoid excess paint that can cause drips or soft edges. Clean the wall surface thoroughly—dust, grease, or previous paint unevenness can hinder your line accuracy. Think of this step as laying a smooth canvas; the cleaner and more even your surface, the easier it is to achieve crisp lines.
Map Out Your Line with Light Guidelines
Before applying paint, lightly mark your intended line with a pencil or painter’s chalk. Use a level or straightedge for longer stretches to ensure straightness. Consider taping the edges temporarily with painter’s tape as a guide, then remove the tape after your freehand stroke is complete. This combination provides a visual aid, reducing the guesswork. In my experience, lightly sketching the line first prevents accidental deviations when the paint is applied.
Apply Paint in Steady, Short Strokes
When ready, load your brush with a modest amount of paint—excess causes blobs and uneven edges. Start from one end of your guideline, holding the brush at a 45-degree angle for better control. Use short, confident strokes rather than prolonged ones; this minimizes fatigue and shaky movements. Picture yourself drawing a straight line with a ruler, but instead, you’re doing it freehand with a confident hand. This technique helps keep the line true, even if your hand wavers slightly at first.
Practice the Motion Before Committing
My breakthrough came when I practiced the motion several times on scrap paper or cardboard. Mimic the wall’s surface, moving your hand along the drawn guideline repeatedly until the motion feels fluid and controlled. This warm-up reduces anxiety and improves accuracy. Remember, consistency is key—regular practice refines your muscle memory, making straight lines easier over time. Even experienced painters often work on practice strokes before tackling the actual wall.
Correct Mistakes with Precision Tools
If you notice a wobble or deviation while painting, don’t panic. Use a small-detail brush dipped in the surrounding color to carefully touch up uneven spots. Alternatively, a damp cloth can quickly erase fresh paint mishaps if caught early. This quick correction can save a messy-looking line from turning into a redo. Over time, as you gain confidence, these imperfections will diminish, and your lines will become smoother.
Seal the Edges for a Sharp Finish
Once your lines dry, inspect them closely. Use a razor or sharp utility knife to trim any fuzzy edges or paint bleed. This step ensures razor-sharp boundaries and a professional look. For an extra crisp edge, some painters lightly go over the line with a fine brush dipped in the base wall color, sealing any imperfections. Practice this final touch, and your wall will look like it was done by a pro—without the need for painter’s tape every time.
Each of these steps builds upon the previous one, transforming a shaky hand into a reliable tool. Remember, consistent practice and patience are your best allies in mastering freehand lines. If you’re eager to deepen your skills further, explore expert techniques at this resource. The key is to keep practicing and refining your technique until painting straight lines becomes second nature.
While many DIY enthusiasts focus on choosing the right paint color or mastering brush techniques, there’s a subtle but critical aspect that often slips under the radar: the importance of surface preparation and understanding paint chemistry. Contrary to popular belief, simply applying a fresh coat without addressing underlying issues can lead to premature failure, bubbling, or chipping—that’s a common myth worth debunking.
One misconception is that any primer will do, and many skip this step altogether, assuming it’s optional. In reality, selecting the correct primer tailored to your surface and paint type is essential to ensure adhesion and longevity. For example, oil-based primers are better for staining, while shellac primers seal knots and prevent bleed-through. Neglecting this nuanced choice can result in uneven coloration or unsightly blemishes over time.
Another advanced mistake involves misunderstanding the interaction between paint and surface porosity. A porous surface like raw drywall or unsealed wood can absorb paint unevenly, leading to patchy coverage. Conversely, non-porous surfaces such as metal or glossy finishes require special primers or surface etching to ensure adhesion. Failing to recognize these nuances can cause surfaces to peel or bubble after drying.
Why Do Some Paints Last Longer Than Others Despite Similar Conditions?
This question touches on the often-overlooked but vital factor of paint formulation and environmental exposure. expert analyses suggest that high-quality paints formulated with advanced binders and UV-resistant additives significantly outperform cheaper alternatives, especially in challenging environments like direct sunlight or humid climates. A study published in the Journal of Coatings Technology indicates that premium paints can last up to 50% longer, saving you money and effort in the long run. For deeper insights into choosing durable coatings, explore this guide on expert painting tips.
Additionally, advanced techniques such as proper surface cleaning, correct application temperature, and avoiding painting in extreme weather can dramatically influence durability. Remember, the goal isn’t just a fresh look but a lasting finish that resists peeling, cracking, and fading over time. So, next time you start a painting project, pause to consider these hidden nuances—they can make all the difference.
Have you ever fallen into this trap? Let me know in the comments.
Keep Your Paint Job in Top Shape
Achieving a professional-looking finish is just the beginning; maintaining it over time is equally vital to ensure longevity and sustained beauty. The right tools and routine maintenance can make a significant difference in preserving your painted surfaces. I personally swear by using high-quality extension poles, like the Wooster Microfiber Extension Pole, which allows for easy reach and minimizes strain, ensuring smoother application and reduced streaks. Regularly inspecting your walls for signs of wear or damage—such as cracking or bubbling—and addressing them promptly helps prevent small issues from becoming major repairs.
How do I keep my paintwork looking fresh over the years?
It’s advisable to use gentle, non-abrasive cleaning tools like microfiber cloths and soft brushes to remove dust and dirt. Avoid harsh chemicals that can degrade paint layers; instead, opt for mild soap solutions, which are gentle yet effective. Applying a clear, matte or satin protective coating every few years, depending on the exposure and traffic, can provide a sacrificial barrier against environmental damage. For exterior surfaces, maintaining gutters and trimming nearby vegetation prevents unnecessary moisture or physical damage that can affect your paint’s integrity.
Investing in quality brushes and rollers also pays off in the long run. For instance, I opt for Purdy High-Capacity Rollers because their durability and smooth finish reduce the need for frequent replacements. Properly cleaning tools immediately after use with warm water and mild detergent ensures they stay in optimal condition, ready for the next project. These small routine practices, combined with routine inspections and timely touch-ups, help extend the life of your paintwork and keep your home looking fresh for years to come.
The Future of Paint Maintenance and Tools
Emerging technologies, such as smart paints embedded with UV-resistant and self-healing properties, are likely to revolutionize long-term maintenance in the next decade. These innovations aim to reduce the frequency and cost of repainting, especially in high-traffic or harsh outdoor environments. Staying informed about developments—like the recent approval of nanotechnology-enhanced coatings—can give you a competitive edge in maintaining your home’s appearance with minimal effort. To explore advanced techniques and tools, consider visiting this resource that offers expert guidance on the latest advancements.
What makes a maintenance routine truly effective?
Consistency is key. Schedule periodic inspections, at least biannually, and address issues before they escalate. Using the right tools—like a quality microfiber duster or a gentle paint conditioner—can make maintenance easier and more efficient. Remember, taking care of your painted surfaces isn’t just about appearance but also about preserving the structural integrity and value of your property over time. Regular upkeep, proper tool use, and staying informed about innovative products are your best strategies for keeping your investment looking its best. Don’t hesitate to start implementing one of these advanced tips today; even small steps now can save you money and effort down the line.
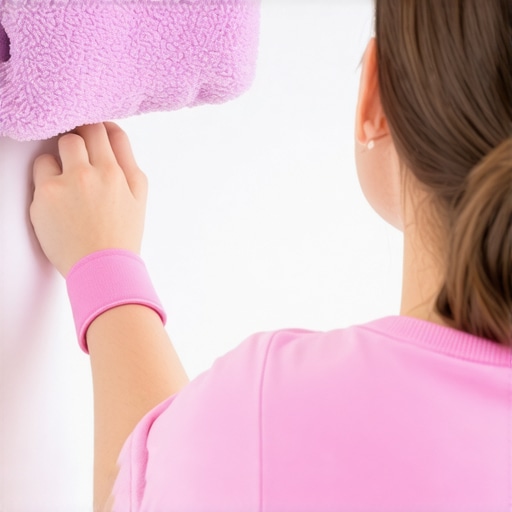
For example, employing high-quality microfiber tools for cleaning can prevent damage to delicate paint finishes and ensure long-lasting results. This small investment in quality tools pays off by reducing the need for touch-ups and prolonging the life of your paint job.
Lessons Only the Experts Have Learned About House Painting
One of the most impactful realizations during my painting journey was how surface preparation and patience outperform shortcuts every time. Rushing the priming or ignoring small imperfections cost me time and money later, teaching me the value of meticulous prep work. I also discovered that practicing your strokes on scrap before tackling the actual surface builds muscle memory, reducing wobbling and uneven lines. Lastly, understanding the nuances of paint chemistry—like how different finishes behave on various surfaces—can make or break your finish’s longevity and appearance.
Tools and Resources That Transformed My Approach
If you’re serious about elevating your house painting skills, these resources have been game-changers for me: This comprehensive guide provides insider tips on perfecting freehand straight lines without tape. For selecting durable paints suited to your environment, I rely on expert advice on the latest coating innovations. When it comes to cleaning tools and maintenance, tools like high-quality microfiber rollers and brushes have dramatically improved my results and efficiency. Lastly, keeping updated with emerging innovations like self-healing or UV-resistant paints via these tech advancements ensures your work stands the test of time.
Building Confidence for Your Next Painting Project
Getting those perfect lines freehand might seem daunting at first, but with patience and practice, you’ll find it becomes second nature. Remember that every mistake is a learning step, and every small success builds your confidence. Think of your painting projects as a chance to create something uniquely yours—each straight line, stripe, or boundary reflects your personal touch. Don’t let fear of imperfection hold you back; with the right techniques and mindset, you’ll transform your home into a masterpiece. So, grab your brush, trust the process, and start shaping your space today. How about sharing your own painting challenges or successes below? I’d love to hear your story.