

I remember the first time I tried to paint crisp, clean lines on a textured drywall surface. It was a disaster. The paint bled, smudged, and looked sloppy—nothing like the sharp edge I envisioned. Frustration set in, and I questioned if achieving perfect lines on textured walls was even possible. That was my lightbulb moment. I realized that understanding the subtle art of cutting in for textured surfaces isn’t just about patience; it’s about using the right technique and tools to work with the drywall’s natural character, rather than against it.
Why Sharp Lines on Textured Walls Matter More Than You Think
If you’re like most homeowners or DIY enthusiasts, you probably think that flawless, straight lines are only necessary for sleek, smooth walls. But textured drywall is a different story. Sharp, clean edges can dramatically improve the overall look of your space, making even the most modest room appear professionally finished. Plus, deliberate lines help to visually define spaces and accents without the confusion of uneven paint boundaries.
Yet, many people assume that achieving crisp lines on textured drywall is a lost cause. That’s simply not true. As a fellow homeowner who’s battled my own textured wall frustrations, I can tell you that with a few strategic techniques, you can significantly improve your results. Remember, it’s not just about aesthetics—well-done edges also reduce the need for touch-up work and ensure your paint job lasts longer. If you’re contemplating a wall refresh or renovation, mastering this skill will save you time and boost your confidence in your DIY projects. Want to see how this can elevate your space? Check out local painting solutions for ideas tailored to your budget.
What Makes Textured Drywall Challenging?
Textured drywall introduces uneven surface patterns—knockdowns, popcorn, swirl, or orange peel—that make traditional taping and edge-painting techniques less effective. The uneven surface tends to absorb paint differently, causing bleed-through or fuzzy borders if not approached correctly. Early on, I made the mistake of treating textured walls as if they were flat, which only accentuated imperfections. Proper preparation and tools are essential for sharp, professional-looking edges.
So, how do you combat these challenges? Well, it’s a mix of right techniques, quality tools, and patience. In the next sections, I’ll walk you through proven strategies—things I’ve tested and refined—that guarantee crisp, clean lines even on the most textured surfaces. Before that, I want to make sure you’re clear on one thing: this isn’t about gimmicks or shortcuts. It’s about understanding your wall and working with its unique texture rather than against it. If you’re curious about more expert tips, explore professional painting tips that can enhance your entire project.
Prepare Your Tools for Success
Start with high-quality painter’s tape designed for textured surfaces; it adheres better and reduces bleed-through. Use a angled sash brush with stiff bristles, which provides better control over uneven textures. I learned this firsthand when I once tried a cheap brush—resulting in feathered edges instead of clean lines. Investing in good tools makes a visible difference and saves time.
Apply Painter’s Tape Strategically
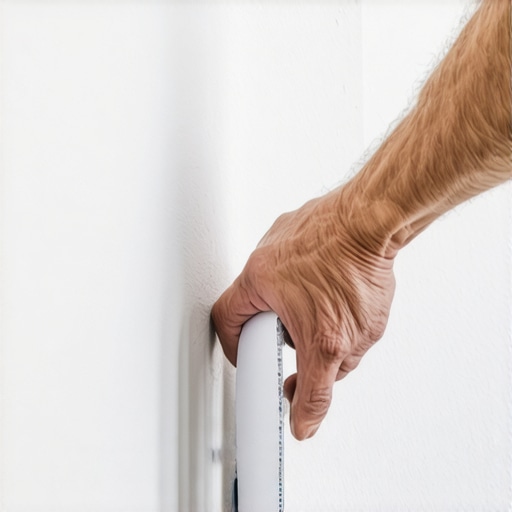
Press the tape firmly onto the textured wall, ensuring no air bubbles or gaps. For heavily textured areas, press the tape into the grooves with a putty knife or your finger. This step is crucial; I once skipped this and ended up with paint seeping underneath, creating fuzzy edges. Take your time here to ensure a tight seal.
Use a Proper Cutting Technique
Load Your Brush Effectively
Dip your brush into the paint, then offload excess by tapping on the side of the can or a rag; avoid overloads that cause drips. Focus on loading the tip of the brush, which gives you more control. I once overloaded my brush and had paint pooling on the tape edge—classic rookie mistake. Practice loading just enough paint for smooth strokes.
Work in Small Sections
Start at one corner and work your way across, maintaining a steady hand. Use short, controlled strokes following the texture’s direction. I once tried rushing and ended up with uneven lines; working small keeps control and ensures precision. The goal is to mimic the natural texture flow while keeping the line crisp.
Refine the Edge for Cleanliness
Once the paint starts to set, gently run a dry, level brush along the edge to smooth out any imperfections. If I notice fuzziness or paint bleed, I carefully scrape or feather the edge with a clean brush, avoiding pulling off the paint on the wall. This technique is like ironing out wrinkles—small adjustments can dramatically improve the final look.
Remove Tape at the Right Moment
Peel off the painter’s tape while the paint is still slightly tacky, pulling away from the line at a 45-degree angle. Removing too early can smudge, while waiting too long risks tearing the paint. When I followed this tip, my edges looked sharp and professional—almost as if a pro had done them.
Final Touch-Ups for Perfection
Inspect your lines closely. Use a small detail brush to clean up any fuzzy or uneven spots. If necessary, lightly feather the edges with a damp sponge or cloth for seamless results. Small touch-ups elevate the entire project and can save you from having to redo an entire wall.
Remember, consistency and patience are your allies. Practicing this process on a scrap piece of drywall can build confidence before tackling your main walls. Mastering these steps will make textured drywall the perfect canvas for crisp, clean lines—transforming your space with crisp precision.
 When it comes to house painting, many homeowners and even seasoned DIYers fall prey to common misconceptions that can compromise the quality and longevity of their finish. While surface-level advice is widespread, truly mastering the craft requires understanding some nuanced, often overlooked aspects that can make or break a project.
One prevalent myth is that selecting the highest-quality paint guarantees perfect results. Although premium paints offer advantages like better coverage and durability, they won’t compensate for poor technique or preparation. For example, even the best paint can peel or show brush strokes if applied over a dirty or uneven surface. According to painting expert Bob Ross, the real magic happens in surface preparation, not just the paint itself. So, investing time in cleaning, sanding, and priming is crucial—skipping these steps is a trap many fall into, leading to costly touch-ups down the line.
Why Do DIY Attempts Often Fall Short Despite Using Good Materials?
It’s tempting to believe that good materials alone lead to professional-looking results, but the truth is that even with high-quality supplies, improper application techniques cause failure. For instance, brushing in the wrong direction or applying too thick a coat can result in streaks, runs, or uneven color. Advanced painters pay attention to the drying times between coats, understanding that rushing can trap moisture or create a matte finish that isn’t uniform. A 2018 study from the National Association of Home Builders highlights that technique accounts for approximately 70% of a successful paint job, overshadowing the importance of materials alone.
Another common misconception involves the timing of primer and paint application. Many believe that one coat of primer is enough, but in reality, a high-quality primer applied correctly can significantly enhance coverage, prevent bleed-through, and improve the adhesion of top coats. Skipping or rushing this step invites problems like patchiness or discoloration. For advanced results, consider using a bonding primer on tricky surfaces like glossy trims or stained drywall, which ensures a stronger bond and longer-lasting finish.
Furthermore, the importance of maintaining proper ventilation and temperature conditions during painting often goes unrecognized. Painting in high humidity or extreme temperatures can cause paint to dry unevenly, leading to bubbling or cracking. Always check weather forecasts and follow manufacturer guidelines—something that many overlook in their eagerness to complete the project quickly.
For homeowners aiming for consistently sharp lines, understanding the nuances of edge painting matters. Using high-quality, angled brushes and specific tape techniques can make a significant difference—something I emphasize in my pro tips. Advanced painters also consider the paint’s thinness or viscosity, as applying multiple thin coats yields a smoother, more uniform finish rather than one thick layer prone to drips.
In essence, mastering house painting involves much more than selecting colors and buying supplies. It requires attention to surface prep, understanding material properties, and applying techniques with patience and precision. Recognizing these hidden nuances can elevate your results from mere DIY to a truly professional finish. Remember, superficial fixes rarely last—embracing these details ensures your project stands the test of time.
Are you guilty of any of these misconceptions? Let me know in the comments, and if you’re ready to boost your skills, check out more expert tips here.
Keep It Working: Essential Tools for Long-Term Success
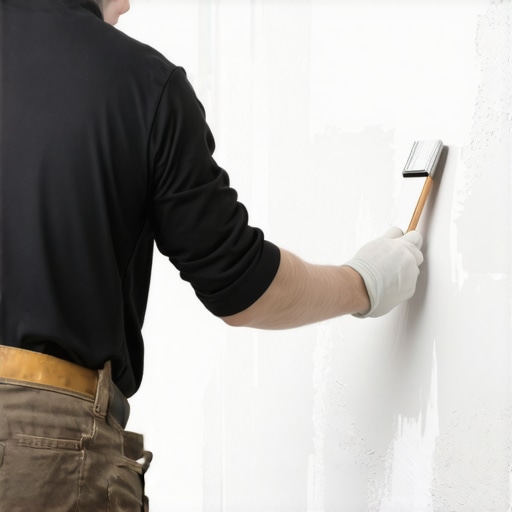
Investing in the right tools is fundamental to maintaining quality and efficiency in your house and local painting projects. While novices might rely on generic brushes and rollers, seasoned painters know that professional results depend on specific equipment. For example, I swear by a high-quality angle sash brush with stiff synthetic bristles—such as the Wooster Shortcut Series—that provides better control for cutting-in crisp lines, especially on textured surfaces. Unlike cheaper brushes that shed hairs and cause imperfections, using a well-designed brush accelerates your workflow and improves finish quality.
Another indispensable tool is a professional-grade paint sprayer, like the Graco Magnum X5. Though initially a hefty investment, it streamlines the application process for large walls or exterior siding, reducing lap marks and uneven coverage. I also recommend investing in a durable, reusable spray tip designed for fine finishing; this ensures consistent spray patterns and minimizes paint wastage. Future trends indicate a rise in cordless, battery-powered sprayers, making mobility and cleanup easier, which could revolutionize small-scale renovations.
Tools That Stand the Test of Time and How to Maintain Them
Properly caring for your equipment is just as important as selecting it. Cleaning brushes and rollers immediately after use with warm, soapy water—especially for latex paints—prevents dried paint from clogging bristles or fabric. For oil-based paints, I lean on a solvent like mineral spirits, but always follow manufacturer recommendations. Storing tools in a dry, covered space prolongs their lifespan. A well-maintained brush can serve you through dozens of projects, saving money and ensuring consistent quality.
Furthermore, inspecting spray tips and seals periodically ensures optimal performance. I personally keep a set of replacement tips on hand, so I avoid delays during sizeable projects. Maintaining your equipment with care not only extends their usefulness but also prevents costly repairs or replacements down the line. For more detailed maintenance routines, exploring professional tips can help you develop a routine tailored to your specific tools and projects.
Scaling Up: Applying Tools for Bigger and Better Projects
When expanding your painting endeavors, automation and efficiency become critical. Larger projects benefit from advanced equipment like airless spray systems with adjustable pressure controls, enabling faster coverage with professional-grade finishes. As my experience grew, I adopted a Wagner Control Pro 130, which delivers consistent results without overwhelming setup complexity. Scaling your painting projects requires strategic tool investment and mastery of maintenance routines to keep everything running smoothly. Properly calibrated and maintained equipment minimizes rework and maximizes productivity, ensuring your efforts translate into impressive, long-lasting results.
How do I maintain tools over time?
Regular cleaning after each use is essential—don’t let paint dry on bristles or spray tips, as this can be permanent. Store your tools in a climate-controlled environment to prevent rust and deformation. Periodic inspection for wear, and replacing worn parts promptly, keeps your tools performing at their best. For detailed guidance, check out expert maintenance routines detailed in industry publications and trusted sources.
Don’t hesitate to try advanced cleaning tips, such as soaking brushes in a vinegar solution to remove residual paint or investing in tool-specific lubricants for moving parts of sprayers. These small steps can dramatically extend service life and improve your results over the long term. Maintaining your equipment today sets the stage for seamless, professional-quality painting tomorrow.
What I Wish I Had Known About Painting Textured Walls Early On
- One profound lesson was that patience and the right tools are essential—skipping these only leads to fuzzy lines and added frustration.
- I realized that embracing the natural texture, rather than fighting against it, creates a more seamless and professional finish.
- Understanding my specific wall texture allowed me to adapt my technique, resulting in sharper, cleaner lines that elevate the entire room.
- The importance of detailed tape application and quick tape removal cannot be overstated; these small steps make a huge difference in final appearance.
Tools and Resources That Accelerate Your Success
- High-quality angled sash brushes: I swear by brands like Wooster for controlling paint flow along textured surfaces, helping me achieve those crisp lines with ease.
- Painter’s tape designed for textured walls: Tapes like 3M ScotchBlue cling better and prevent bleed-through, saving me time on touch-ups.
- Professional-grade paint sprayers: For large textured surfaces, tools like the Graco Magnum X5 have been game-changers, offering smooth finishes in less time.
- Online tutorials and expert blogs: Resources such as this guide help me refine my technique continuously.
Your Next Step to House Painting Excellence
Remember, mastering the technique for crisp lines on textured drywall isn’t just about aesthetics—it’s about transforming your space with confidence and pride. Every project is an opportunity to learn and improve, so don’t shy away from trying these proven methods. Whether you’re tackling a small accent wall or a whole room, your effort will pay off with a finish that looks polished and professional. Ready to elevate your house painting skills? Share your experiences below or start planning your next project today—your perfect line is just a brushstroke away! And if you’re eager for more expert tips, explore local painting solutions tailored to every budget.