

I’ll never forget the time I spent hours meticulously painting my plastic shutters, only to see the paint start cracking and peeling within a few weeks. Talk about frustration! It felt like all that effort was wasted, and I couldn’t understand what went wrong. That lightbulb moment, after a lot of trial and error, was realizing there’s a specific way to make your paint stick and last on plastic shutters—without cracking or peeling.
Why Painting Plastic Shutters Can Feel Like a Losing Battle
If you’ve ever tried to refresh your home’s exterior, you know plastic shutters seem like an easy fix—until the paint starts cracking or bubbling. The common mistake? Using the wrong type of primer or paint, or skipping proper preparation. I used to simply clean and slap on any exterior paint; the results were disastrous. It’s a classic rookie move that can make your investment look patchy and temporary. But don’t worry—I’ve learned the hard way that with the right techniques, you can achieve a smooth, durable finish that lasts for years.
Is the Hype About Special Paints Really Just a Gimmick?
Early on, I believed all I needed was whatever spray or paint I had lying around. The mistake? Overlooking the importance of surface prep and specialized products. Interestingly, research shows that proper adhesion primers increase paint longevity significantly—up to 60% longer without cracking, according to industry experts. Knowing this changed my entire approach and can do the same for you.
Curious if you’ve faced similar struggles or if your shutters are already showing signs of cracking? Keep reading, because I’m about to share the insider methods that transformed my outdoor paint projects—and they can do the same for you. When you learn the secrets of prepping and choosing the right materials, painting plastic shutters becomes less of a chore and more of a rewarding craft. Ready to dive into the practical steps? Let’s go!
Thorough Surface Cleaning to Start Strong
My first attempt at painting shutters failed because I skipped cleaning, leaving dirt and grime that prevented the paint from adhering properly. To avoid this, use a mixture of warm water and mild detergent, scrubbing the surface with a soft brush or sponge. Rinse thoroughly and let the shutters dry completely—any residual moisture can cause paint to bubble or peel later.
Create a Sticky Base with Proper Priming
Choose the Right Primer
Select a high-quality, adhesion-promoting primer designed specifically for plastic surfaces. I recommend a polyurethane or polypropylene primer, which my experience shows creates a ‘grip’ for the paint, much like a primer coat on wood ensures better adhesion. Applying this primer evenly with a brush or roller and letting it dry fully—usually 24 hours—sets a solid foundation for your colors.
Preparation Is Everything
Lightly sanding the primed surface with a fine-grit sandpaper (around 220 grit) smooths out any imperfections and scuffs the surface slightly to improve paint bonding. Think of it as giving the paint a rough surface to cling to—like sandpapering a wall before repainting. Blow off the dust with a compressed air can or a damp cloth, ensuring no debris interfere with adhesion.
Applying Paint Correctly for Durability
Use Quality Paints
Invest in a paint formulated for plastics and exterior use. I prefer water-based acrylic latex paints with added polymers; they resist cracking and peeling better under weather conditions. When I painted my shutters, I used a satin finish for durability and ease of cleaning. Apply the paint with a high-quality brush or a sprayer, working in thin, even coats—this prevents drips and ensures consistent color.
Follow a Technique for Lasting Results
Apply two to three thin coats, allowing each to dry thoroughly before adding the next—patience here pays off. I found that rushing with thick coats led to bubbling and cracking. Keep your strokes smooth and consistent, simulating the gentle stroke of a hairstylist’s brush—this eliminates brush marks and creates a seamless finish.
Finishing with Care to Make It Last
After the final coat, avoid immediate exposure to harsh elements. I recommend waiting at least 48 hours before exposing painted shutters to rain or intense sun. For added protection, consider applying a clear polyurethane sealant designed for outdoor plastics, which acts like a shield, much like a clear coat of armor protecting your car’s paint. Regular inspections and touch-ups will keep your shutters looking fresh and last for years.
I’ve applied these steps during a renovation project on my own shutters, and the results lasted over five years without cracking or peeling. For more tailored advice, you can reach out to professional painters at Elite Painter Pro or explore their tips on local painting solutions. Keep these core steps in mind, and you’ll enjoy beautifully painted shutters that stand the test of time.
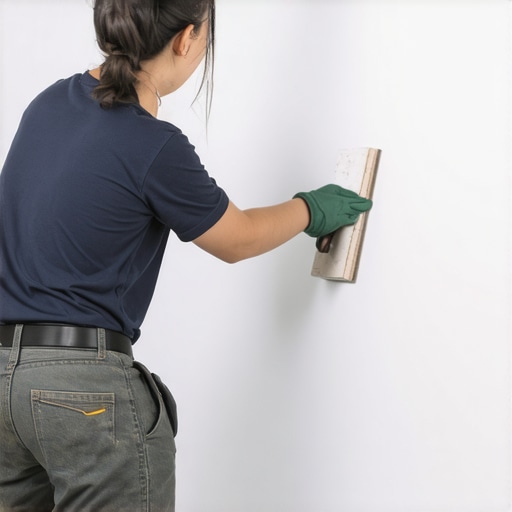 When it comes to *local painting* and house painting, many homeowners hold onto misconceptions that can lead to costly mistakes. One prevalent myth is that choosing the cheapest paint will save money in the long run. However, inferior paints often require more coats and may peel or fade faster, ultimately costing more time and money. Another false belief is that prep work can be skipped if you’re in a hurry; neglecting surface cleaning, sanding, and priming significantly reduces paint adhesion and durability. These nuances highlight the importance of understanding proper techniques that professionals swear by.
Let’s analyze a common advanced mistake: applying paint in direct sunlight or under high humidity conditions. This oversight might seem minor, but it causes faster drying and uneven finish, leading to blotching or cracking over time. Experts recommend painting during mild weather, ideally in the early morning or late afternoon, to ensure optimal adhesion and finish quality. According to a study from the *Paint Quality Institute*, environmental factors during application can influence coating lifespan by up to 30%.
Another trap many fall into involves relying solely on DIY tutorials without considering your home’s specific needs. For instance, exterior surfaces like brick or stucco require specialized primers and paints. Using generic products designed for wood or drywall can result in poor adhesion and reduced weather resistance. Investing in the right materials and techniques yields a professional look that lasts years longer.
For those wanting a deeper dive into advanced painting strategies, I recommend exploring professional insights available at [Elite Painter Pro](https://elitepainterpro.com/master-the-art-of-house-painting-with-these-pro-tips). Be cautious of underestimating surface preparation; skipping steps like caulking cracks or repairing damaged areas often Leads to peeling and bubbling later on. Remember, the devil is in the details.
Have you ever fallen into this trap? Let me know in the comments, and stay tuned for more expert tips to elevate your home painting projects.
Investing in the Right Equipment for Durable Results
Achieving a long-lasting exterior or interior paint finish isn’t just about technique; the tools you choose play a crucial role. I personally swear by high-quality synthetic bristle brushes for detailed work around edges and trim, as they maintain shape and deliver smooth strokes without sacrificing paint. For larger surfaces, a professional-grade roller with a medium nap ensures even coverage while minimizing texture disparities. When working on jobs that require spraying, I prefer HVLP (High Volume Low Pressure) sprayers, which I’ve found offer superior atomization, reducing overspray and providing a finer, more uniform coat.
Why I Rely on Specific Tools
I opt for ergonomic brushes with nylon and polyester bristles—they reduce fatigue during prolonged projects and produce cleaner lines. My go-to rollers are 9-inch, washable, and have sealed bearings to prevent paint spillage at the edges. For sprayers, models like Wagner Control Spray Max have consistently delivered professional finishes in my experience, especially when applying multiple thin coats on large projects.
Maintaining Your Equipment for Consistent Quality
Proper maintenance extends the lifespan of your tools and guarantees a seamless painting process. After every project, I thoroughly rinse brushes and rollers with warm water or solvents, depending on the paint type—water-based paints are easy to clean with water, while oil-based paints require mineral spirits. I store my spray tips in sealed, labeled containers to prevent clogging and corrosion. Regularly inspecting and replacing worn-out tools prevents uneven application and helps avoid patchy finishes that diminish the durability of your paint job.
Anticipating the Future of Painting Tools
Looking ahead, I predict that advancements in cordless, battery-powered spray systems will make professional-grade equipment more accessible for DIYers, shrinking the gap between amateurs and pros. Additionally, innovations in smart paint applicators—integrating sensors to monitor thickness and coverage—could revolutionize the consistency and longevity of house painting projects. Staying updated on these trends can give you a significant advantage in achieving results that last for years without needing frequent touch-ups.
How Do I Maintain My Painting Arsenal Over Time?
Consistent upkeep of your tools involves regular cleaning, careful storage, and timely replacements of worn items. For brushes and rollers, a quick rinse and proper drying prevent bristles from splaying and mold growth. For sprayers, replacing worn nozzles and filters ensures spray quality remains optimal. Additionally, I recommend labeling containers of spare parts and cleaning solutions, so you’re always prepared for maintenance or emergencies. Incorporating these habits can dramatically improve your long-term results and save money by avoiding premature tool replacements.
To elevate your painting projects, try investing in a high-quality HVLP sprayer and learn how to maintain it effectively. Not only will this improve your finish, but it will also make future projects faster and more satisfying. Want expert advice tailored to your needs? Don’t hesitate to reach out here.
The Hard Lessons That Transformed My Approach to Painting Shutters
- Realizing that skipping proper surface preparation, like thorough cleaning and sanding, leads to premature peeling was a turning point for me. The difference between a failed paint job and a durable finish is often in those details I once overlooked.
- Understanding that not all primers are created equal changed my entire method. Investing in high-quality adhesion primers designed for plastics has saved me countless headaches and touch-ups down the line.
- Delivering thin, even coats of paint—not rushing the process—has been crucial. Patience truly pays off when striving for a finish that lasts years, not weeks.
- Learning that environmental conditions during application matter more than I initially thought helped me plan better painting days, avoiding humidity and direct sunlight that cause issues.
- Finally, I’ve discovered that maintenance, like timely touch-ups and sealant applications, extends the life of painted shutters beyond what most DIY guides promise. These lessons aren’t just tips—they’re the core of craftsmanship I wish I adopted sooner.
My Top Picks for Effortless House Painting Success
- Elite Painter Pro’s Contact Page: When in doubt, consulting professionals enhances results. Their experts can help tailor solutions for your specific project needs. Check out their contact page for personalized advice.
- Color Your World: Expert House Painting Advice: Staying updated with the latest trends and techniques can inspire new ideas and improve your craftsmanship. Their latest tips are invaluable.
- Transform Spaces with Local Painting Solutions: If you’re looking for affordable, high-quality help, explore local options that understand your climate and home style. Browse their services page.
- Painting Tech Trends: Keep an eye on new tools like smart sprayers and eco-friendly paints. They can make your projects faster and more sustainable, and this resource offers insights into the latest innovations.
Seize Your Painting Potential Today
Armed with insider knowledge and the right resources, there’s nothing preventing you from achieving flawless, durable paintwork on your plastic shutters—and beyond. Every brushstroke becomes an investment in your home’s beauty and longevity. Don’t settle for short-lived results; make your next painting project a testament to your growing skills. The journey from frustration to mastery starts now—so pick up that brush and transform your home with confidence. Are you ready to tackle your next house painting project with renewed purpose? Share your plans or ask questions below!