

It was a chilly Saturday morning when I finally looked at my outdoor concrete steps and realized they were more dangerous than sturdy. Every step felt like a potential slip-and-slide, especially after a rainstorm. I’d painted the steps last year, thinking a fresh coat of paint would boost my home’s curb appeal. But I overlooked one crucial detail—making sure they weren’t slippery in wet weather. That lightbulb moment made me scratch my head and wonder—how many homeowners out there are unknowingly risking a fall every time they step outside?
Why Slippery Concrete Steps Can Turn Into a Hidden Hazards
Concrete steps are a common feature in many homes, adding character and value. However, they can quickly turn dangerous when they become slick with moss, algae, or just a shiny coat of paint that lacks grip. The bad news? Many folks don’t realize that standard paint can be downright hazardous on outdoor surfaces prone to wet conditions. I learned this the hard way when a neighbor took a tumble on her front porch, which was recently painted with regular interior paint—definitely not made for the outdoors.
The good news is, once I discovered the right sealing techniques and anti-slip solutions, my steps became not just safe but also maintained their beautiful appearance. And trust me, preventing slips isn’t just about avoiding injuries; it’s about peace of mind. According to the National Safety Council, falls are the leading cause of injury at home, with slips on exterior surfaces being a significant contributor. So, if you’ve ever wondered whether your painted steps are a ticking time bomb, keep reading—things are about to get practical.
Are you facing the struggle of making sure your outdoor concrete stays safe and skid-free? If so, you’re in good company, and I promise—by the end of this guide, you’ll have all the tools you need to tackle this common problem.
Will the Tricks Really Stop My Steps From Being Slippery?
I’ve been there—initially skeptical, thinking these solutions might be overhyped or just temporary fixes. But I vividly remember making that mistake early on: coating my concrete with a regular paint, assuming it would last and provide grip. Spoiler alert—within a few months, it was a slick, dangerous mess. That mistake taught me the importance of choosing the right products. For example, incorporating textured sealers and anti-slip additives made all the difference. If you’re curious about the best sealing products and techniques, I highly recommend checking out this comprehensive guide on [local painting solutions](https://elitepainterpro.com/transforming-spaces-local-painting-solutions-for-every-budget). It’s packed with insights on making your home both beautiful and safe.
Getting this right isn’t just about safety; it also preserves the longevity of your paint job. This is why proper preparation and product selection matter—skip these steps, and your efforts might be wasted, or worse, dangerous. So, let’s dive into the easy, effective strategies that will ensure your concrete steps aren’t just painted—they’re safe.
Prepare Your Surface Properly
Start by removing any loose paint, moss, or algae using a stiff brush and a power washer set on low pressure. I once skipped this step on a rainy Saturday and ended up rediscovering moss stuck to my shoes—messy and hazardous. Cleaning creates a smooth, clean surface that ensures better adhesion of sealers and anti-slip products. It also gives you a clear view of existing cracks or damages needing repair.
Repair Cracks and Imperfections
Use a concrete patch or sealant to fill in any cracks or holes. During my own project, I faced a stubborn crack that was a potential trip hazard—filling it with a high-quality concrete patch not only improved safety but also prevented water infiltration, which could worsen the damage. Wait for the patch to cure fully, following the manufacturer’s recommendations, before proceeding to the next step.
Choose the Right Sealer or Coating
Select a high-quality concrete sealer formulated for outdoor use. Look for products with anti-slip properties or additives. Think of it like applying a non-stick coat to cookware—your goal is to prevent liquids from bonding or causing slips. I recommend a textured sealer or one where you can safely add anti-slip granules. Check out this guide for options fit for every budget.
Apply the Sealer Correctly
Use a sturdy roller or sprayer for even application. I prefer rolling, as it gives more control—I once sprayed sealer too thick on one side, creating a slick patch I had to sand down later. Apply thin, even coats, starting from one end and working your way out. Follow the product’s instructions for drying times; rushing this can leave a glossy surface that’s even more slippery. For textured finishes, lightly broadcast anti-slip granules onto wet sealer to enhance grip—this simple step transformed my slippery porch into a safe zone.
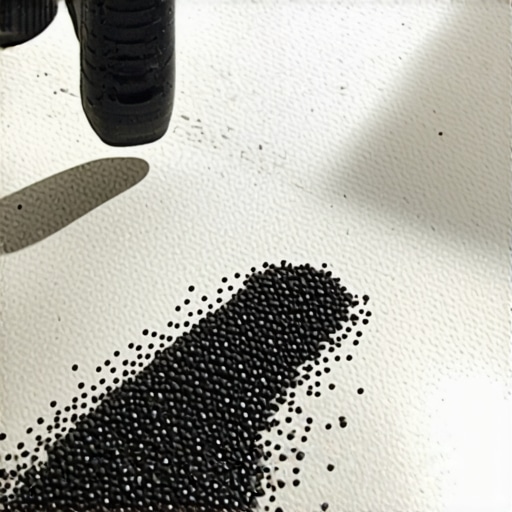
Imagine a close-up of anti-slip granules being sprinkled onto wet sealer, demonstrating the technique for enhanced traction.
Test Your Results Before Use
Once the sealer has dried completely, test the surface’s grip with a simple walk test—walk cautiously to ensure it’s not overly slick. During my project, I used a tire tread to simulate foot traffic, and was pleased to find a significant increase in safety. If the surface remains too slippery, consider applying another coat or additional anti-slip additive. Also, avoid walking on it until fully cured—some products need up to 48 hours to reach maximum slip resistance.
Maintain and Reapply as Needed
Schedule periodic inspections, especially after heavy rain or winter, when grime and moss tend to accumulate. Regular cleaning with a broom or mild detergent keeps the surface safe. I learned that annual reapplication of sealers and anti-slip treatments significantly extends the lifespan of your safety measures—think of it as an ongoing safeguard rather than a one-time fix. Staying vigilant prevents slipping hazards from sneaking back into your outdoor steps, making every step outside a secure step forward.Many homeowners believe that choosing the right color or applying paint evenly is enough for a successful house painting project, but the truth runs much deeper. One common myth is that all paints are created equal, but in reality, the type of paint and its formulation can significantly impact durability and appearance, especially in varying climates. For instance, using interior-grade paint for exterior surfaces can lead to peeling and fading over time, as highlighted by expert tips in professional house-painting strategies. Additionally, many overlook the importance of surface preparation; skipping thorough cleaning and repairs can cause paint to trap dirt or moisture, resulting in issues down the line. An advanced mistake I see often is applying multiple coats prematurely or without proper drying, which can lead to uneven texture and cracking—an issue even seasoned painters sometimes fall prey to. Moreover, understanding how environmental factors like humidity and temperature influence paint curing times is crucial; painting in unsuitable conditions can cause adhesion problems that aren’t immediately obvious. For instance, painting during high humidity periods tends to trap moisture, leading to blistering or bubbling later on. Recognizing these nuances requires more than surface-level knowledge and can prevent future headaches. If you’re interested in mastering these subtleties and achieving flawless results, explore top local painting techniques, which delve into advanced tips for various scenarios. Remember, in house painting, attention to detail isn’t just about aesthetics—it’s about making your investment last. Have you ever fallen into this trap? Let me know in the comments.When it comes to house painting, maintenance and the right tools are what ensure your beautiful work stands the test of time. Selecting equipment that’s both durable and suited to specific surfaces guarantees a smooth finish and minimizes long-term issues. For example, I prefer using high-quality extension poles with adjustable heads; they allow me to reach ceilings and tall walls without compromising control or safety. My go-to sprayer is the Graco Magnum series—its adjustable pressure and compatibility with staining additives make it versatile for both detailed work and large areas. Regularly inspecting your tools and cleaning them promptly prevents residue buildup, which can affect finish quality. I recommend dedicating a few minutes at the end of each painting day to disassemble and wash brushes and rollers—this maintenance is crucial for preserving their integrity and responsiveness over multiple projects.
What I Didn’t Expect About Safety and Surface Preparation
One of the biggest lessons I learned was that proper surface prep is the foundation of safety. Skipping thorough cleaning or crack repair can turn a simple painting project into a slip hazard in disguise. The moment I overlooked this step, I realized the importance of meticulous prep for lasting, non-slip results.
Tools and Techniques That Really Make a Difference
Investing in high-quality sealers with added anti-slip granules and using the right application methods transformed my outdoor steps from dangerous to secure. Rushing or choosing the wrong products can compromise safety, so I highly recommend exploring approved sealing solutions tailored for outdoor concrete. Remember, quality tools like sturdy rollers and textured finishes are worth the extra effort.
Beyond the Practical: How Safety Adds Value and Peace of Mind
Enhancing the traction on my concrete steps didn’t just prevent slips—it boosted my confidence and the home’s curb appeal. When visitors see my secure, beautifully finished steps, it speaks volumes about care and attention to detail. This personal experience reinforced that investing time and resources into safety is a worthwhile commitment.
Insider Wisdom: The Hidden Traps and Lightbulb Moments
- Always test your sealed surface before regular use; what feels secure in the morning might be slick after a rain. I learned to use simple walk tests and even a tire tread to gauge grip.
- Applying multiple thin coats with anti-slip additives beats one thick layer, which can become glossy and slippery. Consistency is key for safety and durability.
- Choose products with proven outdoor performance; not all sealers are created equal. Reading reviews and expert guides like professional painting tips saved me from costly mistakes.
Strategic Resources for Long-Term Success
Over time, I found certain tools and references invaluable:
- Quality sealers with anti-slip granules: Essential for durable, safe outdoor surfaces. I trust products recommended in local painting solutions.
- Professional tutorials and guides: They provided insights into proper application and safety checks. For instance, exploring top local painting strategies helped me improve my technique.
- Regular maintenance routines: Periodic cleaning and reapplication of sealers keep steps slip-free and looking great. Staying proactive saves future headaches.
Take the Next Step to Safer Outdoors
Remember, the effort you put into making your outdoor concrete steps slip-resistant not only prevents injuries but also elevates your home’s aesthetic and value. Each successful project builds confidence, turning a daunting task into a rewarding improvement. Now, it’s your turn—what’s the first step you’re willing to take toward safer, more beautiful outdoor spaces?
Have you ever underestimated the importance of proper surface preparation or chosen the wrong product? Share your experiences below—I’d love to hear your stories and tips.