

Have you ever stood in your tiny kitchen, feeling like the walls are closing in, despite your efforts to brighten the space? I remember the exact moment I realized that painting could be more than just a quick touch-up—it could fundamentally change how I experienced the room. I was elbow-deep in a paint can, cursing my decision, when I stumbled upon a simple truth: the right colors and techniques can make a small kitchen feel astonishingly spacious.
Unlocking the Space in Your Tiny Kitchen
When I first moved into my apartment, my kitchen was more of a closet with appliances. It felt cramped, dark, and uninspiring. I tried everything—adding shelving, buying new appliances, even installing brighter lights. But nothing really made a dent until I understood the secret weapon: paint. No fancy remodel, no costly renovation—just clever color choices and application techniques transformed my space into something that felt twice its size. And trust me, this is a strategy that works because I’ve seen it work in countless homes. Research supports this, showing that colors and finishes can influence our perception of space and light (source: Elite Painter Pro). So, if your kitchen feels too small, I promise you’re not imagining it—and I know a few tricks to help you turn that around.
Is This Just a Fancy Interior Trick or Real Change?
Early in my house painting journey, I made the mistake of choosing dark paint colors for a small space. I thought they would add depth, but instead, the kitchen felt even more confined. That was a lesson in understanding how light interacts with paint shades. Choosing the right hue isn’t just about personal preference; it’s about optimizing the room’s natural light and spatial perception. Yes, it takes some knowledge—a bit of patience, maybe a consultation with a local expert—but the results are worth every effort. Ever faced this kind of problem or made the same mistake? I want to hear about it. Sharing experiences can help us all make smarter choices, and I’m here to guide you through the process.
Now that we’ve identified the problem and the potential of paint, let’s dive into the tactics that will help your small kitchen feel expansive and welcoming. Ready to get started? Keep reading for my tried-and-true strategies!
…
Prep the Walls Like a Pro to Maximize Impact
Start by cleaning your walls thoroughly with a sponge dipped in a mixture of warm water and mild detergent. This removes grease, dust, and grime that can prevent paint adhesion. I once rushed this step and ended up with peeling patches after a few months; taking the time to prep pays off. Next, use a putty knife to fill in any holes or cracks with a high-quality spackle. Sand the surface smoothly once dry. This creates a seamless canvas and prevents uneven paint absorption. Think of it like laying a fresh slate—nothing less.
Select Colors That Enlarge Your Space
Choosing the right hue is critical. Light, cool shades like soft blues, pale greens, or warm neutrals reflect more light, making the room feel larger. I experimented by painting a single wall a darker color in my kitchen, which made the whole space feel oppressive. Always test your shades on a small patch under different lighting conditions to see how they truly look. Remember, matte finishes absorb light and can sometimes deepen colors, so consider eggshell or satin for more bounce.
Master the Application Technique for a Sleek Finish
Use high-quality brushes and rollers suited for your paint type. For walls, a 9-inch roller with a medium nap (about ⅜ inch) is ideal. When painting, Many homeowners believe that simply choosing bright or trendy colors will automatically refresh their space, but seasoned painters understand that color selection is more nuanced than that. For example, people often assume that darker shades always make a room feel smaller, yet in some cases, deep hues with proper lighting can lend coziness and sophistication. The real skill lies in understanding how light interacts with different finishes and pigments — which is why expert painters meticulously test color samples under various lighting conditions before committing to a entire wall.
What Advanced Mistakes Do Even Experienced DIYers Make When Painting?
One common pitfall is neglecting the importance of proper surface preparation. Many overlook that proper priming and sanding can significantly affect the durability and appearance of paint, especially in high-traffic or humid areas. Skipping these steps might save time initially but leads to peeling, bubbling, or uneven color application down the line. Furthermore, some underestimate the importance of using appropriate tools; cheap brushes or rollers can leave marks or cause streaks, undermining the final finish. According to industry experts, investing in high-quality brushes and rollers coupled with detailed prep work yields a professional look that might otherwise require costly redo. Have you ever fallen into this trap? Let me know in the comments. Protect your investment by trusting local painting specialists who understand these nuances; check out local painting secrets to learn more about how expert techniques elevate your space.
Keep It Working: Tools and Maintenance for Longevity
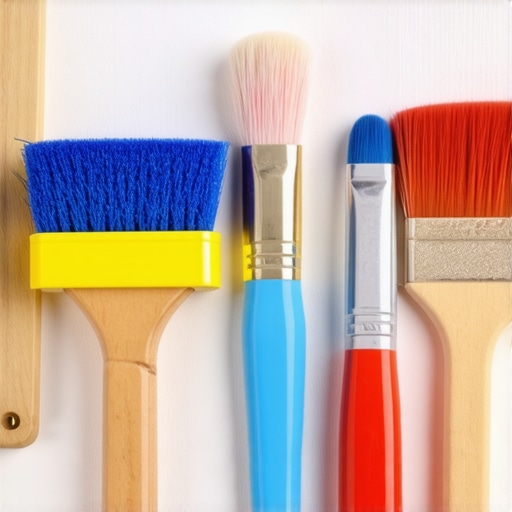
Investing in quality tools is the foundation of durable, professional-looking house painting. I personally swear by using high-grade brushes like the Purdy Monarch brushes because their stiff bristles help achieve smooth, even coats, especially on trim and corners. Paired with a premium roller such as the Wooster Procone, I get fewer streaks and a cleaner finish. Regular maintenance of these tools—cleaning immediately after use with warm water for latex paints or solvent for oil-based—extends their lifespan and maintains optimal performance.
It’s also wise to invest in a good-quality painter’s ladder, like the Werner multi-position ladder. Proper safety gear, including a durable respirator mask such as the 3M Half Facepiece, ensures you can work longer without health concerns. Keep all your equipment clean and stored properly; a neglected roller can harbor mold or dried paint, leading to uneven application the next time you paint.
How do I maintain my painting tools over time?
To preserve your brushes and rollers, rinse latex paints thoroughly with warm water immediately after painting, then spin or shake excess water out and reshape the bristles before drying them upright. For oil-based paints, use mineral spirits or paint thinner for cleaning. Store tools in a dry, sealed container to prevent dust accumulation. Periodic deep cleaning with a specialized brush cleaner can rejuvenate worn brushes, saving you money in the long run. Such maintenance not only prolongs the life of your tools but also ensures smooth, streak-free finishes on future projects. For more detailed tips, check out mastering professional painting techniques.
Looking ahead, the trend points toward smarter, more eco-friendly paints and tools. Advances in low-VOC and biodegradable products mean less environmental impact and healthier indoor air quality. As technology improves, expect to see intelligent paint applicators and AI-assisted color matching become more accessible to DIY enthusiasts and professionals alike.
Ready to take your project to the next level? Try maintaining your brushes with regular deep cleaning and proper storage—you’ll notice the difference in finish quality and tool longevity. For tailored advice or to discuss your local painting needs, contact us through this link. Whether you’re tackling a small refresh or a full-scale renovation, proper maintenance ensures your investment pays off for years to come.
Lessons That Changed My Approach to House Painting
- Overconfidence Blind Spots: I once thought that rushing through surface prep wouldn’t matter. That mistake led to peeling paint and costly rework. It taught me that patience and thorough cleaning set the foundation for a flawless finish.
- The Power of Light in Color Choice: Choosing paint shades without considering natural light turned tiny rooms into cave-like spaces. Now, I always test colors at different times of day, understanding that light transforms hues and perceptions.
- Tools Can Make or Break a Job: Using cheap brushes seemed harmless until streaks and uneven coats appeared. Investing in quality tools drastically improved my results and reduced touch-ups, saving time and frustration.
- Preparation is Everything: Skipping priming or sanding might seem like a shortcut, but it eventually causes issues. Proper preparation ensures longevity and a professional appearance that truly lasts.
- Embrace Eco-Friendly Trends Before They’re Mainstream: I started exploring low-VOC and biodegradable paints early. Not only did it benefit my family’s health, but it also aligned with sustainable practices gaining momentum in the industry—making me an early adopter for quality and environmental consciousness.
My Go-To Arsenal for Perfect Paintings
- Purdy Monarch Brushes: Trusted for their durability and smooth finish, these brushes have become my go-to, ensuring every stroke is precise.
- Wooster Procone Rollers: Fewer streaks and faster coverage—these rollers make my projects look professionally done.
- Multi-Position Werner Ladder: Safety and flexibility allow me to reach high places confidently, reducing accidents and mess.
- GreenSeal Eco-Paints: I believe in products that are healthier for my loved ones and the environment, making eco-friendly paints a critical choice.
Your Next Step Toward a Better Home
Remember, every brushstroke is an opportunity to increase your home’s beauty and value. With the right lessons learned and tools in hand, you’re equipped to transform your space into something you’ll be proud of. Don’t wait any longer—start your painting adventure today, and let your home tell a story of care and craftsmanship. If you’re ready to elevate your home with expert guidance, reach out to us. Every great project begins with a single step—what will yours be? Share your biggest painting challenge below and let’s conquer it together!.