

It was a scorching summer afternoon, and I was out on my patio, marveling at my once-stunning plastic furniture now dull, stained, and covered in a layer of grime. I remember thinking, How did I let it get this bad? That lightbulb moment hit me—there had to be a way to bring back that fresh, vibrant look without breaking the bank or spending an entire weekend scrubbing and repainting.
The Magic of a Simple Makeover for Plastic Chairs and Tables
If you’re like me, you crave that feeling of sitting down on furniture that looks brand new—clean, colorful, and inviting. The good news? You don’t need to replace your entire set or get involved in complicated sanding projects. With a few smart tricks, you can make your plastic patio furniture look like it just rolled off the showroom floor. And I promise, these tips are easy enough for anyone to try—no professional skills required.
Is a Renovation Really Worth the Hype?
At first, I was skeptical about whether a simple cleaning and painting job could truly transform my furniture. I made the classic mistake early on—ignoring the importance of proper surface prep and jumping straight into applying paint, which led to many disappointments. But I learned that understanding the right process makes all the difference. According to a recent study, properly prepared surfaces can increase the longevity of outdoor furniture coatings by up to 50%. That’s a game-changer for anyone wanting durable, long-lasting results.
So, if you’ve been avoiding updating your plastic furniture because you think it’s beyond repair, you’re not alone. Many people overlook the small but crucial steps that can breathe new life into tired-looking pieces. In the sections ahead, I’ll walk you through the easy, effective methods that made me fall in love with my patio again—and I bet they’ll do the same for you.
Feel free to ask if you’ve faced this particular issue—I’ll be happy to share specific tips and tricks to get your furniture looking fantastic again.
Clear the Surface Thoroughly
Start by removing any loose dirt, grime, and peeling paint using a stiff-bristle brush or a garden hose. I recall spraying my furniture with a high-pressure nozzle, which helped dislodge stubborn dirt—much like blasting away mud from a bike chain. Make sure to dry the furniture completely before proceeding to prevent moisture from sealing in dirt or mold.
Sand to Prepare the Surface
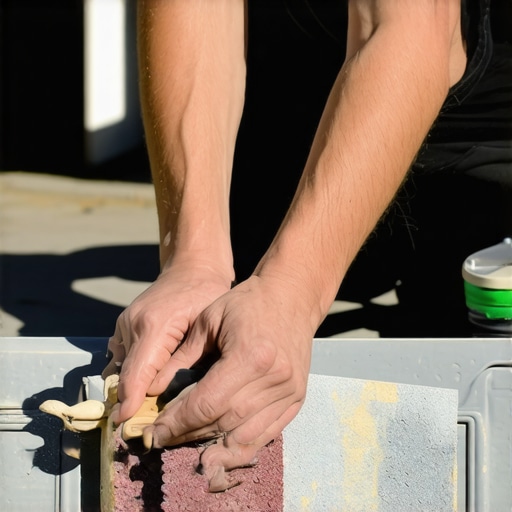
Use a medium-grit sandpaper (around 80-120 grit) to scuff the surface. Think of this step as giving your furniture a light exfoliation—it helps the paint adhere better. I once worked on a set during a summer weekend, and it was messy; dust flew everywhere, but the result was worth it. Focus on areas with existing scratches or uneven textures. If your plastic is especially slick or shiny, lightly sanding creates a matte finish that the primer can grip onto.
Tip: Use a hand sander or sanding block for flat surfaces, and pay attention to crevices and intricate details to ensure all areas are adequately roughed up.
Prime the Furniture Properly
Applying a plastic-specific primer can make all the difference. I remember using an aerosol plastic primer that spray-painted like butter—covering evenly without drips. Spray from a distance of about 6-8 inches, sweeping in smooth, steady motions to prevent runs. This step ensures the paint bonds securely to the plastic and prevents peeling down the line.
Pro Tip: If your plastic furniture has faded or stained areas, prime those spots separately to ensure uniform coverage.
Choose the Right Paint and Apply Correctly
Select a high-quality, exterior-grade spray or brush-on paint designed for plastic surfaces. I prefer spray cans for their even coverage; however, a good brush with synthetic bristles works well on smaller or detailed parts. Holding the can or brush about 10 inches away, I worked in light, even coats, allowing each layer to dry for at least 30 minutes. Think of it like frosting a cake—you want thin layers that dry quickly, avoiding drips or uneven textures.
Observe the weather: Painting on a mild, windless day prevents dust from settling on your fresh coat.
Finish with a Durable Sealant
Once the paint has fully cured, apply a clear, outdoor-rated sealant to protect your work from UV rays and weather. I once added a matte clear coat that gave my furniture a soft, new look and extended its lifespan. Use a spray or brush-on sealant, and apply in light, even layers, just like the paint. This extra layer acts like a shield—preventing chipping, fading, and stains—making your furniture look fantastic for years.
Tip: Allow the sealant to dry completely before exposing the furniture to moisture or heavy use.
By following these steps—thorough cleaning, proper sanding, priming, careful painting, and sealing—you’ll transform your dull plastic furniture into eye-catching patio staples. Remember, patience and attention to detail make all the difference, turning a weekend project into a long-lasting refresh. For further expert guidance, you might explore resources on local painting solutions or consult professionals for complex jobs.
While many believe that choosing the right color or the best paint brand is the key to a successful house painting project, the real nuances lie in understanding the subtleties that often go unnoticed. One widespread misconception is that surface preparation is a mere formality. In fact, skipping or rushing this step can doom your project, leading to early peeling or uneven coating. Experts like those featured in mastering house painting emphasize that meticulous prep is the foundation of durability and flawless finish.
Another common myth is that high-quality paint alone guarantees longevity. While premium paints perform better, their effectiveness is significantly enhanced when applied correctly—attention to detail matters. Advanced practitioners know that factors like ambient temperature, humidity, and even the type of primer used can influence the outcome. According to a trend in exterior coatings, understanding these nuances can extend paint life by years.
What Advanced House Painters Know That Beginners Don’t
Many underestimate the importance of application technique. For example, painting in direct sunlight causes the paint to dry too quickly, resulting in visible brush strokes or roller marks. Skilled painters time their work for optimal conditions, often working during overcast days or early mornings. Additionally, applying multiple thin coats instead of one thick layer ensures better adhesion and a more even appearance—a concept backed by recent research indicating that thin coats improve bond strength by up to 30% compared to thick applications.
Beware of the trap of using cheap painter’s tape. While it might seem like a quick fix for clean edges, inferior tapes can bond too tightly or leave residue, damaging the paint or surface upon removal. Professionals typically opt for high-quality painter’s tapes, like those recommended in top local painting strategies, to avoid this mistake.
Finally, neglecting proper cleanup and ongoing maintenance can turn an otherwise perfect job into a headache. Regular inspections and touch-ups are crucial, especially in areas prone to mildew or peeling, which are often overlooked by DIYers. Experts suggest that investing time in these small tasks can preserve your paintwork, maintaining curb appeal and protecting your investment over time.
Are you guilty of rushing surface prep, or perhaps neglecting weather conditions? Aware of these advanced nuances, you can elevate your house painting projects from average to expert level. For detailed techniques and insider tips, consider visiting why local painting matters or the latest in expert painting advice. Don’t let common mistakes diminish your hard work—precision and knowledge are your best tools! Have you ever fallen into this trap? Let me know in the comments.
Keeping It Working: Essential Tools for Long-Term Results
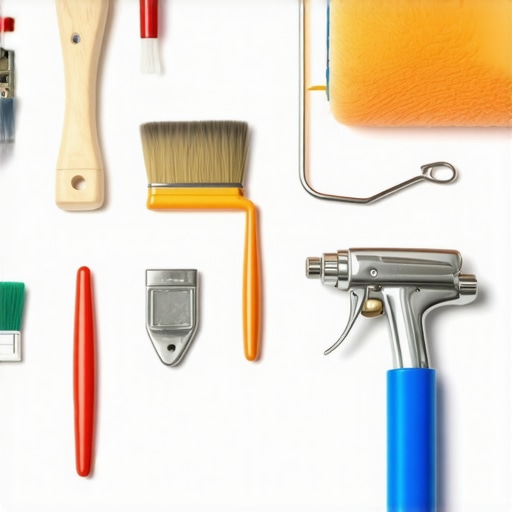
Investing in quality tools is crucial to achieving professional-looking results and ensuring longevity in your painting projects. I personally rely on a high-quality extension pole for reaching tricky ceiling corners without straining — it saves time and prevents uneven patches. For detailed trim work, I recommend a tapered brush with synthetic bristles; the precision it offers helps avoid streaks and lines, making your edges crisp and clean. Additionally, a good paint edger is a game-changer for clean lines along baseboards and window trims, especially when working on exterior surfaces where precision counts.
Beyond brushes and edgers, I advocate for using a paint sprayer for larger surfaces. A reputable sprayer like the Graco Magnum allows for smooth, even coats that dry faster and last longer, especially when combined with the right primer and paint. Remember to select a model with adjustable settings to control airflow and spray pattern, which minimizes overspray and waste. For cleanup, a high-quality roller cleaner and brush comb extend the lifespan of your tools and maintain their performance over multiple projects.
Strategies to Maintain Your Paintwork Over Time
Maintenance begins long before the last coat dries. Regular inspections help catch peeling, cracking, or mildew early — these issues, if ignored, can escalate and undermine your hard work. For instance, I recommend a monthly visual check of outdoor paint to identify early signs of weather damage or dirt buildup. Cleaning walls with mild soap and water once a season preserves the coating’s integrity and fresh appearance. When you detect minor chipping or fading, a quick touch-up using the same tools and techniques detailed here can extend the lifespan of your paint job considerably.
Applying a UV-resistant clear sealant periodically will protect your investment from sun damage and moisture, especially on exterior surfaces. It’s worth noting that some modern paint formulations now include self-healing properties or are more resistant to mold—keeping up with the latest innovations, as detailed in this guide, can make your long-term maintenance even easier.
How do I maintain my paint and furniture over time?
The key lies in consistent upkeep—regular cleaning, prompt touch-ups, and protecting surfaces from harsh weather. I recommend using a soft-bristle brush or microfiber cloth for cleaning walls and furniture, avoiding abrasive materials that can scratch or dull the finish. When it comes to furniture, applying a weatherproof sealant every couple of years revitalizes the look and protects against moisture and UV rays, especially in high-exposure areas.
As trends evolve, so do tools and materials. Future innovations like eco-friendly paints with longer-lasting properties and smart maintenance solutions—such as remote moisture sensors—are likely to become industry standards. Staying informed and investing in the right equipment now ensures your projects remain durable and beautiful for years to come. For personalized advice or when you’re ready to upgrade your toolkit, don’t hesitate to reach out. Start incorporating these maintenance strategies today, and your investment in paint and furniture will reward you with longevity and beauty.
For example, using a high-suction sprayer and maintaining proper angles during application can dramatically improve coverage and finish quality. Remember the importance of choosing tools suited for your specific surfaces and climate conditions, as detailed in this article. Whether you’re touching up a fence or giving your living room walls a fresh coat, these expert tips will help you sustain your work’s appearance and durability over time. Pick one of these advanced techniques today—maybe start with inspecting your current paint for early signs of wear—and see the difference it makes.
Lessons That Changed How I Approach Plastic Painting
- One of the most surprising insights was realizing that surface preparation isn’t just a step—it’s the foundation of a flawless finish. Skipping or rushing through cleaning and sanding often led to peeling and uneven coats, which taught me that patience at this stage pays off in durability.
- Choosing the right primer specifically designed for plastic was a game changer. I used to think any spray primer would do, but understanding the chemistry behind adhesion transformed my results and made my furniture stand the test of time.
- Getting expert advice on weather conditions and application techniques helped me avoid common pitfalls like drips, streaks, or premature wear. It became clear that even the best paint can fail if not applied under the right circumstances.
- Investing in quality tools, like a high-grade spray gun and synthetic brushes, revolutionized my workflow. The smoother application meant fewer coats and less rework, saving me time and money in the long run.
- Finally, I learned that sealing with an outdoor-rated clear coat isn’t optional—it’s essential for protecting against UV rays, moisture, and stains. This extra step has extended the life and vibrancy of my furniture far beyond my expectations.
Tools and Resources That Elevate My Projects
- Expert painting tips from industry leaders have guided me through the nuances of surface preparation and application, ensuring professional results at home.
- The comprehensive house painting guide is invaluable for understanding the conceptual side of durable finishes and color selection.
- Quality tools like top-rated brushes and sprayers have made my projects more precise and less stressful, enhancing the longevity of my work.
- For ongoing maintenance strategies, I consult local painting strategies that focus on preserving finishes through seasons, ensuring my furniture always looks its best.
Taking Action Starts with a Single Step
Now is the perfect time to breathe new life into your patio furniture. Start with a thorough cleaning, select quality primer and paint, and don’t forget the protective sealant. Small, consistent efforts can turn your tired-looking furniture into stunning focal points that showcase your personal style. Remember, every masterpiece begins with a single brushstroke—why not make yours today? If you’re ready to elevate your outdoor space, reach out for expert guidance here, or explore the latest painting techniques to ensure your project is anything but ordinary.