

Ever find yourself staring at a freshly painted wall, only to notice a thin layer of dust settling on its surface a few days later? I’ve been there, rubbing my finger across the wall and wondering if I had just wasted time, money, and effort. That lightbulb moment hit me hard: how could I tell if my walls were genuinely clean or just hiding layers of dust behind that new coat of paint? Luckily, I discovered a simple yet effective method—known as The Rub Test—that changed the way I approach home painting projects forever.
Why Dust Might Be Sabotaging Your Painting Results
When you’re gearing up for a fresh coat of paint, surface cleanliness is paramount. Dust, dirt, and even greasy residues can cause paint to peel, bubble, or not adhere properly. But identifying these contaminants isn’t always straightforward. Have you ever painted over what you thought was a clean wall, only to see imperfections weeks later? That frustration is all too common. The Rub Test provides an honest assessment, ensuring your walls are truly prep-ready, saving you time, effort, and money in the long run.
Will the Rub Test Actually Catch Hidden Dust?
Early in my painting journey, I made the mistake of assuming a quick wipe was enough, only to discover paint peeling because I overlooked lingering dust. I didn’t realize that dust particles can be so microscopic that they blend in with the wall’s surface, invisible to the naked eye. Research supports this—surfaces contaminated with even tiny amounts of dust can prevent proper paint adhesion (source: Elite Painter Pro).
The good news? The Rub Test is a practical solution that reveals these hidden dangers. Ready to learn how to do it effectively? Let’s dive in and ensure your next painting project turns out flawless!
,
Performing the Dust-Busting Rub Test
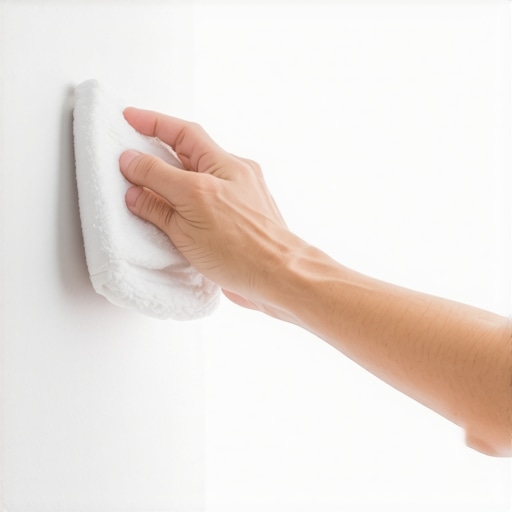
Start by choosing a small, discreet section of your wall—like an inconspicuous corner or behind a piece of furniture. Lightly dampen a clean, lint-free cloth with water—think of it as your gentle probing tool. Gently wipe the chosen area in a circular motion, applying just enough pressure to lift surface dust without gouging the wall. Once done, observe the cloth—if it picks up dust particles, it’s a sign that your wall isn’t as clean as it should be. I remember increasing the pressure slightly on my first attempt, which resulted in smudging paint and extra sanding, proving that finesse matters.
Interpreting the Test Results for Better Prep
If the cloth shows dust, don’t jump to conclusions; instead, repeat the test in multiple spots. Consistent dust pickup indicates the need for a more thorough cleaning. Also, remember that dust particles are invisible to the naked eye, so the cloth’s appearance is your best indicator. After establishing the presence of dust, set aside your cloth and prepare to clean the surface properly. Using a damp microfiber cloth or a sponge with a mild detergent solution can effectively remove residual dust and grease. Avoid harsh chemicals that can leave residues, which might interfere with paint adhesion. Once cleaned, let the wall air dry thoroughly to ensure a dust-free surface.
Handling Sticky or Greasy Spots
Some walls, especially in kitchens or around heaters, may have greasy residues hidden beneath the dust. For these areas, use a solution of warm water with a few drops of dish soap or specialized wall cleaner. Gently wipe the surface, ensuring no greasy film remains. For stubborn spots, a magic eraser can be effective, but test it first on an inconspicuous area to prevent damage. I once overlooked a greasy patch behind my kitchen door, which later caused paint bubbling. After cleaning it with a vinegar-based solution, the paint adhered flawlessly during the second coat, illustrating the importance of proper cleaning techniques.
Tools and Products That Make a Difference
Invest in quality cleaning tools—the right microfiber cloths or soft sponges make all the difference. Eco-friendly, low-chemical cleaners are preferable to avoid residuals. Remember, the goal is a clean, dust-free, and grease-free surface ready for top-quality paint. If you feel uncertain about your surface condition or want a professional assessment, consider consulting experts. They can perform detailed tests that go beyond visual inspection, such as the Flashlight Test. Proper surface prep is the foundation for a durable, smooth finish that lasts years. For further insights into local painting secrets, you can explore local painting strategies or contact seasoned professionals via this form.
 While many homeowners believe they can handle painting projects themselves without any issues, several nuanced pitfalls often go unnoticed. One prevalent misconception is that choosing the cheapest paint or materials guarantees a good result. In reality, quality paints with proper VOC ratings and suitable finishes are essential for durability and aesthetic appeal. Skimping here can lead to peeling, bubbling, or uneven color application, ultimately increasing costs over time. Conversely, many assume that prep work is solely about cleaning and sanding, but **advanced surface preparation** involves assessing moisture levels, underlying materials, and even subtle surface damages that can compromise the finish. Ignoring these factors can trap moisture under paint, causing long-term deterioration.
Why do seasoned professionals emphasize surface testing before painting?
Experts like those referenced in studies from the Painting Industry Research Institute stress that proper testing, such as moisture meters or adhesion tests, can identify underlying issues invisible to the naked eye. Bypassing these steps often results in premature paint failure, requiring costly redo projects.
Furthermore, the myth that all paints are equally compatible with all surfaces is widespread. Using inappropriate primers or finishes can hinder adhesion, especially on problematic surfaces like previously painted metal or plastic. Investing in the right primers and understanding the specific properties of each product ensures a more durable and attractive finish. For advanced tips, seasoned painters often recommend consulting local experts or leveraging innovative techniques—like low-vents or breathable coatings—to combat unique environmental challenges. Visit this resource for more detailed insights on choosing the right local strategies. Remember, rushing through surface assessments or opting for cheaper materials can undermine your project’s success. If you want to ensure flawless results, considering professional assistance might be a wise investment—more details are available at our contact page. Have you ever fallen into this trap? Let me know in the comments.
Keeping It Working: Tools and Techniques for Durable House Paint
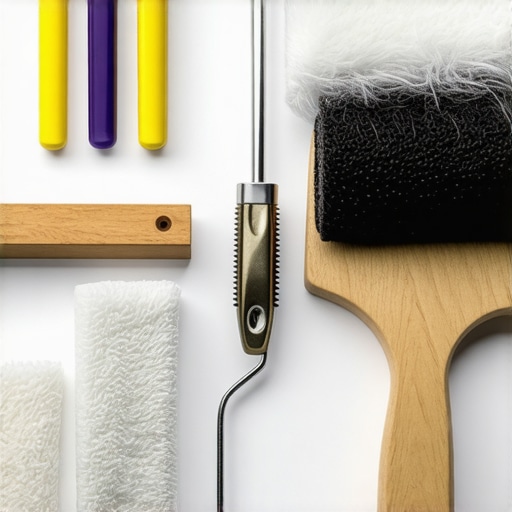
Once you’ve invested time and effort into a professional-looking paint job, maintaining its appearance over years requires the right tools and routine care. Personally, I rely on high-quality equipment that ensures consistency and longevity. For example, I favor Walboard’s premium microfiber rollers; their ultra-fine nap smooths paint application and minimizes streaks, saving me hours on touch-ups. Additionally, I always keep a magnetic angled paint scraper handy—it’s perfect for fixing small imperfections or removing dried drips, especially in tight corners. These tools help me retain that freshly painted look well beyond the initial project, and I recommend them for anyone serious about quality results.
Modern Paint Removers and Surface Prep Solutions
For ongoing maintenance, having effective cleaning and surface prep solutions is crucial. I regularly use eco-friendly surface cleaners designed to remove accumulated dirt and prevent deterioration. These prevent issues like peeling or mold growth that can compromise your paint’s integrity. Innovations like low-VOC, biodegradable cleaners are trending and help protect both your health and the environment, pointing toward a future where eco-consciousness is standard in maintenance routines.
How do I maintain my painted surfaces over time?
Routine inspections are your best bet. Check for signs of fading, cracking, or peeling at least twice a year, particularly before and after harsh weather seasons. Touch up small spots promptly using quality, matching paints—don’t wait until imperfections become glaring. Use fine-grade sandpaper to smooth any minor surface defects before repainting; this ensures a seamless finish. I personally keep a dedicated maintenance kit with brushes, mini rollers, and my favored surface cleaner, ready for quick fixes, which extends the lifespan of my home’s paint job.
Looking ahead, the trend is moving toward smart maintenance solutions. Innovations like moisture sensors embedded in walls and AI-powered diagnostic apps can help identify issues early, saving money and preventing extensive repairs later. Keeping your tools and routines updated ensures your painted surfaces stay pristine regardless of weather or time. For expert advice tailored to your local climate, consider consulting professionals—check out this contact page for assistance.
Next time you notice a small crack or fade, try applying a thin layer of high-quality touch-up paint with a fine brush; it’s a simple yet powerful way to preserve your investment. Regular maintenance not only keeps your walls looking fresh but also helps maintain the value of your home in the long run.
By prioritizing the right tools and routines today, you’ll enjoy beautifully maintained surfaces for years to come. Remember, combining proven techniques with emerging innovations ensures that your home remains a testament to quality and care.
,
Lessons That Turn DIY Disasters into Masterpieces
- One of my hardest lessons was realizing that surface testing isn’t just a step—it’s the foundation of durability. Skipping this can turn a fresh paint job into an early flop, costing double in repairs.
- Trusting cheap tools might save money upfront, but it often leads to uneven textures and extra sanding. Investing in quality equipment like microfiber rollers pays dividends in finish quality and time saved.
- Understanding your paint’s properties—whether it’s oil-based or latex—is crucial. Knowing when and how to use primers or specific finishes prevents adhesion failures and peeling down the line.
- Patience in cleaning and prep isn’t just about aesthetics; it’s about longevity. A thorough dust removal and grease cleaning make all the difference in a smooth, lasting finish.
- Eco-friendly and low-VOC paints are not just healthier for your home—they require different surface prep techniques. Embracing these innovations can elevate your overall painting strategy.
Tools and Tips That Changed My Approach
- Microfiber paint rollers like Walboard’s premium range provide a flawless application, reducing streaks and save hours on touch-ups—trust me, they’re worth every penny.
- A magnetic angled paint scraper has become my secret weapon for fixing imperfections on the fly, keeping walls pristine without a full redo.
- Eco-friendly surface cleaners, such as biodegradable solutions, help maintain the integrity of your paint job over the years. They’re gentle yet effective, aligning with sustainable practices.
- Innovative tools like moisture meters and adhesion testers are game-changers, especially on challenging surfaces. They help identify issues early before painting begins, saving frustration later.
Embrace Your Painting Journey—The Power Is in Your Hands
Every brushstroke is an opportunity to improve your space and confidence. Remember, mastering house painting isn’t just about aesthetics; it’s about creating a durable, quality finish that stands the test of time. With the right knowledge, tools, and patience, you can transform not only walls but also how you approach DIY projects. Ready to elevate your home painting skills? Explore more expert strategies at this resource or contact seasoned professionals through our team. Your home deserves nothing less than your best effort—start today!