

I vividly remember the moment I walked into my living room after repainting. The new gray walls looked modern and fresh, but my once-crisp white trim had taken on a dull, yellowed hue. It was as if my beautiful upgrade was sabotaged by a shadow of its former self. That lightbulb moment revealed a simple yet overlooked truth: white trim doesn’t always stay bright when placed next to trendy gray walls.
This wasn’t just an aesthetic annoyance; it felt like a missed opportunity to truly elevate my space. If you’ve faced this frustrating mismatch—where your crisp white molding looks dingy or yellow next to your new gray walls—you’re not alone. Many homeowners encounter similar issues, often thinking it’s a matter of bad paint or poor quality. But in my experience, the culprit is more nuanced and surprisingly fixable.
Today, I promise to take you through the real reasons behind this common problem and, more importantly, how to restore that bright white allure effortlessly. We’ll cover practical methods to refresh your trim, keep it looking pristine, and make your entire room pop. If you’ve ever wondered whether there’s a secret to foolproof white trim, you’re about to discover it.
White Trim vs. Gray Walls Why the Contrast Gets Dingy
Is your White Trim Actually Worth the Hype?
One of my early mistakes was assuming I needed to repaint or buy new trim paint to fix the dullness. Turns out, the issue wasn’t the paint itself but the subtle interaction between the paint, the wall color, and environmental factors. White paints can really change appearance depending on lighting and adjacent colors. For example, gray hues can cast a slight tint that emphasizes yellow or dull tones in white trims, making them appear dingy and aged. According to experts, this yellowing effect can be exacerbated by improper preparation or outdated paint formulations.
If you want a brighter, cleaner look, understanding the underlying causes is key. But don’t worry—I’ve been where you are, and I’ve found some game-changing tricks that can turn the situation around. Want to ensure your trim stays crisp and bright? Keep reading to learn how in-depth prep and specific products can make all the difference.
Have you ever experienced a moment where your freshly painted walls look flawless, but your trim seems to ruin the picture? If so, you’re in the right place. We’re about to lay out the exact steps that will help you regain that pristine white finish—saving you time, money, and future headache. For deeper insights on professional painting secrets, check out this comprehensive guide on mastering house painting with expert tips. Now, let’s get into why this problem happens—and what you can do about it.
Prep Your Surface Like a Pro
Start by removing any dust, grease, or peeling paint from your trim. Use a damp cloth with a little dish soap to clean thoroughly, then sand any rough or peeling areas with fine-grit sandpaper. I remember gently scuffing my trim with a 220-grit paper, which smoothed out imperfections and gave the primer something to cling to. After sanding, wipe down with a damp cloth again to remove dust. Proper prep ensures that new paint adheres well and results in a brighter finish. Consider applying a high-quality, alkyd-based primer like professional-grade primers to block any stains or yellowing that the wall color might accentuate.
Choose the Right Paint for Brightness and Durability
Select a high-quality, pure white paint with a flat or satin finish. For instance, paints labeled as “ultra-white” or “bright white” are formulated to stay crisp over time. I once used a water-based acrylic enamel and achieved a stunning white that didn’t yellow, even after months. Avoid cheap paints that contain yellowing additives or fillers. For added durability and ease of cleaning, opt for paints with stain-resistant formulas. Remember, the actual shade can shift depending on lighting—so sample your paint on a small section of trim before committing. Check out expert advice on choosing paint finishes to understand how to match your desired brightness with the right product.
Apply Multiple Thin Coats with Care
Apply the paint in three thin, even coats rather than one thick layer. Use a high-quality, angled brush for edges and a small roller or foam brush for flat surfaces. I vividly remember carefully cutting in along the edges with a 2-inch brush, then filling in the centers with a foam roller. Let each coat dry completely—usually 2-4 hours—before applying the next. Thin coats help prevent drips, streaks, and uneven patches that dull the surface. During my last project, I made sure to keep a wet edge, blending each stroke seamlessly. This results in a smooth, bright finish that pops against the gray walls.
Address Yellowing and Discoloration Effectively
If your trim still looks dull or yellow after painting, it may be due to underlying stains or age-related discoloration. Use a tint-blocking primer or a white primer with pink or red undertones to neutralize yellows. I once applied a tinted primer, which made the white topcoat look vibrant and clean, even in bad lighting. For best results, apply the primer in two coats, letting each dry thoroughly. This step creates a blank canvas, preventing yellowish hues from bleeding through your finish. To further prevent future discoloration, ensure your environment is well-ventilated and avoid smoking indoors, which can stain and yellow trim over time.
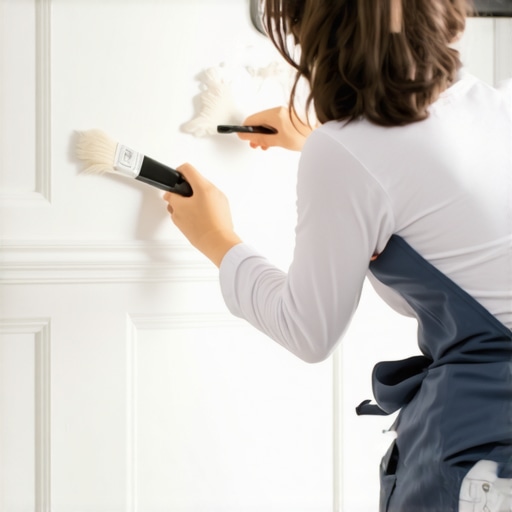
Image showing a homeowner applying primer and paint to trim with proper tools, highlighting the detailed process for achieving a bright white finish.
When tackling house painting projects, most homeowners focus on choosing the right color, brushes, and tools. However, there are subtle nuances and advanced mistakes that can make or break the final result, even for seasoned DIYers. Let’s explore some common myths and pitfalls often overlooked, along with expert insights to elevate your painting game.
A prevalent myth is that a single coat is sufficient for a flawless finish. In reality, many overlook the importance of multiple thin coats to achieve deep, uniform color and durability. Skin-deep applications can lead to uneven sheen, streaks, and reduced longevity. Professionals routinely apply two to three coats, especially with darker or bolder hues, to ensure vibrant, even coverage. Skipping this step is a rookie mistake that diminishes the overall appearance and lifespan of your paintwork.
Another misconception centers around the choice of paint finish. While flat or matte paints are popular for walls, they can trap dirt and be hard to clean, making them less suitable for high-traffic areas. Conversely, semi-gloss or satin finishes, though glossy, offer better resistance to moisture and easy cleaning, which most homeowners struggle to leverage correctly. Selecting the appropriate finish based on room function and traffic is crucial for both aesthetics and maintenance.
Some homeowners believe that a quick prep suffices—simply wiping down surfaces before painting. But neglecting proper surface preparation, such as sanding rough patches or using primer on stained or uneven surfaces, can cause paint adhesion issues. These problems often lead to peeling, cracking, or discoloration over time, which appear like poor craftsmanship but are actually preventable.
**Are there advanced tricks to ensure crisp, long-lasting lines, especially in complex designs?** Absolutely. Using painter’s tape judiciously combined with tools like a damp brush to soften edges can help achieve sharp lines without bleed-through. For intricate patterns, employing a ‘cut-in’ technique with high-quality angled brushes ensures precision. An extra tip from the pros: always remove painter’s tape while the paint is slightly tacky to avoid tearing or smudging.
It’s also vital to understand how environmental factors affect your painting results. Excess humidity or temperature fluctuations during painting can cause blistering or uneven drying. According to industry experts, optimal conditions—around 70°F (21°C) with low humidity—are ideal for best results. Ventilating well and planning your project during favorable weather prevents these advanced issues.
Finally, beware of the trap of using cheap, low-quality paints, thinking they save money. While initial costs seem appealing, inferior paints often contain fillers and additives that yellow over time and lack durability. Investing in high-quality, eco-friendly options, like those recommended in our comprehensive guide on boosting curb appeal, yields a stunning, long-lasting finish that truly elevates your home’s look.
Have you ever fallen into this trap? Let me know in the comments. Remember, mastering these nuances can differentiate a DIY disaster from a professional-looking finish. For an in-depth dive into professional tips that can transform your approach, visit mastering the art of house painting.
Invest in Quality Tools for Long-Lasting Results
When it comes to maintaining a pristine paint job, the right tools make all the difference. I personally swear by using high-quality angled brushes, like Purdy SpectraEdge, because their tapered bristles allow for precise cuts and minimize streaks on trim and corners. A durable, extendable paint roller helps reach high or awkward spots without the need for ladders, reducing the risk of drips and uneven coverage. For cleaning brushes between coats or after finishing, I rely on the classic dish soap method, which helps preserve brush integrity and prevents dried paint from hardening the bristlessource. Properly maintaining your equipment ensures that your work stays flawless over time.
Utilize Smart Techniques To Extend Paint Life
One tip I find invaluable is wrapping brushes and rollers in plastic wrap or aluminum foil during short breaks. This simple step prevents paint from drying out, saving you from having to clean and reprepare tools before continuing. Additionally, when touching up or repainting narrow surfaces like window sills, I use foam brushes, which provide smooth application and reduce paint waste. For precision edging, the tape-and-damp-brush method is a game-changer—dampening painter’s tape slightly before removal results in cleaner linesreference. Adopting these techniques helps your project stay consistent, reducing the need for frequent touch-ups and rework, thereby securing long-term satisfaction.
Embrace Digital Tools for Future Maintenance
To stay ahead of potential issues, I use digital apps like Sherwin-Williams’ ColorSnap Visualizer, which allows me to preview color schemes before painting. This prevents costly mistakes and ensures that your chosen colors age well. Moreover, scheduling regular inspections with a moisture meter helps detect early signs of water infiltration that can cause paint to peel or bubblesource. Investing in these tools paves the way for proactive maintenance, extending the life of your paint and protecting your investment.
How do I maintain my paint over time?
Proper cleaning using gentle detergents, touch-up with quality paint that matches the original color, and routine inspections for issues like cracking or blistering are key. Regularly wiping surfaces with a damp cloth removes dust and grime that can degrade paint’s appearance. For ceilings and hard-to-reach areas, consider using a mini-extension pole with an angled brush to access and refresh those spots without the need for resealing entire walls. Staying attentive to environmental factors such as humidity and sunlight helps you plan touch-ups before problems escalate. Remember, a little maintenance now saves big rework later—and tools like moisture meters and paint match apps are invaluable allies in this effort. Want to explore innovative house painting ideas to refresh your space? Visit this resource for some inspired strategies.
Lessons Only Experience Can Teach About White Trim
After countless projects and late-night touch-ups, I’ve realized that the subtle art of maintaining bright white trim goes beyond choosing the right paint. One hard-earned lesson is that lighting conditions can dramatically alter how your white looks; a trim that appears dull in one corner might shine in another under different light. Another insight is that environmental factors, like humidity or cigarette smoke, can cause even freshly painted trim to yellow over time, revealing the necessity for protective measures. The most profound realization is that surface preparation—thorough cleaning, sanding, and priming—lays the foundation for a lasting, luminous finish. Lastly, I learned that patience in applying multiple thin coats outperforms rushing through a single thick layer, ensuring that your white trim stays stunningly bright for years, not days.
My Top Picks to Keep Your White Trim Impressively Bright
To keep my trim consistently crisp, I rely on professional-grade primer like premium primers, which neutralize discoloration. For paints, I swear by high-quality, pure white products with a satin or semi-gloss finish, such as those recommended in expert painting guides. My go-to tools include angled brushes like Purdy SpectraEdge for precise edging, and durable rollers that help me blend coats seamlessly. Additionally, I keep a moisture meter from trusted brands handy for assessing environmental conditions before painting. These resources and tools have transformed my approach, delivering pro results that I can be proud of.
Your Bright Future Begins with a Bold Step
Now that you’ve uncovered these insider secrets, it’s time to take action and elevate your home’s aesthetic with confidence. Bright white trim can dramatically improve your space’s appeal, making everything look fresh, clean, and professionally finished. Remember, small details—like proper prep, the right paint, and patience—make all the difference in achieving a lasting, stunning look. If you’re ready to turn your vision into reality, visit our full resource library for more expert advice and inspiration. Your perfectly bright trim is just a brushstroke away—go ahead, give your home the upgrade it deserves!